
type
status
date
slug
summary
tags
category
icon
password
📚 🖨 Print on Demand
本页汇总了 🖨 Print on Demand 相关的常见问题(共 58 个)
▶ How does Print on Demand integrations work with Customily
On Customily, you can choose to work with different Print on Demand (POD)
providers, to source your products. By working with them, the printing and
fulfillment of your orders will be done by the POD provider.
This means the POD company will be in charge of producing and storing
inventory, fulfilling, packing, and shipping the products to your final
customers.
Important
Automatic POD integrations are only available for stores on Shopify or
Etsy
How does it work?
When working with a POD provider through Customily, Customily will share your
order information directly with your POD provider via API. This means that for
every order you receive of a product that has Customily, we will share with
the POD the order information (customer details, products in the order, etc.)
with the unique print file needed to fulfill that personalization.
Once the POD gets the order, they will handle it from there.
**What is the difference in using the POD directly without Customily, and with
Customily?**
You can always work with POD providers directly, without using Customily.
However, POD providers do not provide personalization capabilities. So when
you publish a product with a certain design on the POD directly, all customers
will be able to buy is that exact design.
What do I need to work with a POD?
All POD providers that work with Customily require you to have an account with
them. This is necessary for them to have your business and billing
information. If you are using Customily and the POD on your Shopify store, you
need to have the POD App added to your store
Once you have an account with the POD you can connect it to Customily via API
to start working with them through Customily.
What POD providers are available in Customily?
We offer automatic integrations with the following POD providers (alphabetical order):
- Casestry
- CustomCat
- Gearment
- Gelato
- MerchOne
- Printful
- Printify
- ShineOn
- Teelaunch
Keep in mind
If a provider you want to use is not on the list, that doesn't mean you can't
use it with Customily. Most POD provers will allow you to fulfill orders via a
CSV. You can learn how to export a CSV of your orders to share with your
provider here.
▶ How to integrate a POD on Shopify
Important
To use any POD on Customily, the first thing you need to do is to create an
account on that POD service. If the POD has a Shopify App (most of them do!)
then you should add their app to your store as well.
Once you have your POD account created, head on to Customily and follow these
steps.
- Open your Customily App on Shopify
- Head on to Start or Store on the left menu
- Go to Settings and open the Integrations tab.
- If you have more than one store on your account, make sure you are changing the setting of the correct store by selecting it from the top left dropdown.
- Select the POD provider you want to work with from the dropdown
- Click enable integration
- Fill in the required information for that POD. If you have multiple integrations, the new one you added will appear at the bottom of the list.
- Once you filled all the information click Save Settings at the bottom of the page.
Keep in mind
Each POD requires slightly different information. You can check our articles
on each POD to understand what information each one needs and how to obtain
it.
Troubleshooting
If you get an Invalid Key message, this means you have entered the API key or
token for that POD incorrectly. API keys and be very long numbers, so double- check that you are copying and pasting the entire number given by your POD.
If you are not sure if you are getting the correct keys/tokens, you can check
our guides on where to get this information from each POD.
▶ How to integrate a POD on Etsy
Important
To use any POD on Customily, the first thing you need to do is to create an
account on that POD service.
The first thing you need to do to offer POD products on Etsy, is to add them
as a Production Partner. Etsy requires stores to disclaim who is fulfilling
the products for them. So for Customily to be able to send the orders from
Etsy to the POD we need this information to be added to your Etsy account.
If you haven't already, follow these steps to add the POD as a production
partner on your Etsy.
Add the POD as a production partner on your Etsy store
To offer POD products on Etsy, they require you to disclaim who is fulfilling
those products for you. So for Customily to send the orders from Etsy to the
POD we need this information to be added to your Etsy account.
- Sign in to your Etsy account.
- Go to your Shop Manager , and choose Settings.
- Select **Production partners**.
- Select Add a new production Partner and fill out the following information about your POD:
- \- Production partner: Use the name provided in the table below
If your POD is | use this as Production Partner
---|---
Casestry | casestry
CustomCat | customcat
Gearment | gearment
Gelato | gelato
Printful | printful
Printify | printify
Shine On | shineon
- \- Location : Use the POD's location
- \- About your partnership: You can simply put "A production partner", or fill in a short description of why you like to work with them if you're feeling inspired.
- \- Production partner: select the following statements
"I don't have the technical ability to make it entirely by myself"
"I design everything myself"
"They do everything for me"
Your production partner information should look something like this:
- Once done, you can click Show Preview to see how it will appear in your store.
- Click Save Partner and you are done!
Important
If you were already working with the POD on your Etsy store, you might have
the Production Partner for them already created. **You must check that you are
using the same names as we provided in the table above** , otherwise,
Customily won't recognize them.
Once you have your POD account created, and the POD added as a Production
Partner on your Etsy store you'll need to add the POD on Customily.
Add the POD information on Customily
- Log in to your Customily account
- Head on to Start or Store on the left menu
- Go to Settings and open the Integrations tab.
- If you have more than one store on your account, make sure you are changing the setting of the correct store by selecting it from the top left dropdown.
- Select the POD provider you want to work with from the dropdown
- Click enable integration
- Fill in the required information for that POD. If you have multiple integrations, the new one you added will appear at the bottom of the list.
- Once you filled in all the information click Save Settings at the bottom of the page.
Keep in mind
Each POD requires slightly different information. You can check our articles
on each POD to understand what information each one needs and how to obtain
it.
Troubleshooting
If you get an Invalid Key message, this means you have entered the API key or
token for that POD incorrectly. API keys and be very long numbers, so double- check that you are copying and pasting the entire number given by your POD.
If you are not sure if you are getting the correct keys/tokens, you can check
our guides on where to get this information from each POD.
▶ How to remove a POD integration
If you don't want to work with a POD anymore, you can easily remove the
integration on Customily.
Keep in mind
When you remove an integration, all products that were using that POD will
still be live on your store, but they will not be sending orders to the POD to
fulfill them automatically.
To remove a POD from your account follow these steps:
- Open Customily
- Head on to Start or Store on the left menu
- Go to Settings and open the Integrations tab.
- If you have more than one store on your account, make sure you are changing the setting of the correct store by selecting it from the top left dropdown.
- Find the POD you want to remove and click **remove integration
▶ Can I offer products from multiple PODs?
You can work with as many POD providers at the same time as you'd like. In
fact, some of the most successful stores offer an array of products from
different providers, as each POD is unique.
To offer products from multiple PODs all you need to do is
integrate with
them.
Can customers order products from multiple PODs in the same order?
Yes! Customily will organize everything and send each product on the order to
the necessary POD for fulfillment.
Can I offer products from multiple PODs in one listing?
Unfortunately, this is not possible. Each POD works independently so they will
need to have their product listing created on Shopify.
What about multiple products from the same POD in one listing?
Unfortunately, this is not possible. At the moment you can work with one POD
product per listing. You can offer as many variants of that product as you
want, as long as they are variants.
Let's say you want to offer a product as a Poster, and as a Framed Poster, if
these are separate products on the POD, you will have to offer them as
separate products in your store.
Want this?
You can suggest this as a feature here! Just fill in the information and click create post.
▶ I can’t find a specific POD product, can it be added?
Yes! We can add most of the POD products. Just message our team and share with
them the link of the product you'd like to add.
You can send us an email to
support@customily.com, chat with our team
inside the app, or submit a ticket right here.
There are some exceptions though, of **products that can't be added on
Customily** at the moment, because of the requirements the print files have.
These are:
- Embroidery products
- Engraving products
- Laser cut products
▶ How to use a product from a POD
Once you are integrated with your POD you are ready to start offering their
products on your store.
Using a POD product
- Head over to the Start section
- Click Create new product
Tip
If you'd rather use an existing product on your store, instead of having
Customily create a new listing from scratch, then pick "use an existing
product from store". The rest of the process will be the same, the only
difference is that at the end, the personalization will be connected to the
product listing you selected, instead of having a new listing created from
scratch.
- Pick the POD provider you want to work with
- Browse and choose the product you want. You can search for a specific product by their title.
- Pick the variants you'd like to offer, and the location where you'd like to add the design (Print Area), then click next.
- When you are done selecting the product specifics, you can go ahead and select the design you want to use on the product. This can be a pre-made design by Customily or one of your own designs (if you've created any!).
- When you are done selecting the design, it will be placed on the product. You will see a preview of it, where you can play around with the options before publishing it to your store.
By default, designs are placed in the middle of the print area, to occupy as
much space as they can. If you'd like to change the position of the design,
scroll down to the tip where we tell you how to do that.
- Before publishing you can edit the product details (name, price, description, and main product image) by clicking edit product details. You can also save a specific mockup as your product image by clicking "save this as product image" under your mockup.!edit product details.png
- Once you are done editing the product, you can Publish it or Save it as a Draft. If you publish it, your brand-new product will open on a new tab.
You'll also be redirected to your product information page on Customily, where
you can see the details of your listing.
Tip
If you don't like where the design was placed on the POD product, you can
always edit it after the product has been published. When you are in the
product information page, click to open the template that is connected to your
product. Here you'll be able to edit the template and move the design around
the print area.
▶ How does the integration with Printful work?
When working with Printful and Customily, Customily will share your order
information directly with Printful via API. This means that for every order
you receive of a product that has Customily, we will share with Printful the
order information (customer details, products in the order, etc.) with the
unique print file needed to fulfill that personalization.
The whole product-to-order cycle is:
- Publish your product in Customily using a Printful product as a base.
- Your customer places an order in your store.
- You'll immediately see the order information on your Shopify dashboard, including all the personalization information provided by Customily.
- Once the print file is ready (this usually takes around 30') Customily will send the order to Printful via API, and you'll be able to see the order on your Printful dashboard.
- Confirm the order on Printful to start fulfillment.
- Printful will start fulfillment and send updates as it goes. When the order is shipped, this update will be pushed to your Shopify order so your customer can receive their tracking information.
Click on any item to learn more about it.
Publish your product in Customily using a Printful product as a base
By going to start, and choosing to Publish a New product, you can select
Printful as your POD and then pick a product to use. You can see more details on how to publish a product from a POD here.
If you see Printful disabled, make sure you've integrated Printful's API Token
in your settings. You can learn how to integrate with a POD here.
**Products published via Customily will be created with the following
settings** :
- Vendor: Products will have Printful as the vendor. If you rather have your store appear as the vendor, you can change this on your product settings on Shopify.
- SKU: Products will be assigned an automatic SKU on Shopify. You can change this SKU whenever you want, as it won't affect the connection of the product with Printful or order tracking.
- Location: The location of your product will be set to Customily. You can check this by going to your Shopify product and opening the product variants to see their stock information.
_This setting is required for order tracking to work properly. Customily does
not fulfill or hold any products in this location—your POD provider will still
handle fulfillment and shipping. The Customily location exists so that we can
update your orders with tracking information when Printful starts shipping._
Important
Products published via Customily will not appear on your Printful products
dashboard. You don't have to sync your Customily products with Printful,
or connect them in any way. If the product is synched with Printful, you will
get double orders. One through Customily's API, and one directly through
Printful, and we don't want that!
Seeing the order on Shopify
After a customer makes a purchase you'll see their order on your Shopify Order
Dashboard instantly. There you will have all the customer's and product's
information, including the personalization and the print file. Keep in mind
print files take some time to be generated (approx 30').
Important
If you have your Shopify configured to fulfill orders automatically, your order might appear as
rejected by Printful at first. This is because we send orders to Printful
once the print file is ready, and this can take around 30 minutes, so at first
Printful won't find any order. But not to worry, once the print file is ready,
and the order is created on Printful, the **fulfillment status will update
automatically to accepted**.
If you have your Shopify configured to fulfill orders manually, then you
should wait until the print file is ready to request fulfillment, otherwise it
will be rejected at first.
Seeing the order on Printful
Orders are sent to Printful when the print file is complete in Customily.
This normally takes around 30 minutes. They are created with the same order
number from Shopify, with all the customer's information, product information,
and the print file necessary to fulfill the order.
Confirm the order on Printful
Orders in Printful will always be created as draft orders. This means
you have to manually confirm each order to send it to production. Even if
you have your store configured on Printful to have orders confirmed
automatically, this setting does not apply to orders received via API (which is how Customily sends orders) so you will still have to confirm them
manually.
To confirm orders, you can either:
- confirm all of them in bulk, by clicking the "Approve Orders" button on the top right corner!approve orders printful.png
- or click each order and approve them one by one by clicking the "Confirm Order" button.!confirm order on Printful.png
Fulfillment and tracking
Once you confirm the order, Printful will start working on it. You'll see
fulfillment updates on Printful, as you would with any ordinary Printful
order.
the order is fulfilled and shipping begins, you will see the tracking
information on Printful. This update will be automatically sent to your
Shopify Order, together with the tracking information, so your customer can be
aware that their order is being shipped and can track its progress.
Orders on Shopify will be marked as fulfilled , and the tracking number
for the shipment will be added to them.
▶ Integrating Printful for Shopify
To use Printful with Customily for Shopify, the first thing you need to do is
to create an account on Printful. If you don't have an account with Printful,
Then if you don't have it already you should add their
app to your Shopify store.
Once you have your Printful account created and the app installed, open your
Customily app on Shopify and follow these steps.
- Head on to Start or Store on the left menu
- Go to Settings and open the Integrations tab.
- If you have more than one store on your account, make sure you are changing the setting of the correct store by selecting it from the top left dropdown.
- Select Printful from the Select a provider for integration dropdown
- Click enable integration
- Paste your Printful API Key (also known as API token). Learn where you can find your API Token on Printful here.
- Click Save Settings at the bottom of the page.
▶ Where can I find my Printful API token (API key)
- Login to your **Printful** account, or register with them here if you don't have an account yet.
- If your store is already connected with Printful, skip this step and go straight to step 4. If you don't have your store connected with Printful yet, then head on to Stores on the left Menu.
- Click Choose Platform to connect your store with Printful.!Choose platform Printful.png
Tip
If you just want to try things and don't want to connect to an actual store
yet, you can click on Create under Manual order platform / API instead,
fill it with any store name you want to give it, and continue using that dummy
store.
- Expand Settings on the left menu, and Click **API
- Click to open **Printful Developers
- Log in with your Printful credentials, and then click on Create a token.**
- Give the Token an easily recognizable name (like Customily), add a contact email, and add an expiration date. We recommend using the furthest date possible, which is 2 years from the moment you set it.
- Set the access level to a single store, and choose your store from the dropdown. Make sure you are selecting the store you want to work with in Customily.
- Select all scopes available, to give the token full permission to work with your store.
- Click Create new token. Wait a couple of seconds and your token will appear at the bottom of the page. Copy that value to use it in Customily
▶ Where can I find my orders on Printful?
Orders are sent to Printful when the print file is complete in Customily.
This normally takes around 30 minutes. They are created with the same order
number from Shopify, with all the customer's information, product information,
and the print file necessary to fulfill the order.
To find your orders on Printful
- Open your Printful App
- Head on to Orders on the left menu
- Make sure you are seeing orders for all stores , or for the specific store you want to check.
- You will find orders created with the same order number as on Shopify.
I can't find my order on Printful
If you can't find your order, there are a couple of things you can check
before contacting our support team.
- Check if the print file is ready. Remember, orders will be created only when the print file is ready, so if it's not ready yet it is normal for the order to be missing. To check if your Print file is ready, head over to your Shopify Order , and click the Customily-production-url link.
If you see a screen saying it's not ready yet, then wait a couple of minutes
and check again. Once you see your file (or if it downloads), you should be
able to see your order on Printful!
- Make sure you are checking the correct store on Printful. If you have many stores on your Printful account, make sure you are looking for the order in the correct store. To be safe, select to see orders from all stores.
- Check that the product is properly connected with Printful. Open your product settings in Customily, by going to Store > Products > and opening the product from the order. Under fulfillment settings, you should see that it is connected with Printful.
If you've checked all this, and still don't see the order, contact our support
team to get more information on why it's not coming through.
How can I change the Print File for my order?
Orders on Printful get created as a Draft. If you haven't approved them yet to
send to fulfillment, you can change the print file on the order before doing
so.
- First, you will need to generate the new file you want to use. You can either edit the file you got or generate a new one with Customily. You can learn how to create a new Print file for your Order here.
- Open your Printful account, and find the order you want to modify. You'll be able to modify it only if it's still in draft mode.
- Click on **Change Order.
- This will open the order details. Hover over the Print File and click Edit.
- This will open the Printful Design Maker. Delete the layer for the current file that is on the print file, and then go to uploads to upload the new one you want to use.
- When you are done editing the file, click continue. You'll come back to the order information, and you'll see the new Print file there. You can now go ahead and confirm the order with the new Print file.
I'm seeing duplicated orders on my Printful
If you are getting 2 orders on Printful for each order on Shopify, this means
there is an order being made through Customily's API, and an order made
directly through Printful.
Customily's API order will have the correct custom Print file with the
customer's personalization. On the other hand, the order created directly from
Printful, will either have a blank print file, or a print file without the
proper personalization.
This issue happens if you have synced your Customily products with Printful.
This means for every product created on Customily, Printful will create a
product on their catalog. When a customer places an order for that product,
Printful will create an order directly from their catalog. This is the
duplicated order without personalization you'll see.
To make sure you are not syncing products:
- Open Printful.
- Go to stores.
- Select your stores and make sure that Import not synced products from Shopify is not selected.**
**
If you see that setting is selected, it means that products published through
Customily, where imported to Printful. You'll have to manually delete the
products created on Printful to avoid duplicate orders on the future.
▶ How does shipping and order tracking work for Printful on Shopify
To ensure proper shipping information is shown during checkout and order
tracking works correctly, **products published via Customily will be created
with the following settings** :
- Vendor: Products will have Printful as the vendor. If you rather have your store appear as the vendor, you can change this on your product settings on Shopify.
- SKU: Products will be assigned an automatic SKU on Shopify. You can change this SKU whenever you want, as it won't affect the connection of the product with Printful or order tracking.
- Location: The location of your product will be set to Customily. You can check this by going to your Shopify product and opening the product variants to see their stock information.
This setting is required for order tracking to work properly. Customily does
not fulfill or hold any products in this location—your POD provider will still
handle fulfillment and shipping. The Customily location exists so that we can
update your orders with tracking information when Printful starts shipping.
Important
Please don't change the location of the product. If you remove Customily as
the location, tracking for orders of that product won't work.
Shipping Rates for Customily Products
All products published with Customily will be assigned to the **Customily
location** in Shopify. For orders to be submitted, this location must have
valid shipping rates assigned.
By default, Customily location will be added to the General Shipping Rates
from your store (if any exist). If not, you’ll need to set up rates manually.
When working with Printful and Shopify, there are three kinds of shipping
rates: custom rates, Printful flat rates, and the Printful shipping
calculator. Out of these, only custom rates and flat rates work with
Customily products.
Custom Shipping Rates (Recommended & Simplest)
Custom rates are rates you define directly in Shopify. They let you decide how
much to charge shoppers—whether that’s free shipping, a single flat fee, or
rules by region.
Most stores choose this option, as it provides a simple way to cover all
customizable products at once.
How to set up custom rates:
- Go to Settings → Shipping and Delivery in Shopify.
- Open your General Shipping Rates.!general shipping rates.png
- Find the Fulfillment Location for Customily and add a shipping zone (e.g., United States, Europe).
- Click Add rate , and enter your shipping rules (for example, Free, $4.99 Flat Rate, etc.).
Tip
If you already have zones created, you can simply assign the **Customily
location** to those existing zones. Just remember if the location is already
in use elsewhere, remove it from there first and then add it to the zones and
rates you want.
You can also add the Customily location to other shipping profiles if you
want more flexibility.
###
Printful Flat Rates
Printful provides predefined flat rates for each product type (e.g., t-shirts, mugs, posters). These rates match what Printful charges you for fulfillment,
so you don’t need to calculate or guess costs.
To use these, you’ll **first need to publish at least one product directly
from the Printful app**. That action creates Printful's shipping profiles in
your Shopify settings, and then you can assign them to the Customily location.
How to set up Printful flat rates:
- In the Printful app, publish at least one product using the option Automatically assign and update profile if needed.
- In Shopify, go to Settings → Shipping and Delivery and find the PrintfulApp Shipping profile. !Printful shipping location.png
- Click to edit the rates. Under Fulfillment Location, select Add LocationAdd printful location.png**
- Select the Customily location
- Under Manage products , add your Customily products to this profile so the rates apply to them.
Remember, these rates only appear on your store when you have published a
product directly from Printful. If you don't have them but would like to
use them, you can publish a dummy product and then delete it, just to get the
rates.
Important
If you see the message “Shipping not available” when checking out, it means
your Customily location does not have valid shipping rates assigned for
that shipping zone. Double-check your General Shipping Rates or Printful flat
rates to make sure they cover the address.!shipping not available.png
Printful Shipping Calculator (Not Supported with Customily)
Live shipping rates provided by
Printful are not available with Customily. If you have them enabled on your
Printful, make sure you disable them to avoid issues with shipping during
checkout.
How can I offer express shipping?
To offer express shipping, all you need to do is create a shipping profile on
your general shipping rates that contains the
word "express ".
Customily will recognize the word express on the order's shipping information
and will send the order via API to Printful with with express shipping
enabled.
How does tracking work?
When Printful starts shipping the order, a notification will be sent via
webhook to your Shopify Order. Orders on Shopify will be marked as
Fulfilled , and the tracking number will be added to it.
If you have your Shopify configured to send shipping updates to your
customers, this will trigger that communication, so your customers can be
aware of their shipping updates.
For tracking to work, products must have Customily set as their location.
This is something Customily applies by default to all products, so please
don't change it!
▶ How does the integration with Printify work?
When working with Printify and Customily, Customily will share your order
information directly with Printify via API. This means that for every order
you receive of a product that has Customily, we will share with Printify the
order information (customer details, products in the order, etc.) with the
unique print file needed to fulfill that personalization.
The whole product-to-order cycle is:
- Publish your product in Customily using a Printify product as a base.
- Your customer places an order in your store.
- You'll immediately see the order information on your Shopify dashboard, including all the personalization information provided by Customily.
- Once the print file is ready (this usually takes around 30') Customily will send the order to Printify via API, and you'll be able to see the order on your Printify dashboard.
- Confirm the order on Printify to start fulfillment.
- Printify will start fulfillment and send updates as it goes. When the order is shipped, this update will be pushed to your Shopify order so your customer can receive their tracking information.
Click on any item to learn more about it.
Publish your product in Customily using a Printify product as a base
By going to start, and choosing to Publish a New product, you can select
Printify as your POD and then pick a product to use. You can see more details on how to publish a product from a POD here.
If you see Printify disabled, make sure you've integrated Printify's API key
in your settings. You can learn how to integrate with a POD here.
**Products published via Customily will be created with the following
settings** :
- Vendor: Products will have Printify as the vendor. If you rather have your store appear as the vendor, you can change this on your product settings on Shopify.
- SKU: Products will be assigned an automatic SKU on Shopify. You can change this SKU whenever you want, as it won't affect the connection of the product with Printify or order tracking.
- Location: The location of your product will be set to Customily. You can check this by going to your Shopify product and opening the product variants to see their stock information.
_This setting is required for order tracking to work properly. Customily does
not fulfill or hold any products in this location—your POD provider will still
handle fulfillment and shipping. The Customily location exists so that we can
update your orders with tracking information when Printify starts shipping._
Important
Products published via Customily will not appear on your Printify products
dashboard. You don't have to create any kind of product on Printify or
connect them with the products published through Customily in any way.
Seeing the order on Shopify
After a customer makes a purchase you'll see their order on your Shopify Order
Dashboard instantly. There you will have all the customer's and product's
information, including the personalization and the print file. Keep in mind
print files take some time to be generated (approx 30').
Important
If you have your Shopify configured to fulfill orders automatically, your order might appear as
rejected by Printify at first. This is because we send orders to Printify
once the print file is ready, and this can take around 30 minutes, so at
first, Printify won't find any order. But not to worry, once the print file is
ready, and the order is created on Printify, the **fulfillment status will
update automatically to accepted**.
If you have your Shopify configured to fulfill orders manually, then you
should wait until the print file is ready to request fulfillment, otherwise it
will be rejected at first.
Seeing the order on Printify
Orders are sent to Printify when the print file is complete in Customily.
This normally takes around 30 minutes. They are created with the same order
number from Shopify + API order # added to the end (to indicate it is an order created through API) with all the customer's information, product information,
and the print file necessary to fulfill the order.
To be able to create an API order, Customily needs to create a product on your
Printify dashboard. This is a product that is not published on your store,
it is a "dummy" product we create via API with the customer's personalization,
to be able to add that product to the order. You can find these products under
my products on Printify, they will have the name of the product from the
order.
There is no need to publish these products, whatsoever. Once the order has
been fulfilled you can delete them from your Printify dashboard if you want.
Confirm the order on Printify
Orders in Printify will always be created with status on hold. This means
you have to confirm each order to send it to production. You can confirm
orders manually one bye one, or configure Printify to confirm orders
automatically after some amount of time.
To confirm orders manually you can:
- hover over the order and click "Submit order"!submit one order Printify.png
- or select multiple orders with the checkbox and click "Submit order" on the top right corner.!bulk submit orders Printify.png
You can also configure your orders to be submitted automatically, by
configuring it on your Printify settings.
- Open Printify
- Go to store settings on the left menu
- Open the order settings tab
- Scroll down to the Order Approval section and pick the setting you prefer
- Scroll to the end and click save
Fulfillment and tracking
Once you confirm the order, Printify will start working on it. You'll see
fulfillment updates on Printify, as you would with any ordinary Printify
order.
the order is fulfilled and shipping begins, you will see the tracking
information on Printify. This update will be automatically sent to your
Shopify Order, together with the tracking information, so your customer can be
aware that their order is being shipped and can track its progress.
Orders on Shopify will be marked as fulfilled , and the tracking number
for the shipment will be added to them.
▶ Where can I find my orders on Printify?
Orders are sent to Printify when the print file is complete in Customily.
This normally takes around 30 minutes. They are created with the same order
number from Shopify followed by an API order number, with all the customer's
information, product information, and the print file necessary to fulfill the
order.
To find your orders on Printify
- Open your Printify App
- Head on to the left menu and make sure you have the correct store selected
- Open Orders
- You will find orders created by Customily under the Printify Orders tab. They will have the same order number as on Shopify followed by an API #.
I can't find my order on Printify
If you can't find your order, there are a couple of things you can check
before contacting our support team.
- Check if the print file is ready. Remember, orders will be created only when the print file is ready, so if it's not ready yet it is normal for the order to be missing. To check if your Print file is ready, head over to your Shopify Order , and click the Customily-production-url link.
If you see a screen saying it's not ready yet, then wait a couple of minutes
and check again. Once you see your file (or if it downloads), you should be
able to see your order on Printify!
- Make sure you are checking the correct store on Printify. If you have many stores on your Printify account, make sure you are looking for the order in the correct store. You can change stores at the top of the left menu. Also, make sure you are seeing the Printify Orders tab, and not the Other Orders one.
- Check that the product is properly connected with Printify. Open your product settings in Customily, by going to Store > Products > and opening the product from the order. Under fulfillment settings, you should see that it is connected with Printify.
If you've checked all this, and still don't see the order, contact our support
team to get more information on why it's not coming through.
How can I change the Print File for my order?
Orders on Printify get created with On Hold status. If you haven't approved
them yet to send to fulfillment, you can change the print file on the order
before doing so.
- First, you will need to generate the new file you want to use. You can either edit the file you got or generate a new one with Customily. You can learn how to create a new Print file for your Order here.
- Open your Printify account, and head on to My products , to edit the product that was created for your order (remember it is an unpublished product). When you find it, click on Edit design.
- This will open the Printify Design Editor. Delete the layer for the current file that is on the print file, and click on add designs to upload the new one you want to use.
- Click Save product
- This will open the product information page, don't make any changes and click save as draft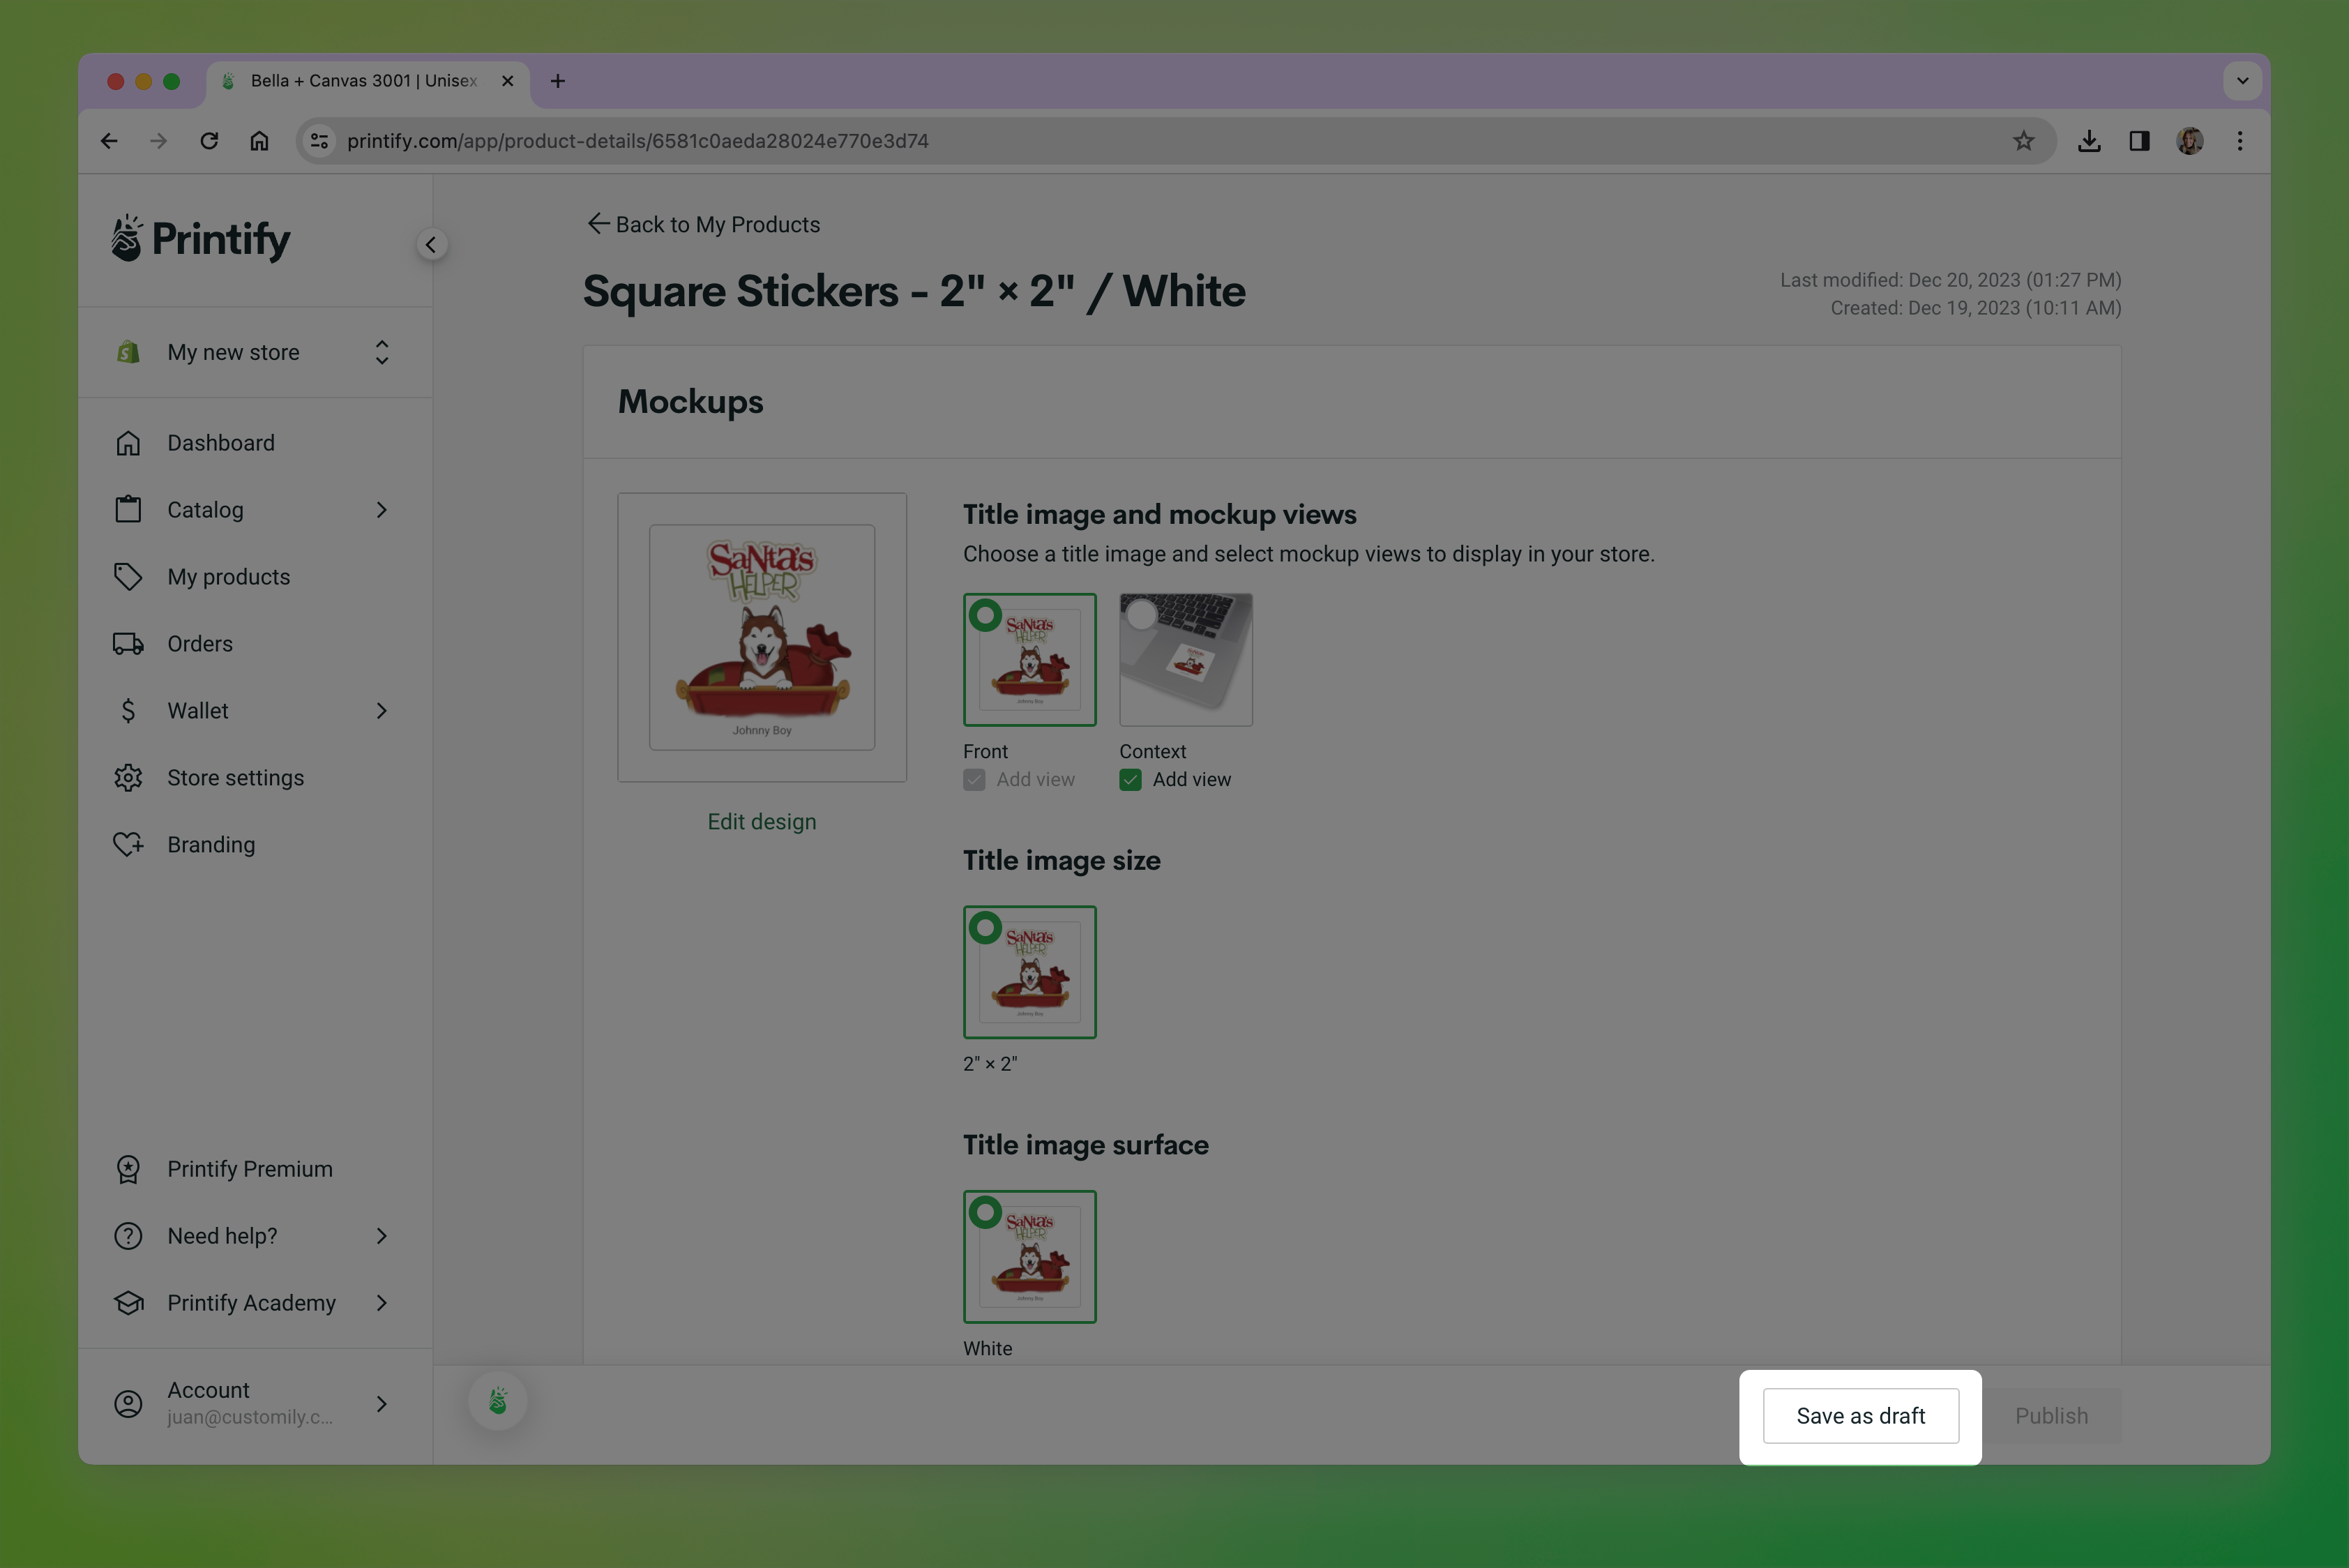save as draft.png**
- This will update the product that is associated with your order. If you go to Orders , and find your order you'll see it has the new modified product in it. You can now go ahead and confirm the order with the new Print file.
▶ How does shipping and order tracking work for Printify on Shopify
To ensure proper shipping information is shown during checkout and order
tracking works correctly, **products published via Customily will be created
with the following settings** :
- Vendor: Products will have Printify as the vendor. If you rather have your store appear as the vendor, you can change this on your product settings on Shopify.
- SKU: Products will be assigned an automatic SKU on Shopify. You can change this SKU whenever you want, as it won't affect the connection of the product with Printify or order tracking.
- Location: The location of your product will be set to Customily. You can check this by going to your Shopify product and opening the product variants to see their stock information.
This setting is required for order tracking to work properly. Customily does
not fulfill or hold any products in this location—your POD provider will still
handle fulfillment and shipping. The Customily location exists so that we can
update your orders with tracking information when Printify starts shipping.
Important
Please don't change the location of the product. If you remove Customily as
the location, tracking for orders of that product won't work.
Shipping Rates for Customily Products
All products published with Customily will be assigned to the **Customily
location** in Shopify. For orders to be submitted, this location must have
valid shipping rates assigned.
By default, Customily location will be added to the General Shipping Rates
from your store (if any exist). If not, you’ll need to set up rates manually.
When working with Printify and Shopify, there are three kinds of shipping
rates: custom rates, Printify flat rates, and the Printify shipping
calculator. Out of these, only custom rates and flat rates work with
Customily products.
Custom Shipping Rates (Recommended & Simplest)
Custom rates are rates you define directly in Shopify. They let you decide how
much to charge shoppers—whether that’s free shipping, a single flat fee, or
rules by region.
Most stores choose this option, as it provides a simple way to cover all
customizable products at once.
How to set up custom rates:
- Go to Settings → Shipping and Delivery in Shopify.
- Open your General Shipping Rates.!general shipping rates.png
- Find the Fulfillment Location for Customily and add a shipping zone (e.g., United States, Europe).
- Click Add rate , and enter your shipping rules (for example, Free, $4.99 Flat Rate, etc.).
Tip
If you already have zones created, you can simply assign the **Customily
location** to those existing zones. Just remember if the location is already
in use elsewhere, remove it from there first and then add it to the zones and
rates you want.
You can also add the Customily location to other shipping profiles if you
want more flexibility.
###
Printify Flat Rates
Printify provides predefined flat rates for each product type (e.g., t-shirts, mugs, posters). These rates match what Printify charges you for fulfillment,
so you don’t need to calculate or guess costs.
To use these, you’ll **first need to publish at least one product directly
from the Printify app**. That action creates Printify’s shipping profiles in
your Shopify settings, and then you can assign them to the Customily location.
How to set up Printify flat rates:
- In the Printify app, publish at least one product using the option Automatically assign and update profile if needed.
- In Shopify, go to Settings → Shipping and Delivery and find the Printify App Shipping profile. !Printify shipping profile.png
- Click to edit the rates. Under Fulfillment Location, select Add Locationadd location.png**
- Select the Customily location
- Under Manage products , add your Customily products to this profile so the rates apply to them.
Remember, these rates only appear on your store when you have published a
product directly from Printify. If you don't have them but would like to
use them, you can publish a dummy product and then delete it, just to get the
rates.
Important
If you see the message “Shipping not available” when checking out, it means
your Customily location does not have valid shipping rates assigned for
that shipping zone. Double-check your General Shipping Rates or Printify flat
rates to make sure they cover the address.!shipping not available.png
Printify Shipping Calculator (Not Supported with Customily)
Printify's Shipping Calculator is not available with Customily. If you have it enabled on your
Printify, make sure you disable it to avoid issues with shipping during
checkout.
How can I offer express shipping?
To offer express shipping, all you need to do is create a shipping profile on
your general shipping rates that contains the word "express ".
Customily will recognize the word express on the order's shipping information
and will send the order via API to printify with with express shipping
enabled.
How does tracking work?
When Printify starts shipping the order, a notification will be sent via
webhook to your Shopify Order. Orders on Shopify will be marked as
Fulfilled , and the tracking number will be added to it.
If you have your Shopify configured to send shipping updates to your
customers, this will trigger that communication, so your customers can be
aware of their shipping updates.
For tracking to work, products must have Customily set as their location.
This is something Customily applies by default to all products, so please
don't change it!
▶ Integrating Printify for Shopify
To use Printify with Customily for Shopify, the first thing you need to do is
to create an account on Printify. If you don't have an account with Printify,
Then if you don't have it already you should add their
app to your Shopify store.
Once you have your Printify account created and the app installed, open your
Customily app on Shopify and follow these steps.
- Head on to Start or Store on the left menu
- Go to Settings and open the Integrations tab.
- If you have more than one store on your account, make sure you are changing the setting of the correct store by selecting it from the top left dropdown.
- Select Printify from the Select a provider for integration dropdown
- Click enable integration
- Paste your Printify API Key. Learn where you can find your API Token on Printify here.
- Select the store where you will be receiving the order from the dropdown.
- Click Save Settings at the bottom of the page.
▶ Where can I find my Printify API key (token)
- Login to your **Printify** account, or register with them here if you don't have an account yet.
- Click on your user in the bottom left corner and go to **Connections
**
- Click on Generate to create a new API token.
- Give the Token an easily recognizable name (like Customily), select All scopes (full access) , and click Generate Token !generate token.png
- A window with your token will show up. Click Copy to clipboard , to be able to paste it in Customily.!printify token ready.png
▶ Where can I find my Gelato API Key
- Log into your **Gelato** account, or register with them here if you don't have an account yet.
- Expand Developer on the left menu and select **API Key
**
- Click on Add API key.
- Add a name for the API that is easy to recognize (for example Customily) and click **Create Key
**
- An API Key will be generated. ClickCopy to clipboard , to use it in Customily.
▶ Integrating Gelato for Shopify
To use Gelato with Customily for Shopify, the first thing you need to do is to
create an account on Gelato. If you don't have an account with Gelato, you can create one here.
Then if you don't have it already you should add their
app to your Shopify store.
Once you have your Gelato account created and the app installed, open your
Customily app on Shopify and follow these steps.
- Head on to Start or Store on the left menu
- Go to Settings and open the Integrations tab.
- If you have more than one store on your account, make sure you are changing the setting of the correct store by selecting it from the top left dropdown.
- Select Gelato from the Select a provider for integration dropdown
- Click enable integration
- Paste your Gelato API Key. Learn where you can find your API Key on Gelato here.
- Click Save Settings at the bottom of the page.
▶ Integrating Printful for Etsy
To use Printful with Customily for Etsy, the first thing you need to do is to
create an account on Printful. If you don't have an account with Printful,
Once you have a Printful account, you will need to add them as a Production
Partner on your Etsy shop. Etsy requires stores to disclaim who is fulfilling
the products for them. So for Customily to be able to send the orders from
Etsy to Printful we need this information to be added to your Etsy account.
Follow these steps to add Printful as a production partner on your Etsy.
- Sign in to your Etsy account.
- Go to your Shop Manager , and choose Settings.
- Select **Production partners**.
- Select Add a new production Partner and fill out the following information:
- \- Production partner: printful
- \- Location : Chatsworth, CA
- \- About your partnership: You can simply put "A production partner", or fill in a short description of why you like to work with them if you're feeling inspired.
- \- Production partner: select the following statements
"I don't have the technical ability to make it entirely by myself"
"I design everything myself"
"They do everything for me"
- Once done, you can click Show Preview to see how it will appear in your store.
- Click Save Partner and you are done!
Important
If you were already working with Printful on your Etsy store, you might have
the Production Partner for them already created. **You must check that you are
using the same names as we provided in the steps above** , otherwise,
Customily won't recognize them.
Once you have Printful added as your Production Partner, open your Customily
app on Shopify and follow these steps.
- Head on to Start or Store on the left menu
- Go to Settings and open the Integrations tab.
- If you have more than one store on your account, make sure you are changing the setting of the correct store by selecting it from the top left dropdown.
- Select Printful from the Select a provider for integration dropdown
- Click enable integration
- Paste your Printful API Key (also known as API token). Learn where you can find your API Token on Printful here.
- Click Save Settings at the bottom of the page.
▶ Integrating Printify for Etsy
To use Printify with Customily for Etsy, the first thing you need to do is to
create an account on Printify. If you don't have an account with Printify,
Once you have a Printify account, you will need to add them as a Production
Partner on your Etsy shop. Etsy requires stores to disclaim who is fulfilling
the products for them. So for Customily to be able to send the orders from
Etsy to Printify we need this information to be added to your Etsy account.
Follow these steps to add Printify as a production partner on your Etsy.
- Sign in to your Etsy account.
- Go to your Shop Manager , and choose Settings.
- Select **Production partners**.
- Select Add a new production Partner and fill out the following information:
- \- Production partner: printify
- \- Location : United States of America
- \- About your partnership: You can simply put "A production partner", or fill in a short description of why you like to work with them if you're feeling inspired.
- \- Production partner: select the following statements
"I don't have the technical ability to make it entirely by myself"
"I design everything myself"
"They do everything for me"
- Once done, you can click Show Preview to see how it will appear in your store.
- Click Save Partner and you are done!
Important
If you were already working with Printify on your Etsy store, you might have
the Production Partner for them already created. **You must check that you are
using the same names as we provided in the steps above** , otherwise,
Customily won't recognize them.
Once you have Printify added as your Production Partner, open your Customily
app on Shopify and follow these steps.
- Head on to Start or Store on the left menu
- Go to Settings and open the Integrations tab.
- If you have more than one store on your account, make sure you are changing the setting of the correct store by selecting it from the top left dropdown.
- Select Printify from the Select a provider for integration dropdown
- Click enable integration
- Paste your Printify API Key. Learn where you can find your API Token on Printify here.
- Select the store where you will be receiving the order from the dropdown.
- Click Save Settings at the bottom of the page.
▶ Integrating Gelato for Etsy
To use Gelato with Customily for Etsy, the first thing you need to do is to
create an account on Gelato. If you don't have an account with Gelato, you can create one here.
Once you have a Gelato account, you will need to add them as a Production
Partner on your Etsy shop. Etsy requires stores to disclaim who is fulfilling
the products for them. So for Customily to be able to send the orders from
Etsy to Gelato we need this information to be added to your Etsy account.
Follow these steps to add Gelato as a production partner on your Etsy.
- Sign in to your Etsy account.
- Go to your Shop Manager , and choose Settings.
- Select **Production partners**.
- Select Add a new production Partner and fill out the following information:
- \- Production partner: gelato
- \- Location : Oslo, Norway
- \- About your partnership: You can simply put "A production partner", or fill in a short description of why you like to work with them if you're feeling inspired.
- \- Production partner: select the following statements
"I don't have the technical ability to make it entirely by myself"
"I design everything myself"
"They do everything for me"
- Once done, you can click Show Preview to see how it will appear in your store.
- Click Save Partner and you are done!
Important
If you were already working with Gelato on your Etsy store, you might have the
Production Partner for them already created. **You must check that you are
using the same names as we provided in the steps above** , otherwise,
Customily won't recognize them.
Once you have Gelato added as your Production Partner, open your Customily app
on Shopify and follow these steps.
- Head on to Start or Store on the left menu
- Go to Settings and open the Integrations tab.
- If you have more than one store on your account, make sure you are changing the setting of the correct store by selecting it from the top left dropdown.
- Select Gelato from the Select a provider for integration dropdown
- Click enable integration
- Paste your Gelato API Key. Learn where you can find your API Token on Gelato here.
- Click Save Settings at the bottom of the page.
▶ POD partner sample API
Overview
This document describes the minimal set of API endpoints needed for Customily
to interact with a Print on Demand (POD) provider. The JSON examples are for
demonstration purposes aswe can adapt to your JSON response structure.
- Get Products \- Retrieve a list of products.
- Get Product Details \- Retrieve details for a specific product.
- Create Order \- Place an order for a selected product and variants
- Package Shipped Webhook \- Receive notifications when a package has been shipped.
- * *
Get Products
Purpose:
The Get Products endpoint allows our application to retrieve a list of all
available products from the POD provider. This is useful for displaying a
catalog or product selection menu.
HTTP Method:
GETURL:
https://api.podprovider.com/v1/productsQuery Parameters:
limit(integer, optional) : The maximum number of products to retrieve in a single request (default: 20).
offset(integer, optional) : The number of products to skip before starting to retrieve results (useful for pagination).
Response Format:
The response will be in JSON format and include a list of basic product
details for each product.
Expected JSON Response Structure
{
"products": [ { "productId": "123456", "productName": "Custom T-Shirt", "description": "A high-quality custom t-shirt with various colors and sizes available.", "price": 19.99, "thumbnailURL": "https://example.com/images/product123-thumbnail.jpg" }, { "productId": "789012", "productName": "Custom Mug", "description" : "A ceramic mug that can be customized with your own design.", "price": 14.99, "thumbnailURL": "https://example.com/images/product789-thumbnail.jpg" } ]
}
Field Descriptions
- products (array) : An array of product objects, each containing basic information about a product. Each product object includes:
- productId (string) : The unique identifier for the product in the POD provider's system.
- productName (string) : The name of the product, as registered with the POD provider.
- description (string) : A brief description of the product.
- price (number) : The base price of the product, in USD.
- thumbnailURL (string) : A URL pointing to a thumbnail image of the product.
Get Product Details
Purpose:
The Get Product Details endpoint allows our application to pull
comprehensive details for a specific product, including variant options,
pricing, and fulfillment time.
HTTP Method:
GETURL:
https://api.podprovider.com/v1/products/{productId}Path Parameter:
productId(string) : The unique identifier for the product to retrieve details for.
Response Format:
The response will be in JSON format and include detailed information about the
selected product.
Expected JSON Response Structure
{
"Product ID": "123456",
"Product Name": "Custom T-Shirt",
"Description": "The heritage brand known for quality, Champion, produces this
customization-oriented, short-sleeve unisex t-shirt. This Champion t-shirt has
the iconic Champion \"C\" logo on the left sleeve and no tag on the neck
label. It is a lightweight, classic fit tee made of 100% ring spun cotton. Add
it to your store today",
"Variants": {
"Variant: Black / S": {
"color": "Black",
"hex_color": "#000000",
"size": "S",
"printareas": [ { "name": "front", "heightmm": 431.8, "widthmm": 355.6, "positionurl": "https://cdn.customily.com/product- images/daa86f27-857d-4d92-9f95-2810e34b58ed.png", "format": "PNG" } ],
"prices": {
"merchant_cost": "8.84 USD",
"suggestedretailprice": "20 USD",
"shipping": {
"min_cost": 3.99,
"max_cost": "15 USD"
},
"delivery": {
"min_time": "1 day",
"max_time": "10 days"
}
}
},
"Variant: Black / M": {
"color": "Black",
"hex_color": "#000000",
"size": "M",
"printareas": [ { "name": "front", "heightmm": 431.8, "widthmm": 355.6, "positionurl": "https://cdn.customily.com/product- images/daa86f27-857d-4d92-9f95-2810e34b58ed.png", "format": "PNG" } ],
"prices": {
"merchant_cost": "8.84 USD",
"suggestedretailprice": "20 USD",
"shipping": {
"min_cost": 3.99,
"max_cost": "15 USD"
},
"delivery": {
"min_time": "1 day",
"max_time": "10 days"
}
}
},
"Variant: Maroon / S": {
"color": "Maroon",
"hex_color": "#800000",
"size": "S",
"printareas": [ { "name": "back", "heightmm": 431.8, "widthmm": 355.6, "positionurl": "https://cdn.customily.com/product- images/a92bf498-66c9-44c6-9602-55500c1ea8a2.png", "format": "PNG" } ],
▶ How does the integration with Monjo work?
When working with Monjo and Customily, Customily will share your order
information directly with Monjo via API. This means that for every order you
receive of a product that has Customily, we will share with Monjo the order
information (customer details, products in the order, etc.) with the unique
print file needed to fulfill that personalization.
The whole product-to-order cycle is:
- Publish your product in Customily using a Monjo product as a base.
- Your customer places an order in your store.
- You'll immediately see the order information on Customily's order dashboard, including all the shoppers details and personalization information
- Once the print file is ready (this usually takes around 20') you'll be able to confirm the order in Customily. Once it is confirmed, we will send the order to Monjo via API. At this time, you will be charged for the order, plus any costs for shipping.
- When fulfillment starts you will be billed for the product and shipping costs.
Click on any item to learn more about it.
Publish your product in Customily using a Monjo product as a base
By going to start, and choosing to Publish a New product, you can select
Monjo as your POD and then pick a product to use. You can see more details on how to publish a product from a POD here.
If you see Monjo disabled, make sure you've integrated their API Token in your
Products published via Customily will be assigned an automatic SKU, but you
can change this SKU whenever you want since it won't affect the connection of
the product with Monjo.
Seeing the order on your store
After a customer makes a purchase you'll see their order on your Customily
Order Dashboard instantly. There you will have all the customer's and
product's information, including the personalization and the print file (keep in mind print files take about 20' to be generated). It's also were you can
keep track of the order's status.
As always, your orders will also be visible on your store's Orders Dashboard.
Depending on the platform you are using, the details you see on the order
might differ. There you will have all the customer's and product's
information, including the personalization and the print file.
Confirm the order on Customily
Orders in Customily will always be created as draft orders. This means
you have to manually confirm each order to send it to production.
To confirm orders, you can either:
- confirm all of them in bulk, by selecting the checkbox to select all orders waiting for approval, and click the clicking the "Approve Orders" button on the top right corner!approve order bulk.png
- or hover over each order status that says needs approval, and approve them one by one by clicking the "Approve" button.!tracking number.png
Fulfillment and tracking
Once you confirm the order, Monjo will start working on it. You'll see
fulfillment updates on your Order Dashboard, under the Status column.
When the order is fulfilled and shipping begins, you will see the tracking
information by hovering on the fulfilled status.
This update will be automatically sent to your Shopify Order, together with
the tracking information, so your customer can be aware that their order is
being shipped and can track its progress.
Orders on Shopify will be marked as fulfilled , and the tracking number
for the shipment will be added to them.
Order billing
Once you confirm the order, you will be billed for the product costs once
fulfillment starts. Then once shipping begins you will be charged for that
separately. You can learn more how billing with Monjo works here.
▶ Integrating Monjo on your account.
To use Monjo with Customily, you will need to:
- Connect with Monjo API.
- Configure your billing information.
Monjo will collect payment for fulfillment and shipping costs via Customily,
so it's essential to set your payment method for the integration to work
completely.
Connecting with Monjo API
- Head on to Start or Store on the left menu
- Go to Settings and open the Integrations tab.
- If you have more than one store on your account, make sure you are changing the setting of the correct store by selecting it from the top left dropdown.
- Select Monjo from the Select a provider for integration dropdown
- Click enable integration
- Use the API token that comes by default: 115420
This will make sure all your orders are sent properly to Monjo.
- Click Save Settings at the bottom of the page.
Configure billing for Monjo
- Head on to Account Settings on the left menu
- Open the POD Billing tab.
- Add your billing information
If you don't see the POD Billing tab
Try publishing a product using Monjo, and then come back to the account
settings. For that, head to start, choose publish new product, select Monjo as
the POD, choose any product and any design, and save the product as a draft.
Once you do this, come back to the settings, refresh the page if necessary and
you'll see POD Billing.
Once billing for your orders start you will find all your bills under the POD
integrations tab.
Keep in mind
You will be charged for each order you receive from Monjo once fulfillment
starts. You will receive two bills, one for the product cost and the other for
▶ How does billing with Monjo work?
If you’re selling Monjo products on your store, then two transactions take
place:
- A customer purchases a product from your store, and they pay you using your store’s payment platform.
- The order comes through to us from your linked store, and then we bill you for the Monjo fulfillment of that order.
The difference between your retail price and order costs makes your profit
from each sale.
Why can’t online store owner’s customers pay Monjo directly?
Monjo works as a white-label printing service on behalf of online store
owners. In this case, the online store owners, meaning you, pay Monjo for a
service. In most cases, your customers buy from you via a store or
marketplace. Since Monjo doesn’t host the store platform, it’s not involved in
that transaction between you and your customer.
##
What's the difference with Customily's transaction fee?
Customily's transaction fee is independent from Monjo fulfillment and shipping
costs.
Customily's transaction fee is covering the creation of the personalized print
file, that then Monjo will use to fulfill the product. Transaction fees are
charged based on your whole usage of Customily on a specific month.
Fulfillment and shipping costs are charged whenever an order goes to
fulfillment.
How do I set up billing method for my Monjo orders?
- Head on to Account Settings on the left menu
- Open the POD Billing tab.
- Add your billing information
- Click Add Credit Card to load your billing information.
If you don't see the POD Billing tab
Try publishing a product using Monjo, and then come back to the account
settings. For that, head to start, choose publish new product, select Monjo as
the POD, choose any product and any design, and save the product as a draft.
Once you do this, come back to the settings, refresh the page if necessary and
you'll see POD Billing.
Once billing for your orders start you will find all your bills under the POD
integrations tab.
▶ Step-by-Step Guide to Launching Your First POD Product
Ready to bring your ideas to life? This step-by-step guide will walk you
through the entire process of creating and launching your POD products.
1 API Key Access
- Go to Settings > Integrations in Customily to set up your POD API Key.
2 Extra configurations
Shopify:
- Make sure Customily is added as a location in your Shipping Profile settings.
Etsy:
- Add your Print-on-Demand (POD) provider as a **Production Partner** in your shop settings.
- Assign the POD provider as the**Production partner** for each product you create.
- Ensure you have an active **Shipping Profile** set up for your products.
For New Listings
1 Create Your Design
- Go to theMy Designs tab and create the design you want to use.
2 Start the Product Creation
- Go to theStart tab and select Publish New Product.publish new.png**
- Choose the POD service and product base you want to use. You’ll be redirected to the configuration page.
3 Configure the Product
- Select Variants: Choose the product variants you want to offer.
Important
Variants cannot be added, edited, or removed after product creation
without breaking the automatic fulfillment connection.
- Set Print Areas and Designs: Choose the design areas and apply your designs.
4 Finalize the Listing
- Click Next and wait for the system to create the product.
- Once ready, you’ll see a preview of the listing.
- In Product Details, you can:
- Edit the product title, description, and variant price.
- Upload a new product image.
- Click Save as Draft or Publish to finish.
For Existing Listings (Only available for Shopify)
1 Create Your Design
- Go to the My Designs tab and create the design you want to use.
2 Add Fulfillment & Personalization
- Go to theStart tab and select Add fulfillment & personalization to an existing product.!Add fulfillment.png
- Choose your POD service and product base.
3 Match Product Variants
- Link the variants in your Shopify listing to the available variants in the POD product.
4 Set Design Areas
- Select which design to apply to each print area.
5 Complete the Process
- Wait for the system to link the design templates to your products.
Important Considerations
Avoid POD Synchronization
- For Existing Listings: Ensure the product is not synced with any POD (Print on Demand) platform.Do not use products imported from your POD platform.
- For New Listings: Do not sync the product with your POD platform after publishing.
No Disconnection from POD
- Once a product is created through a POD platform, it cannot be connected to Customily. There is no way to disconnect a product from the POD service once synced.
ProductVisibility
- Products connected through Customily will not appear on your POD platform.
Editing Templates
- While templates can be modified to adjust the design and live preview mockup, do not change the template dimensions or export format. Also, if your product has multiple print areas, do not replace its template with a different one , as this can break the automatic fulfillment connection.
▶ Integrating PixPOD for Shopify or WooCommerce
To use PixPOD with Customily for Shopify or WooCommerce, the first thing you
need to do is to create an account on PixPOD. If you don't have an account
with PixPOD, you can create one here.
Once you have your PixPOD account created, open your Customily app on Shopify
and follow these steps.
- Head on to Start or Store on the left menu
- Go to Settings and open the Integrations tab.
- If you have more than one store on your account, make sure you are changing the setting of the correct store by selecting it from the top left dropdown.
- Select PixPOD from the Select a provider for integration dropdown
- Click enable integration
- Paste your PixPOD API Key. Learn where you can find your API Key on PixPOD here.
If you see a field to add an API secret, leave it empty.
- Click Save Settings at the bottom of the page.
▶ Where can I find my PixPOD API Key
- Login to your PixPOD account, or register with them here if you don't have an account yet.
- Go to your account Settings on the left menu, and expand the API Token box.
- Click Generate and save API token
- Copy the value to use it in Customily
▶ Integrating PixPOD for Etsy
To use PixPOD with Customily for Etsy, the first thing you need to do is to
create an account on PixPOD. If you don't have an account with PixPOD, you can create one here.
Once you have a PixPOD account, you will need to add them as a Production
Partner on your Etsy shop. Etsy requires stores to disclaim who is fulfilling
the products for them. So for Customily to be able to send the orders from
Etsy to PixPOD we need this information to be added to your Etsy account.
Follow these steps to add PixPOD as a production partner on your Etsy.
- Sign in to your Etsy account.
- Go to your Shop Manager , and choose Settings.
- Select **Production partners**.
- Select Add a new production Partner and fill out the following information:
- \- Production partner: Pixpod
- \- Location : Bartlett, TN
- \- About your partnership: You can simply put "A production partner", or fill in a short description of why you like to work with them if you're feeling inspired.
- \- Production partner: select the following statements
"I don't have the technical ability to make it entirely by myself"
"I design everything myself"
"They do everything for me"
- Once done, you can click Show Preview to see how it will appear in your store.
- Click Save Partner and you are done!
Important
If you were already working with PixPOD on your Etsy store, you might have the
Production Partner for them already created. **You must check that you are
using the same names as we provided in the steps above** , otherwise,
Customily won't recognize them.
Once you have PixPOD added as your Production Partner, open your Customily app
on Shopify and follow these steps.
- Head on to Start or Store on the left menu
- Go to Settings and open the Integrations tab.
- If you have more than one store on your account, make sure you are changing the setting of the correct store by selecting it from the top left dropdown.
- Select PixPOD from the Select a provider for integration dropdown
- Click enable integration
- Paste your PixPOD API Key (also known as API token). Learn where you can find your API Token on PixPOD here.
If you see a field to add an API secret, leave it empty.
- Click Save Settings at the bottom of the page.
▶ How does integration with PixPOD work on Shopify
When working with PixPOD and Customily, Customily will share your order
information directly with PixPOD via API. This means that for every order you
receive of a product that has Customily, we will share with PixPOD the order
information (customer details, products in the order, etc.) with the unique
print file needed to fulfill that personalization.
The whole product-to-order cycle is:
- Your customer places an order in your store.
Click on any item to learn more about it.
Publish your product in Customily using a PixPOD product as a base
By going to start, and choosing to Publish a New product, you can select
PixPOD as your POD and then pick a product to use. You can see more details on how to publish a product from a POD here.
**Products published via Customily will be created with the following
settings** :
- Vendor : Products will have PixPOD as the vendor. If you rather have your store appear as the vendor, you can change this on your product settings on Shopify.
- SKU : Products will be assigned an automatic SKU on Shopify. You can change this SKU whenever you want, as it won't affect the connection of the product with PixPOD or order tracking.
- Location : The location of your product will be set to Customily. You can check this by going to your Shopify product and opening the product variants to see their stock information.
_This setting is required for order tracking to work properly. Customily does
not fulfill or hold any products in this location—your POD provider will still
handle fulfillment and shipping. The Customily location exists so that we can
update your orders with tracking information when PixPOD starts shipping._
Important
Remember to add your PixPOD API Key for orders to run smoothly to your
account. You can learn how to connect your PixPOD account to Customily here.
Seeing the order on your store
After a customer makes a purchase you'll see their order on your store's
Dashboard instantly. There you will have all the customer's and product's
information, including the personalization and the print file. Keep in mind
print files take some time to be generated (approx 30').
Important
If you have your Shopify configured to fulfill orders automatically, your order might appear as
rejected by PixPOD at first. This is because we send orders to PixPOD once
the print file is ready, and this can take around 30 minutes, so at first
PixPOD won't find any order. But not to worry, once the print file is ready,
and the order is created on PixPOD, the **fulfillment status will update
automatically to accepted**.
If you have your Shopify configured to fulfill orders manually, then you
should wait until the print file is ready to request fulfillment, otherwise it
will be rejected at first.
Seeing the order on PixPOD
Orders are sent to PixPOD when the print file is complete in Customily.
This normally takes around 30 minutes. They are created with the same order
number from Shopify, with all the customer's information, product information,
and the print file necessary to fulfill the order.
Confirm the order on PixPOD
Orders in PixPOD will always be created as draft orders. This means **you
have to manually confirm each order to send it to production.**
Fulfillment and tracking
Once you confirm the order, PixPOD will start working on it. You'll see
fulfillment updates on PixPOD, as you would with any ordinary PixPOD order.
When the order is fulfilled and shipping begins, you will see the tracking
information on PixPOD. This update will be automatically sent to your Shopify
Order, together with the tracking information, so your customer can be aware
that their order is being shipped and can track its progress.
Orders on Shopify will be marked as fulfilled , and the tracking number
for the shipment will be added to them.
▶ Integrating Printed Simply for Shopify or WooCommerce
To use Printed Simply with Customily for Shopify or WooCommerce, the first
thing you need to do is to create an account on Printed Simply. If you don't
have an account with Printed Simply, you can create one here.
Once you have your Printed Simply account created, open your Customily app on
Shopify and follow these steps.
- Head on to Start or Store on the left menu
- Go to Settings and open the Integrations tab.
- If you have more than one store on your account, make sure you are changing the setting of the correct store by selecting it from the top left dropdown.
- Select Printed Simply from the Select a provider for integration dropdown
- Click enable integration
- Paste your Printed Simply API Key (also known as Customer Identifier). Learn where you can find your API Key on Printed Simply here.
- Click Save Settings at the bottom of the page.
▶ Integrating Printed Simply for Etsy
To use Printed Simply with Customily for Etsy, the first thing you need to do
is to create an account on Printed Simply. If you don't have an account with
Printed Simply, you can create one here.
Once you have a Printed Simply account, you will need to add them as a
Production Partner on your Etsy shop. Etsy requires stores to disclaim who is
fulfilling the products for them. So for Customily to be able to send the
orders from Etsy to Printed Simply we need this information to be added to
your Etsy account.
Follow these steps to add Printed Simply as a production partner on your Etsy.
- Sign in to your Etsy account.
- Go to your Shop Manager , and choose Settings.
- Select **Production partners**.
- Select Add a new production Partner and fill out the following information:
- \- Production partner: Printed Simply
- \- Location : Orange County, CA
- \- About your partnership: You can simply put "A production partner", or fill in a short description of why you like to work with them if you're feeling inspired.
- \- Production partner: select the following statements
"I don't have the technical ability to make it entirely by myself"
"I design everything myself"
"They do everything for me"
- Once done, you can click Show Preview to see how it will appear in your store.
- Click Save Partner and you are done!
Important
If you were already working with Printed Simply on your Etsy store, you might
have the Production Partner for them already created. **You must check that
you are using the same names as we provided in the steps above** , otherwise,
Customily won't recognize them.
Once you have Printed Simply added as your Production Partner, open your
Customily app on Shopify and follow these steps.
- Head on to Start or Store on the left menu
- Go to Settings and open the Integrations tab.
- If you have more than one store on your account, make sure you are changing the setting of the correct store by selecting it from the top left dropdown.
- Select Printed Simply from the Select a provider for integration dropdown
- Click enable integration
- Paste your Printed Simply API Key (also known as Customer Identifier). Learn where you can find your API Key on Printed Simply here.
- Click Save Settings at the bottom of the page.
▶ Where can I find my Printed Simply API Key (Customer Identifier)
- Go to Portal Settings on the left menu, and click to generate a Customer Identifier.
- Copy the value to use it in Customily API Key field
▶ How does integration with Printed Simply work
When working with Printed Simply and Customily, Customily will share your
order information directly with Printed Simply via API. This means that for
every order you receive of a product that has Customily, we will share with
Printed Simply the order information (customer details, products in the order, etc.) with the unique print file needed to fulfill that personalization.
The whole product-to-order cycle is:
- Your customer places an order in your store.
Click on any item to learn more about it.
Publish your product in Customily using a Printed Simply product as a base
By going to start, and choosing to Publish a New product, you can select
Printed Simply as your POD and then pick a product to use. You can see more details on how to publish a product from a POD here.
**Products published via Customily will be created with the following
settings** :
- Vendor: Products will have Printed Simply as the vendor. If you rather have your store appear as the vendor, you can change this on your product settings on Shopify.
- SKU: Products will be assigned an automatic SKU on Shopify. You can change this SKU whenever you want, as it won't affect the connection of the product with Printed Simply or order tracking.
- Location: The location of your product will be set to Customily. You can check this by going to your Shopify product and opening the product variants to see their stock information.
_This setting is required for order tracking to work properly. Customily does
not fulfill or hold any products in this location—your POD provider will still
handle fulfillment and shipping. The Customily location exists so that we can
update your orders with tracking information when Printed Simply starts
shipping._
Important
Remember to add your Printed Simply API Key for orders to run smoothly to your
account. You can learn how to connect your Printed Simply account to Customily here.
Seeing the order on your store
After a customer makes a purchase you'll see their order on your store's
Dashboard instantly. There you will have all the customer's and product's
information, including the personalization and the print file. Keep in mind
print files take some time to be generated (approx 30').
Important
If you have your Shopify configured to fulfill orders automatically, your order might appear as
rejected by Printed Simply at first. This is because we send orders to
Printed Simply once the print file is ready, and this can take around 30
minutes, so at first Printed Simply won't find any order. But not to worry,
once the print file is ready, and the order is created on Printed Simply, the
fulfillment status will update automatically to accepted.
If you have your Shopify configured to fulfill orders manually, then you
should wait until the print file is ready to request fulfillment, otherwise it
will be rejected at first.
Seeing the order on Printed Simply
Orders are sent to Printed Simply **when the print file is complete in
Customily**. This normally takes around 30 minutes. They are created with the
same order number from Shopify, with all the customer's information, product
information, and the print file necessary to fulfill the order.
Confirm the order on Printed Simply
Orders in Printed Simply will always be created as draft orders. This
means you have to manually confirm each order to send it to production.
Fulfillment and tracking
Once you confirm the order, Printed Simply will start working on it. You'll
see fulfillment updates on Printed Simply, as you would with any ordinary
Printed Simply order.
When the order is fulfilled and shipping begins, you will see the tracking
information on Printed Simply. This update will be automatically sent to your
Shopify Order, together with the tracking information, so your customer can be
aware that their order is being shipped and can track its progress.
Orders on Shopify will be marked as fulfilled , and the tracking number
for the shipment will be added to them.
▶ Integrating BurgerPrints for Shopify or WooCommerce
To use BurgerPrints with Customily for Shopify or WooCommerce, the first thing
you need to do is to create an account on BurgerPrints. If you don't have an
account with BurgerPrints, you can create one here.
Once you have your BurgerPrints account created, open your Customily app on
Shopify and follow these steps.
- Head on to Start or Store on the left menu
- Go to Settings and open the Integrations tab.
- If you have more than one store on your account, make sure you are changing the setting of the correct store by selecting it from the top left dropdown.
- Select BurgerPrints from the Select a provider for integration dropdown
- Click enable integration
- Paste your BurgerPrints API Key. Learn where you can find your API Key on BurgerPrints here.
If you see a field to add an API secret, leave it empty.
- Click Save Settings at the bottom of the page.
▶ Integrating BurgerPrints for Etsy
To use BurgerPrints with Customily for Etsy, the first thing you need to do is
to create an account on BurgerPrints. If you don't have an account with
BurgerPrints, you can create one here.
Once you have a BurgerPrints account, you will need to add them as a
Production Partner on your Etsy shop. Etsy requires stores to disclaim who is
fulfilling the products for them. So for Customily to be able to send the
orders from Etsy to BurgerPrints we need this information to be added to your
Etsy account.
Follow these steps to add BurgerPrints as a production partner on your Etsy.
- Sign in to your Etsy account.
- Go to your Shop Manager , and choose Settings.
- Select **Production partners**.
- Select Add a new production Partner and fill out the following information:
- \- Production partner: BurgerPrints
- \- Location : Bartlett, TN
- \- About your partnership: You can simply put "A production partner", or fill in a short description of why you like to work with them if you're feeling inspired.
- \- Production partner: select the following statements
"I don't have the technical ability to make it entirely by myself"
"I design everything myself"
"They do everything for me"
- Once done, you can click Show Preview to see how it will appear in your store.
- Click Save Partner and you are done!
Important
If you were already working with BurgerPrints on your Etsy store, you might
have the Production Partner for them already created. **You must check that
you are using the same names as we provided in the steps above** , otherwise,
Customily won't recognize them.
Once you have BurgerPrints added as your Production Partner, open your
Customily app on Shopify and follow these steps.
- Head on to Start or Store on the left menu
- Go to Settings and open the Integrations tab.
- If you have more than one store on your account, make sure you are changing the setting of the correct store by selecting it from the top left dropdown.
- Select BurgerPrints from the Select a provider for integration dropdown
- Click enable integration
- Paste your BurgerPrints API Key (also known as API token). Learn where you can find your API Token on BurgerPrints here.
If you see a field to add an API secret, leave it empty.
- Click Save Settings at the bottom of the page.
▶ Where can I find my BurgerPrints API Key
- Login to your BurgerPrints account, or register with them here if you don't have an account yet.
- Go to Stores**** on the left menu.
- Under your Default store, click **Get API Key
**
- Copy the value to use it in Customily
copy api key.png**
▶ How does integration with BurgerPrints work on Shopify
When working with BurgerPrints and Customily, Customily will share your order
information directly with BurgerPrints via API. This means that for every
order you receive of a product that has Customily, we will share with
BurgerPrints the order information (customer details, products in the order, etc.) with the unique print file needed to fulfill that personalization.
The whole product-to-order cycle is:
- Your customer places an order in your store.
Click on any item to learn more about it.
Publish your product in Customily using a BurgerPrints product as a base
By going to start, and choosing to Publish a New product, you can select
BurgerPrints as your POD and then pick a product to use. You can see more details on how to publish a product from a POD here.
**Products published via Customily will be created with the following
settings** :
- Vendor: Products will have BurgerPrints as the vendor. If you rather have your store appear as the vendor, you can change this on your product settings on Shopify.
- SKU: Products will be assigned an automatic SKU on Shopify. You can change this SKU whenever you want, as it won't affect the connection of the product with BurgerPrints or order tracking.
- Location: The location of your product will be set to Customily. You can check this by going to your Shopify product and opening the product variants to see their stock information.
_This setting is required for order tracking to work properly. Customily does
not fulfill or hold any products in this location—your POD provider will still
handle fulfillment and shipping. The Customily location exists so that we can
update your orders with tracking information when BurgerPrints starts
shipping._
Important
Remember to add your BurgerPrints API Key for orders to run smoothly to your
account. You can learn how to connect your BurgerPrints account to Customily here.
Seeing the order on your store
After a customer makes a purchase you'll see their order on your store's
Dashboard instantly. There you will have all the customer's and product's
information, including the personalization and the print file. Keep in mind
print files take some time to be generated (approx 30').
Important
If you have your Shopify configured to fulfill orders automatically, your order might appear as
rejected by BurgerPrints at first. This is because we send orders to
BurgerPrints once the print file is ready, and this can take around 30
minutes, so at first BurgerPrints won't find any order. But not to worry, once
the print file is ready, and the order is created on BurgerPrints, the
fulfillment status will update automatically to accepted.
If you have your Shopify configured to fulfill orders manually, then you
should wait until the print file is ready to request fulfillment, otherwise it
will be rejected at first.
Seeing the order on BurgerPrints
Orders are sent to BurgerPrints **when the print file is complete in
Customily**. This normally takes around 30 minutes. They are created with the
same order number from Shopify, with all the customer's information, product
information, and the print file necessary to fulfill the order.
Confirm the order on BurgerPrints
Orders in BurgerPrints will always be created as draft orders. This means
you have to confirm each order to send it to production.
Fulfillment and tracking
Once you confirm the order, BurgerPrints will start working on it. You'll see
fulfillment updates on BurgerPrints, as you would with any ordinary
BurgerPrints order.
When the order is fulfilled and shipping begins, you will see the tracking
information on BurgerPrints. This update will be automatically sent to your
Shopify Order, together with the tracking information, so your customer can be
aware that their order is being shipped and can track its progress.
Orders on Shopify will be marked as fulfilled , and the tracking number
for the shipment will be added to them.
▶ Integrating Completeful on your account.
To use Completeful with Customily, you will need to:
Completeful will collect payment for fulfillment and shipping costs via
Customily, so it's essential to set your payment method for the integration to
work completely.
Connecting with Completeful API
- Head on to Start or Store on the left menu
- Go to Settings and open the Integrations tab.
- If you have more than one store on your account, make sure you are changing the setting of the correct store by selecting it from the top left dropdown.
- Select Completeful from the Select a provider for integration dropdown
- Click enable integration
- Use the API token that comes by default: fywruMazcCPaqTLLuifiojSoKxFuTbq9yAjgEiXdVe3VzJDcoG
This will make sure all your orders are sent properly to Completeful.
- Click Save Settings at the bottom of the page.
Configure billing for Completeful
- Head on to Account Settings on the left menu
- Open the POD Billing tab.
- Add your billing information
If you don't see the POD Billing tab
Try publishing a product using Completeful, and then come back to the account
settings. For that, head to start, choose publish new product, select
Completeful as the POD, choose any product and any design, and save the
product as a draft. Once you do this, come back to the settings, refresh the
page if necessary and you'll see POD Billing.
Once billing for your orders start you will find all your bills under the POD
integrations tab.
Keep in mind
You will be charged for each order you receive from Completeful once
fulfillment starts. You will receive two bills, one for the product cost and
the other for shipping. You can learn more how billing with Completeful works here.
▶ How does the integration with Completeful work?
When working with Completeful and Customily, Customily will share your order
information directly with Completeful via API. This means that for every order
you receive of a product that has Customily, we will share with Completeful
the order information (customer details, products in the order, etc.) with the
unique print file needed to fulfill that personalization.
The whole product-to-order cycle is:
- Your customer places an order in your store.
- When fulfillment starts you will be billed for the product and shipping costs.
Click on any item to learn more about it.
Publish your product in Customily using a Completeful product as a base
By going to start, and choosing to Publish a New product, you can select
Completeful as your POD and then pick a product to use. You can see more details on how to publish a product from a POD here.
If you see Completeful disabled, make sure you've integrated their API Token
in your settings. You can learn how to integrate with a POD here.
Products published via Customily will be assigned an automatic SKU, but you
can change this SKU whenever you want since it won't affect the connection of
the product with Completeful.
Seeing the order on your store
After a customer makes a purchase you'll see their order on your Customily
Order Dashboard instantly. There you will have all the customer's and
product's information, including the personalization and the print file (keep in mind print files take about 20' to be generated). It's also were you can
keep track of the order's status.
As always, your orders will also be visible on your store's Orders Dashboard.
Depending on the platform you are using, the details you see on the order
might differ. There you will have all the customer's and product's
information, including the personalization and the print file.
Confirm the order on Customily
Orders in Customily will always be created as draft orders. This means
you have to manually confirm each order to send it to production.
To confirm orders, you can either:
- confirm all of them in bulk, by selecting the checkbox to select all orders waiting for approval, and click the clicking the "Approve Orders" button on the top right corner!approve order bulk.png
- or hover over each order status that says needs approval, and approve them one by one by clicking the "Approve" button.!tracking number.png
Fulfillment and tracking
Once you confirm the order, Completeful will start working on it. You'll see
fulfillment updates on your Order Dashboard, under the Status column.
When the order is fulfilled and shipping begins, you will see the tracking
information by hovering on the fulfilled status.
This update will be automatically sent to your Shopify Order, together with
the tracking information, so your customer can be aware that their order is
being shipped and can track its progress.
Orders on Shopify will be marked as fulfilled , and the tracking number
for the shipment will be added to them.
Order billing
Once you confirm the order, you will be billed for the product costs once
fulfillment starts. Then once shipping begins you will be charged for that
▶ How does billing with Completeful work?
If you’re selling Completeful products on your store, then two transactions
take place:
- A customer purchases a product from your store, and they pay you using your store’s payment platform.
- The order comes through to us from your linked store, and then we bill you for the Completeful fulfillment of that order.
The difference between your retail price and order costs makes your profit
from each sale.
Why can’t online store owner’s customers pay Completeful directly?
Completeful works as a white-label printing service on behalf of online store
owners. In this case, the online store owners, meaning you, pay Completeful
for a service. In most cases, your customers buy from you via a store or
marketplace. Since Completeful doesn’t host the store platform, it’s not
involved in that transaction between you and your customer.
##
What's the difference with Customily's transaction fee?
Customily's transaction fee is independent from Completeful fulfillment and
shipping costs.
Customily's transaction fee is covering the creation of the personalized print
file, that then Completeful will use to fulfill the product. Transaction fees
are charged based on your whole usage of Customily on a specific month.
Fulfillment and shipping costs are charged whenever an order goes to
fulfillment.
How do I set up billing method for my Completeful orders?
- Head on to Account Settings on the left menu
- Open the POD Billing tab.
- Add your billing information
- Click Add Credit Card to load your billing information.
If you don't see the POD Billing tab
Try publishing a product using Completeful, and then come back to the account
settings. For that, head to start, choose publish new product, select
Completeful as the POD, choose any product and any design, and save the
product as a draft. Once you do this, come back to the settings, refresh the
page if necessary and you'll see POD Billing.
Once billing for your orders start you will find all your bills under the POD
integrations tab.
▶ How does integration with JetPrint work on Shopify
When working with JetPrint and Customily, Customily will share your order
information directly with JetPrint via API. This means that for every order
you receive of a product that has Customily, we will share with JetPrint the
order information (customer details, products in the order, etc.) with the
unique print file needed to fulfill that personalization.
The whole product-to-order cycle is:
- Your customer places an order in your store.
Click on any item to learn more about it.
Publish your product in Customily using a JetPrint product as a base
By going to start, and choosing to Publish a New product, you can select
JetPrint as your POD and then pick a product to use. You can see more details on how to publish a product from a POD here.
**Products published via Customily will be created with the following
settings** :
- Vendor: Products will have JetPrint as the vendor. If you rather have your store appear as the vendor, you can change this on your product settings on Shopify.
- SKU: Products will be assigned an automatic SKU on Shopify. You can change this SKU whenever you want, as it won't affect the connection of the product with JetPrint or order tracking.
- Location: The location of your product will be set to Customily. You can check this by going to your Shopify product and opening the product variants to see their stock information.
_This setting is required for order tracking to work properly. Customily does
not fulfill or hold any products in this location—your POD provider will still
handle fulfillment and shipping. The Customily location exists so that we can
update your orders with tracking information when JetPrint starts shipping._
Important
Remember to add your JetPrint API Key for orders to run smoothly to your
account. You can learn how to connect your JetPrint account to Customily here.
Seeing the order on your store
After a customer makes a purchase you'll see their order on your store's
Dashboard instantly. There you will have all the customer's and product's
information, including the personalization and the print file. Keep in mind
print files take some time to be generated (approx 30').
Important
If you have your Shopify configured to fulfill orders automatically, your order might appear as
rejected by JetPrint at first. This is because we send orders to JetPrint
once the print file is ready, and this can take around 30 minutes, so at first
JetPrint won't find any order. But not to worry, once the print file is ready,
and the order is created on JetPrint, the **fulfillment status will update
automatically to accepted**.
If you have your Shopify configured to fulfill orders manually, then you
should wait until the print file is ready to request fulfillment, otherwise it
will be rejected at first.
Seeing the order on JetPrint
Orders are sent to JetPrint when the print file is complete in Customily.
This normally takes around 30 minutes. They are created with the same order
number from Shopify, with all the customer's information, product information,
and the print file necessary to fulfill the order.
Confirm the order on JetPrint
Orders in JetPrint will always be created as draft orders. This means
you have to confirm each order to send it to production.
Fulfillment and tracking
Once you confirm the order, JetPrint will start working on it. You'll see
fulfillment updates on JetPrint, as you would with any ordinary JetPrint
order.
When the order is fulfilled and shipping begins, you will see the tracking
information on JetPrint. This update will be automatically sent to your
Shopify Order, together with the tracking information, so your customer can be
aware that their order is being shipped and can track its progress.
Orders on Shopify will be marked as fulfilled , and the tracking number
for the shipment will be added to them.
▶ Where can I find my JetPrint API Key
- Login to your JetPrint account, or register with them here if you don't have an account yet.
- Go to "**Integrations**" on the left menu.
- Find your default store, and click the Key Icon to get your API Key and Client ID.
- Copy both values to use them in Customily.
▶ Integrating JetPrint for Etsy
To use JetPrint with Customily for Etsy, the first thing you need to do is to
create an account on JetPrint. If you don't have an account with JetPrint,
Once you have a JetPrint account, you will need to add them as a Production
Partner on your Etsy shop. Etsy requires stores to disclaim who is fulfilling
the products for them. So for Customily to be able to send the orders from
Etsy to JetPrint we need this information to be added to your Etsy account.
Follow these steps to add JetPrint as a production partner on your Etsy.
- Sign in to your Etsy account.
- Go to your Shop Manager , and choose Settings.
- Select **Production partners**.
- Select Add a new production Partner and fill out the following information:
- \- Production partner: JetPrint
- \- Location : China
- \- About your partnership: You can simply put "A production partner", or fill in a short description of why you like to work with them if you're feeling inspired.
- \- Production partner: select the following statements
"I don't have the technical ability to make it entirely by myself"
"I design everything myself"
"They do everything for me"
- Once done, you can click Show Preview to see how it will appear in your store.
- Click Save Partner and you are done!
Important
If you were already working with JetPrint on your Etsy store, you might have
the Production Partner for them already created. **You must check that you are
using the same names as we provided in the steps above** , otherwise,
Customily won't recognize them.
Once you have JetPrint added as your Production Partner, open your Customily
app on Shopify and follow these steps.
- Head on to Start or Store on the left menu
- Go to Settings and open the Integrations tab.
- If you have more than one store on your account, make sure you are changing the setting of the correct store by selecting it from the top left dropdown.
- Select JetPrint from the Select a provider for integration dropdown
- Click enable integration
- Paste your JetPrint API Key, and your API Signature (also known as Client ID). Learn where you can find your API Key and Client ID on JetPrint here.
- Click Save Settings at the bottom of the page.
▶ Integrating JetPrint for Shopify or WooCommerce
To use JetPrint with Customily for Shopify or WooCommerce, the first thing you
need to do is to create an account on JetPrint. If you don't have an account
with JetPrint, you can create one here.
Once you have your JetPrint account created, open your Customily app on
Shopify and follow these steps.
- Head on to Start or Store on the left menu
- Go to Settings and open the Integrations tab.
- If you have more than one store on your account, make sure you are changing the setting of the correct store by selecting it from the top left dropdown.
- Select JetPrint from the Select a provider for integration dropdown
- Click enable integration
- Paste your JetPrint API Key and API Signature (also known as Client ID). Learn where you can find your API Key and Client ID on JetPrint here.
- Click Save Settings at the bottom of the page.
▶ How does integration with Digital on Demand work on Shopify
When working with Digital on Demand and Customily, Customily will share your
order information directly with Digital on Demand via API. This means that for
every order you receive of a product that has Customily, we will share with
Digital on Demand the order information (customer details, products in the order, etc.) with the unique print file needed to fulfill that
personalization.
The whole product-to-order cycle is:
- Your customer places an order in your store.
Click on any item to learn more about it.
Publish your product in Customily using a Digital on Demand product as a
base
By going to start, and choosing to Publish a New product, you can select
Digital on Demand as your POD and then pick a product to use. You can see more details on how to publish a product from a POD here.
**Products published via Customily will be created with the following
settings** :
- Vendor: Products will have Digital on Demand as the vendor. If you rather have your store appear as the vendor, you can change this on your product settings on Shopify.
- SKU: Products will be assigned an automatic SKU on Shopify. You can change this SKU whenever you want, as it won't affect the connection of the product with Digital on Demand or order tracking.
- Location: The location of your product will be set to Customily. You can check this by going to your Shopify product and opening the product variants to see their stock information.
_This setting is required for order tracking to work properly. Customily does
not fulfill or hold any products in this location—your POD provider will still
handle fulfillment and shipping. The Customily location exists so that we can
update your orders with tracking information when Digital on Demand starts
shipping._
Important
Remember to add your Digital on Demand API Key for orders to run smoothly to
your account. You can learn how to connect your Digital on Demand account to Customily here.
Seeing the order on your store
After a customer makes a purchase you'll see their order on your store's
Dashboard instantly. There you will have all the customer's and product's
information, including the personalization and the print file. Keep in mind
print files take some time to be generated (approx 30').
Important
If you have your Shopify configured to fulfill orders automatically, your order might appear as
rejected by Digital on Demand at first. This is because we send orders to
Digital on Demand once the print file is ready, and this can take around 30
minutes, so at first Digital on Demand won't find any order. But not to worry,
once the print file is ready, and the order is created on Digital on Demand,
the fulfillment status will update automatically to accepted.
If you have your Shopify configured to fulfill orders manually, then you
should wait until the print file is ready to request fulfillment, otherwise it
will be rejected at first.
Seeing the order on Digital on Demand
Orders are sent to Digital on Demand **when the print file is complete in
Customily**. This normally takes around 30 minutes. They are created with the
same order number from Shopify, with all the customer's information, product
information, and the print file necessary to fulfill the order.
Confirm the order on Digital on Demand
Orders in Digital on Demand will always be created as draft orders. This
means you have to confirm each order to send it to production.
Fulfillment and tracking
Once you confirm the order, Digital on Demand will start working on it. You'll
see fulfillment updates on Digital on Demand, as you would with any ordinary
Digital on Demand order.
When the order is fulfilled and shipping begins, you will see the tracking
information on Digital on Demand. This update will be automatically sent to
your Shopify Order, together with the tracking information, so your customer
can be aware that their order is being shipped and can track its progress.
Orders on Shopify will be marked as fulfilled , and the tracking number
for the shipment will be added to them.
▶ Integrating Digital on Demand for Shopify or WooCommerce
To use Digital on Demand with Customily for Shopify or WooCommerce, the first
thing you need to do is to create an account on Digital on Demand. If you
don't have an account with Digital on Demand, you can create one here.
Once you have your Digital on Demand account created, open your Customily app
on Shopify and follow these steps.
- Head on to Start or Store on the left menu
- Go to Settings and open the Integrations tab.
- If you have more than one store on your account, make sure you are changing the setting of the correct store by selecting it from the top left dropdown.
- Select Digital on Demand from the Select a provider for integration dropdown
- Click enable integration
- Paste your Digital on Demand API Key and API Signature (also known as Client ID). Learn where you can find your API Key and Client ID on Digital on Demand here.
- Click Save Settings at the bottom of the page.
▶ Integrating Digital on Demand for Etsy
To use Digital on Demand with Customily for Etsy, the first thing you need to
do is to create an account on Digital on Demand. If you don't have an account
with Digital on Demand, you can create one here.
Once you have a Digital on Demand account, you will need to add them as a
Production Partner on your Etsy shop. Etsy requires stores to disclaim who is
fulfilling the products for them. So for Customily to be able to send the
orders from Etsy to Digital on Demand we need this information to be added to
your Etsy account.
Follow these steps to add Digital on Demand as a production partner on your
Etsy.
- Sign in to your Etsy account.
- Go to your Shop Manager , and choose Settings.
- Select **Production partners**.
- Select Add a new production Partner and fill out the following information:
- \- Production partner: Digital on Demand
- \- Location : Danvers, MA
- \- About your partnership: You can simply put "A production partner", or fill in a short description of why you like to work with them if you're feeling inspired.
- \- Production partner: select the following statements
"I don't have the technical ability to make it entirely by myself"
"I design everything myself"
"They do everything for me"
- Once done, you can click Show Preview to see how it will appear in your store.
- Click Save Partner and you are done!
Important
If you were already working with Digital on Demand on your Etsy store, you
might have the Production Partner for them already created. **You must check
that you are using the same names as we provided in the steps above** ,
otherwise, Customily won't recognize them.
Once you have Digital on Demand added as your Production Partner, open your
Customily app on Shopify and follow these steps.
- Head on to Start or Store on the left menu
- Go to Settings and open the Integrations tab.
- If you have more than one store on your account, make sure you are changing the setting of the correct store by selecting it from the top left dropdown.
- Select Digital on Demand from the Select a provider for integration dropdown
- Click enable integration
- Paste your Digital on Demand API Key, and your API Signature (also known as Client ID). Learn where you can find your API Key and Client ID on Digital on Demand here.
- Click Save Settings at the bottom of the page.
▶ Where can I find my Digital on Demand API Key
- Use the sign up form to register with Digital on Demand here. Make sure your information is correct, as Digital on Demand will use this to create your account with them.
- Digital on Demand will reach out to you via Email with your API information. Make sure you check your promotions or spam folder.
- Copy the values share by the Digital on Demand team to use them in Customily.
▶ Integrating ShineOn for Shopify or WooCommerce
To use ShineOn with Customily for Shopify or WooCommerce, the first thing you
need to do is to create an account on ShineOn. If you don't have an account
with ShineOn, you can create one here.
Once you have your ShineOn account created, open your Customily app on Shopify
and follow these steps.
- Head on to Start or Store on the left menu
- Go to Settings and open the Integrations tab.
- If you have more than one store on your account, make sure you are changing the setting of the correct store by selecting it from the top left dropdown.
- Select ShineOn from the Select a provider for integration dropdown
- Click enable integration
- Paste your ShineOn API Key (also known as Customer Identifier). Learn where you can find your API Key on ShineOn here.
- Click Save Settings at the bottom of the page.
▶ Integrating ShineOn for Etsy
To use ShineOn with Customily for Etsy, the first thing you need to do is to
create an account on ShineOn. If you don't have an account with ShineOn, you can create one here.
Once you have a ShineOn account, you will need to add them as a Production
Partner on your Etsy shop. Etsy requires stores to disclaim who is fulfilling
the products for them. So for Customily to be able to send the orders from
Etsy to ShineOn we need this information to be added to your Etsy account.
Follow these steps to add ShineOn as a production partner on your Etsy.
- Sign in to your Etsy account.
- Go to your Shop Manager , and choose Settings.
- Select **Production partners**.
- Select Add a new production Partner and fill out the following information:
- \- Production partner: ShineOn
- \- Location : FL, United States
- \- About your partnership: You can simply put "A production partner", or fill in a short description of why you like to work with them if you're feeling inspired.
- \- Production partner: select the following statements
"I don't have the technical ability to make it entirely by myself"
"I design everything myself"
"They do everything for me"
- Once done, you can click Show Preview to see how it will appear in your store.
- Click Save Partner and you are done!
Important
If you were already working with ShineOn on your Etsy store, you might have
the Production Partner for them already created. **You must check that you are
using the same names as we provided in the steps above** , otherwise,
Customily won't recognize them.
Once you have ShineOn added as your Production Partner, open your Customily
app on Shopify and follow these steps.
- Head on to Start or Store on the left menu
- Go to Settings and open the Integrations tab.
- If you have more than one store on your account, make sure you are changing the setting of the correct store by selecting it from the top left dropdown.
- Select ShineOn from the Select a provider for integration dropdown
- Click enable integration
- Paste your ShineOn API Key (also known as Customer Identifier). Learn where you can find your API Key on ShineOn here.
- Click Save Settings at the bottom of the page.
▶ Where can I find my ShineOn API Key
- On the left menu, under Manage, click to +Add your store
- Select Connect under Partner ETSY / API / CSV
- Once your store is created, go to API Configuration on the left menu
- Generate your API Key and copy the value to use it in Customily API Key field
▶ How does integration with ShineOn work
When working with ShineOn and Customily, Customily will share your order
information directly with ShineOn via API. This means that for every order you
receive of a product that has Customily, we will share with ShineOn the order
information (customer details, products in the order, etc.) with the unique
print file needed to fulfill that personalization.
The whole product-to-order cycle is:
- Your customer places an order in your store.
Click on any item to learn more about it.
Publish your product in Customily using a ShineOn product as a base
By going to start, and choosing to Publish a New product, you can select
ShineOnas your POD and then pick a product to use. You can see more details on how to publish a product from a POD here.
**Products published via Customily will be created with the following
settings** :
- Vendor: Products will have ShineOn as the vendor. If you rather have your store appear as the vendor, you can change this on your product settings on Shopify.
- SKU: Products will be assigned an automatic SKU on Shopify. You can change this SKU whenever you want, as it won't affect the connection of the product with ShineOn or order tracking.
- Location: The location of your product will be set to Customily. You can check this by going to your Shopify product and opening the product variants to see their stock information.
_This setting is required for order tracking to work properly. Customily does
not fulfill or hold any products in this location—your POD provider will still
handle fulfillment and shipping. The Customily location exists so that we can
update your orders with tracking information when ShineOn starts shipping._
Important
Remember to add your ShineOn API Key for orders to run smoothly to your
account. You can learn how to connect your ShineOn account to Customily here.
Seeing the order on your store
After a customer makes a purchase you'll see their order on your store's
Dashboard instantly. There you will have all the customer's and product's
information, including the personalization and the print file. Keep in mind
print files take some time to be generated (approx 30').
Important
If you have your Shopify configured to fulfill orders automatically, your order might appear as
rejected by ShineOn at first. This is because we send orders to ShineOn
once the print file is ready, and this can take around 30 minutes, so at first
ShineOn won't find any order. But not to worry, once the print file is ready,
and the order is created on ShineOn, the **fulfillment status will update
automatically to accepted**.
If you have your Shopify configured to fulfill orders manually, then you
should wait until the print file is ready to request fulfillment, otherwise it
will be rejected at first.
Seeing the order on ShineOn
Orders are sent to ShineOn when the print file is complete in Customily.
This normally takes around 30 minutes. They are created with the same order
number from Shopify, with all the customer's information, product information,
and the print file necessary to fulfill the order.
Confirm the order on ShineOn
Orders in ShineOn will always be created as draft orders. This means **you
have to manually confirm each order to send it to production.**
Fulfillment and tracking
Once you confirm the order, ShineOn will start working on it. You'll see
fulfillment updates on ShineOn, as you would with any ordinary ShineOn order.
When the order is fulfilled and shipping begins, you will see the tracking
information on ShineOn. This update will be automatically sent to your Shopify
Order, together with the tracking information, so your customer can be aware
that their order is being shipped and can track its progress.
Orders on Shopify will be marked as fulfilled , and the tracking number
for the shipment will be added to them.
▶ How does integration with Merchize work on Shopify
When working with Merchize and Customily, Customily will share your order
information directly with Merchize via API. This means that for every order
you receive of a product that has Customily, we will share with Merchize the
order information (customer details, products in the order, etc.) with the
unique print file needed to fulfill that personalization.
The whole product-to-order cycle is:
- Publish your product in Customily using a Merchize product as a base.
- Your customer places an order in your store.
Click on any item to learn more about it.
Publish your product in Customily using a Merchize product as a base
By going to start, and choosing to Publish a New product, you can select
Merchize as your POD and then pick a product to use. You can see more details on how to publish a product from a POD here.
**Products published via Customily will be created with the following
settings** :
- Vendor: Products will have Merchize as the vendor. If you rather have your store appear as the vendor, you can change this on your product settings on Shopify.
- SKU: Products will be assigned an automatic SKU on Shopify. You can change this SKU whenever you want, as it won't affect the connection of the product with Merchize or order tracking.
- Location: The location of your product will be set to Customily. You can check this by going to your Shopify product and opening the product variants to see their stock information.
_This setting is required for order tracking to work properly. Customily does
not fulfill or hold any products in this location—your POD provider will still
handle fulfillment and shipping. The Customily location exists so that we can
update your orders with tracking information when Merchize starts shipping._
Important
Remember to add your Merchize API Key for orders to run smoothly to your
account. You can learn how to connect your Merchize account to Customily here.
Seeing the order on your store
After a customer makes a purchase you'll see their order on your store's
Dashboard instantly. There you will have all the customer's and product's
information, including the personalization and the print file. Keep in mind
print files take some time to be generated (approx 30').
Important
If you have your Shopify configured to fulfill orders automatically, your order might appear as
rejected by Merchize at first. This is because we send orders to Merchize
once the print file is ready, and this can take around 30 minutes, so at first
Merchize won't find any order. But not to worry, once the print file is ready,
and the order is created on Merchize, the **fulfillment status will update
automatically to accepted**.
If you have your Shopify configured to fulfill orders manually, then you
should wait until the print file is ready to request fulfillment, otherwise it
will be rejected at first.
Seeing the order on Merchize
Orders are sent to Merchize when the print file is complete in Customily.
This normally takes around 30 minutes. They are created with the same order
number from Shopify, with all the customer's information, product information,
and the print file necessary to fulfill the order.
Confirm the order on Merchize
Orders in Merchize will always be created as draft orders. This means
you have to confirm each order to send it to production.
Fulfillment and tracking
Once you confirm the order, Merchize will start working on it. You'll see
fulfillment updates on Merchize, as you would with any ordinary Merchize
order.
Important
To make sure order tracking is properly synced, you need to add Customily's
webhook on your Merchize account. You can learn how to do that here.
When the order is fulfilled and shipping begins, you will see the tracking
information on Merchize. This update will be automatically sent to your
Shopify Order, together with the tracking information, so your customer can be
aware that their order is being shipped and can track its progress.
Orders on Shopify will be marked as fulfilled , and the tracking number
for the shipment will be added to them.
▶ Integrating Merchize for Shopify or WooCommerce
To use Merchize with Customily for Shopify or WooCommerce, the first thing you
need to do is to create an account on Merchize. If you don't have an account
with Merchize, you can create one here.
Once you have your Merchize account created, open your Customily app on
Shopify and follow these steps.
- Head on to Start or Store on the left menu
- Go to Settings and open the Integrations tab.
- If you have more than one store on your account, make sure you are changing the setting of the correct store by selecting it from the top left dropdown.
- Select Merchize from the Select a provider for integration dropdown
- Click enable integration
- Paste your Merchize API Key (also known as Access Token) and API Signature (also known as Base URL). Learn where you can find your Access Token and Base URL on Merchize here.
- Click Save Settings at the bottom of the page.
- To make sure order tracking is properly synched, you will need to add Customily's webhook to your Merchize account settings. To do that, open your Merchize account, go to "Integrations " on the left menu and click API. Scroll down to the webhook section, click Add webhook.
- Paste the following URL on the Webhook Endpoint
<https://sh.customily.com/provider/hooks/orderShipped?provider=merchize>
And select the event: Order changed tracking
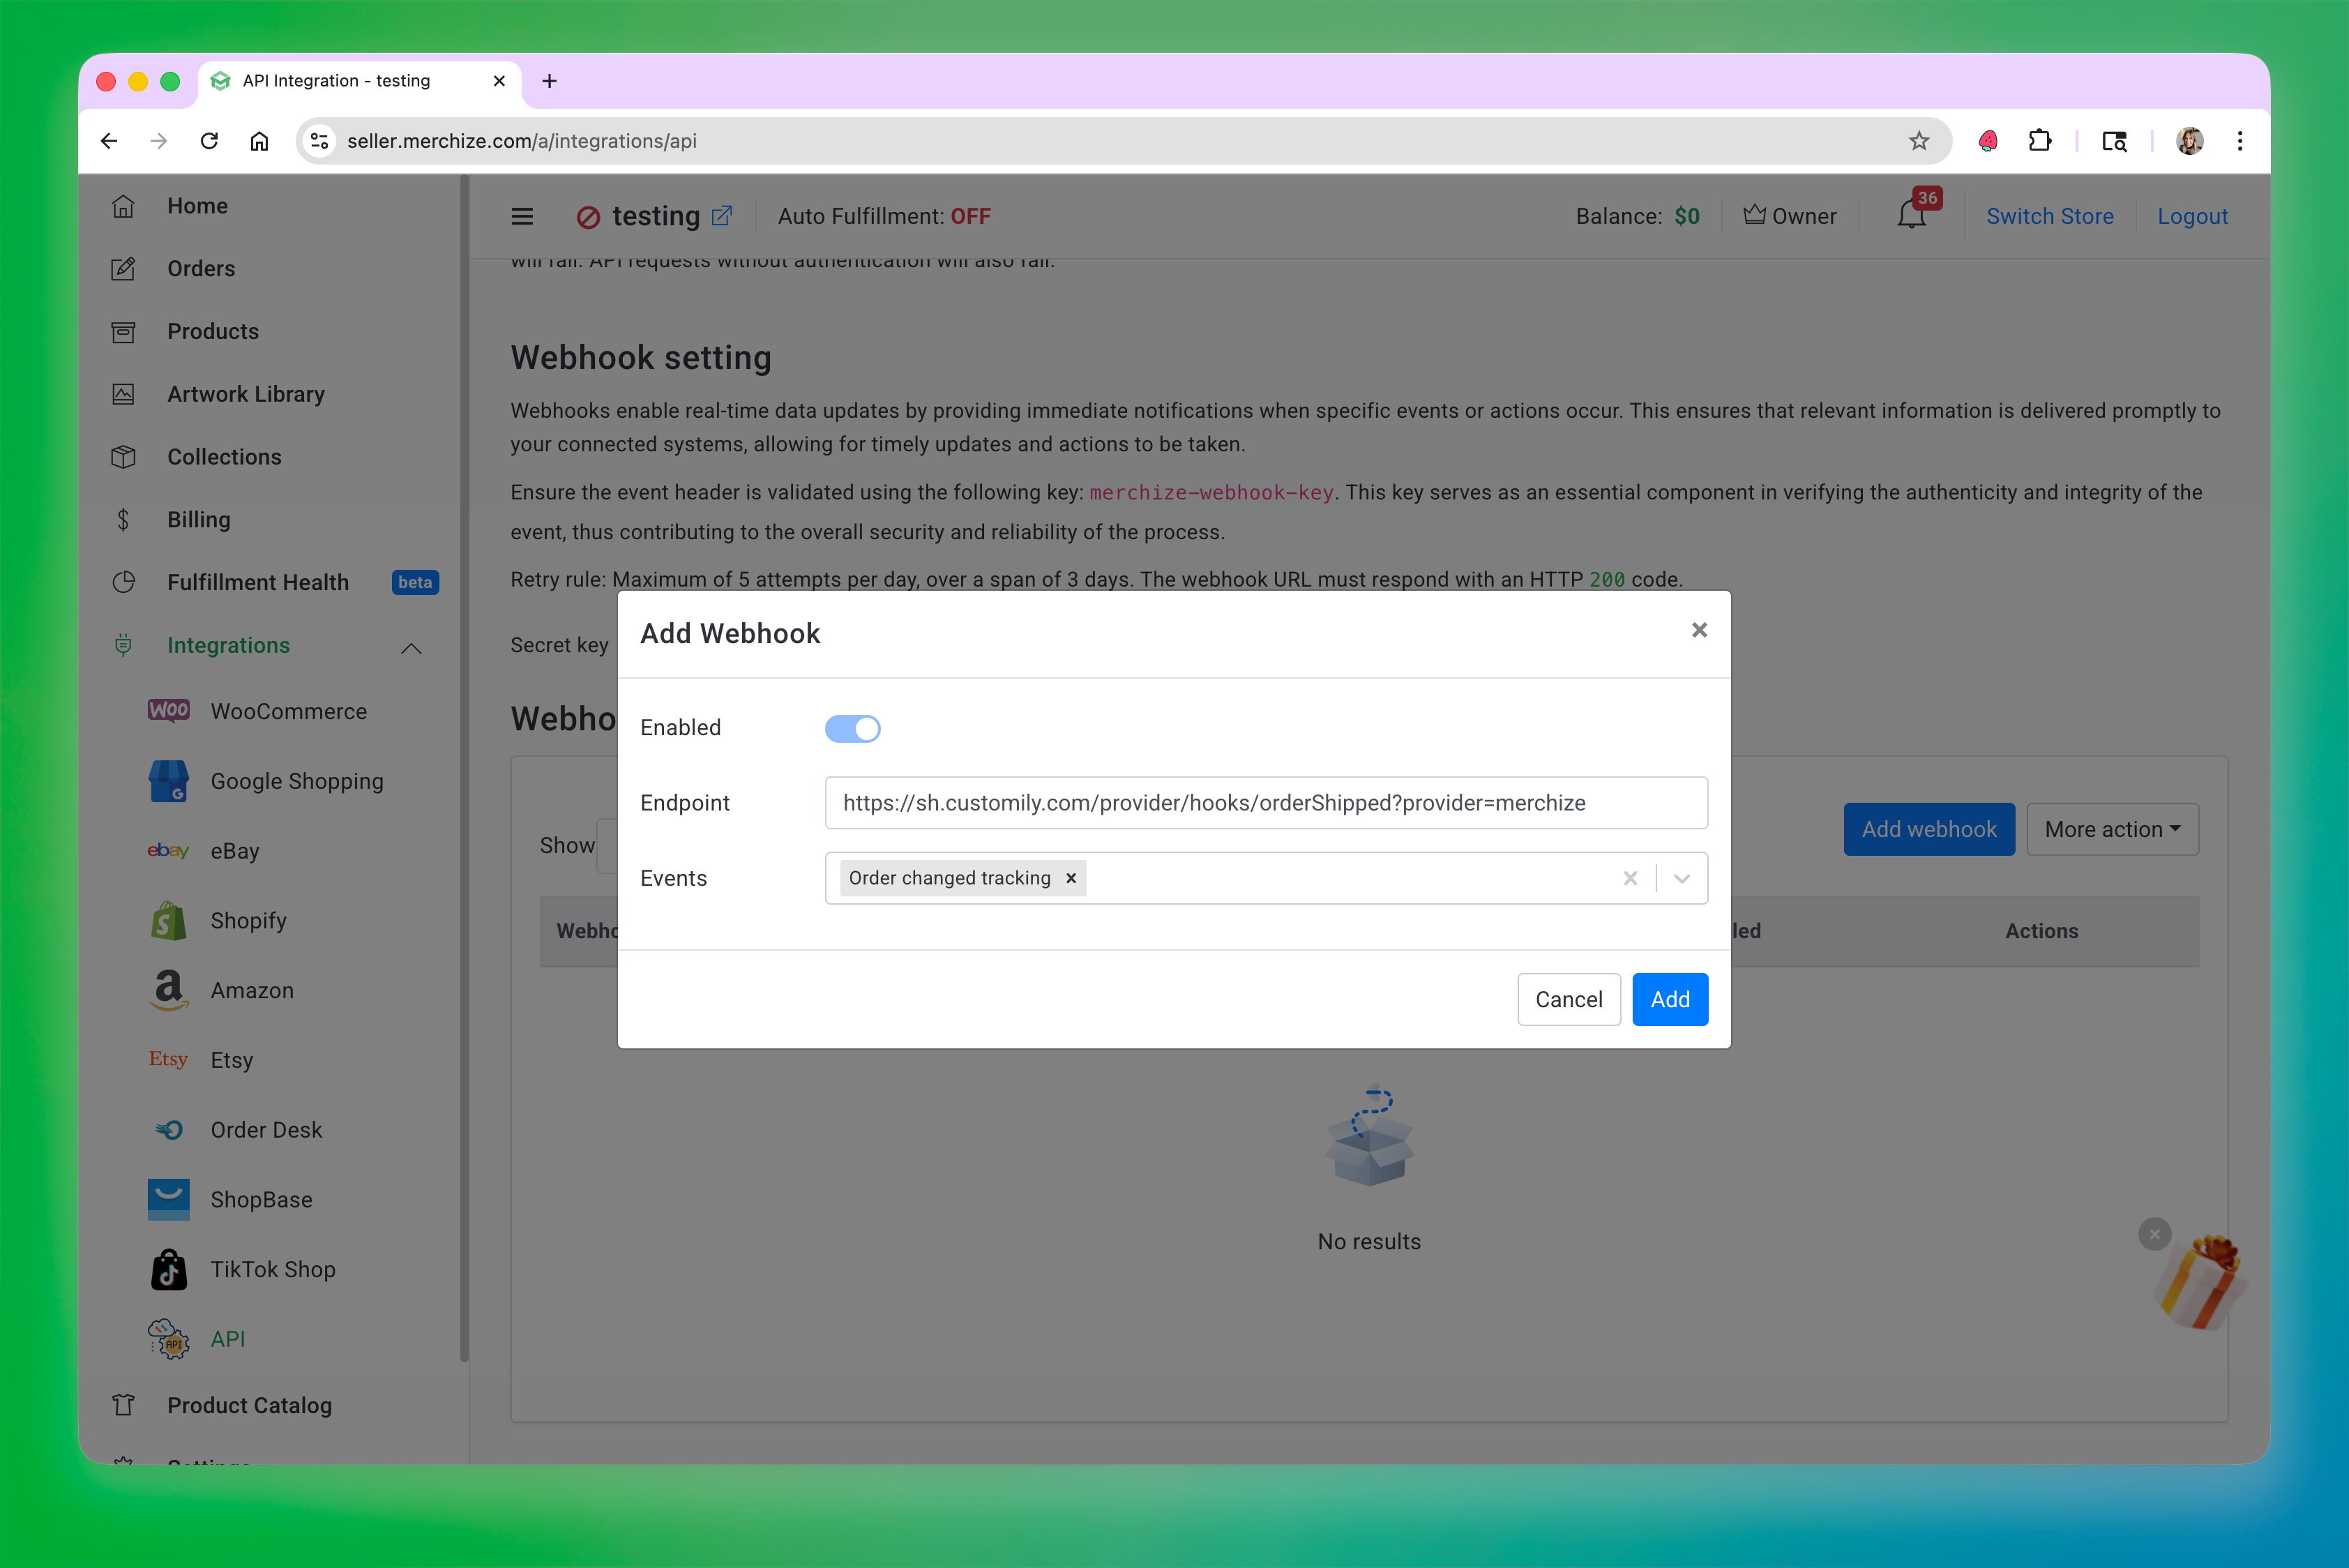Webhook added.png**
ClickAdd to save the webhook.
▶ Integrating Merchize for Etsy
To use Merchize with Customily for Etsy, the first thing you need to do is to
create an account on Merchize. If you don't have an account with Merchize,
Once you have a Merchize account, you will need to add them as a Production
Partner on your Etsy shop. Etsy requires stores to disclaim who is fulfilling
the products for them. So for Customily to be able to send the orders from
Etsy to Merchize we need this information to be added to your Etsy account.
Follow these steps to add Merchize as a production partner on your Etsy.
- Sign in to your Etsy account.
- Go to your Shop Manager , and choose Settings.
- Select **Production partners**.
- Select Add a new production Partner and fill out the following information:
- \- Production partner: Merchize
- \- Location : Select the location that aligns with the facility fulfilling your orders (e.g., US, EU, UK, Vietnam)
- \- About your partnership: You can simply put "A production partner", or fill in a short description of why you like to work with them if you're feeling inspired.
- \- Production partner: select the following statements
"I don't have the technical ability to make it entirely by myself"
"I design everything myself"
"They do everything for me"
- Once done, you can click Show Preview to see how it will appear in your store.
- Click Save Partner and you are done!
Important
If you were already working with Merchize on your Etsy store, you might have
the Production Partner for them already created. **You must check that you are
using the same names as we provided in the steps above** , otherwise,
Customily won't recognize them.
Once you have Merchize added as your Production Partner, open your Customily
app on Shopify and follow these steps.
- Head on to Start or Store on the left menu
- Go to Settings and open the Integrations tab.
- If you have more than one store on your account, make sure you are changing the setting of the correct store by selecting it from the top left dropdown.
- Select Merchize from the Select a provider for integration dropdown
- Click enable integration
- Paste your Merchize API Key (also known as Access Token) and API Signature (also known as Base URL). Learn where you can find your Access Token and Base URL on Merchize here.
- Click Save Settings at the bottom of the page.
- To make sure order tracking is properly synched, you will need to add Customily's webhook to your Merchize account settings. To do that, open your Merchize account, go to "Integrations " on the left menu and click API. Scroll down to the webhook section, click Add webhook.
- Paste the following URL on the Webhook Endpoint
<https://sh.customily.com/provider/hooks/orderShipped?provider=merchize>
And select the event: Order changed tracking
Webhook added.png**
ClickAdd to save the webhook.
▶ Where can I find my Merchize API Key
- Login to your Merchize account, or register with them here if you don't have an account yet.
- Go to "Integrations " on the left menu and click API.
- Find your default store, and copy the access token, this will be used in the API Key input in Customily.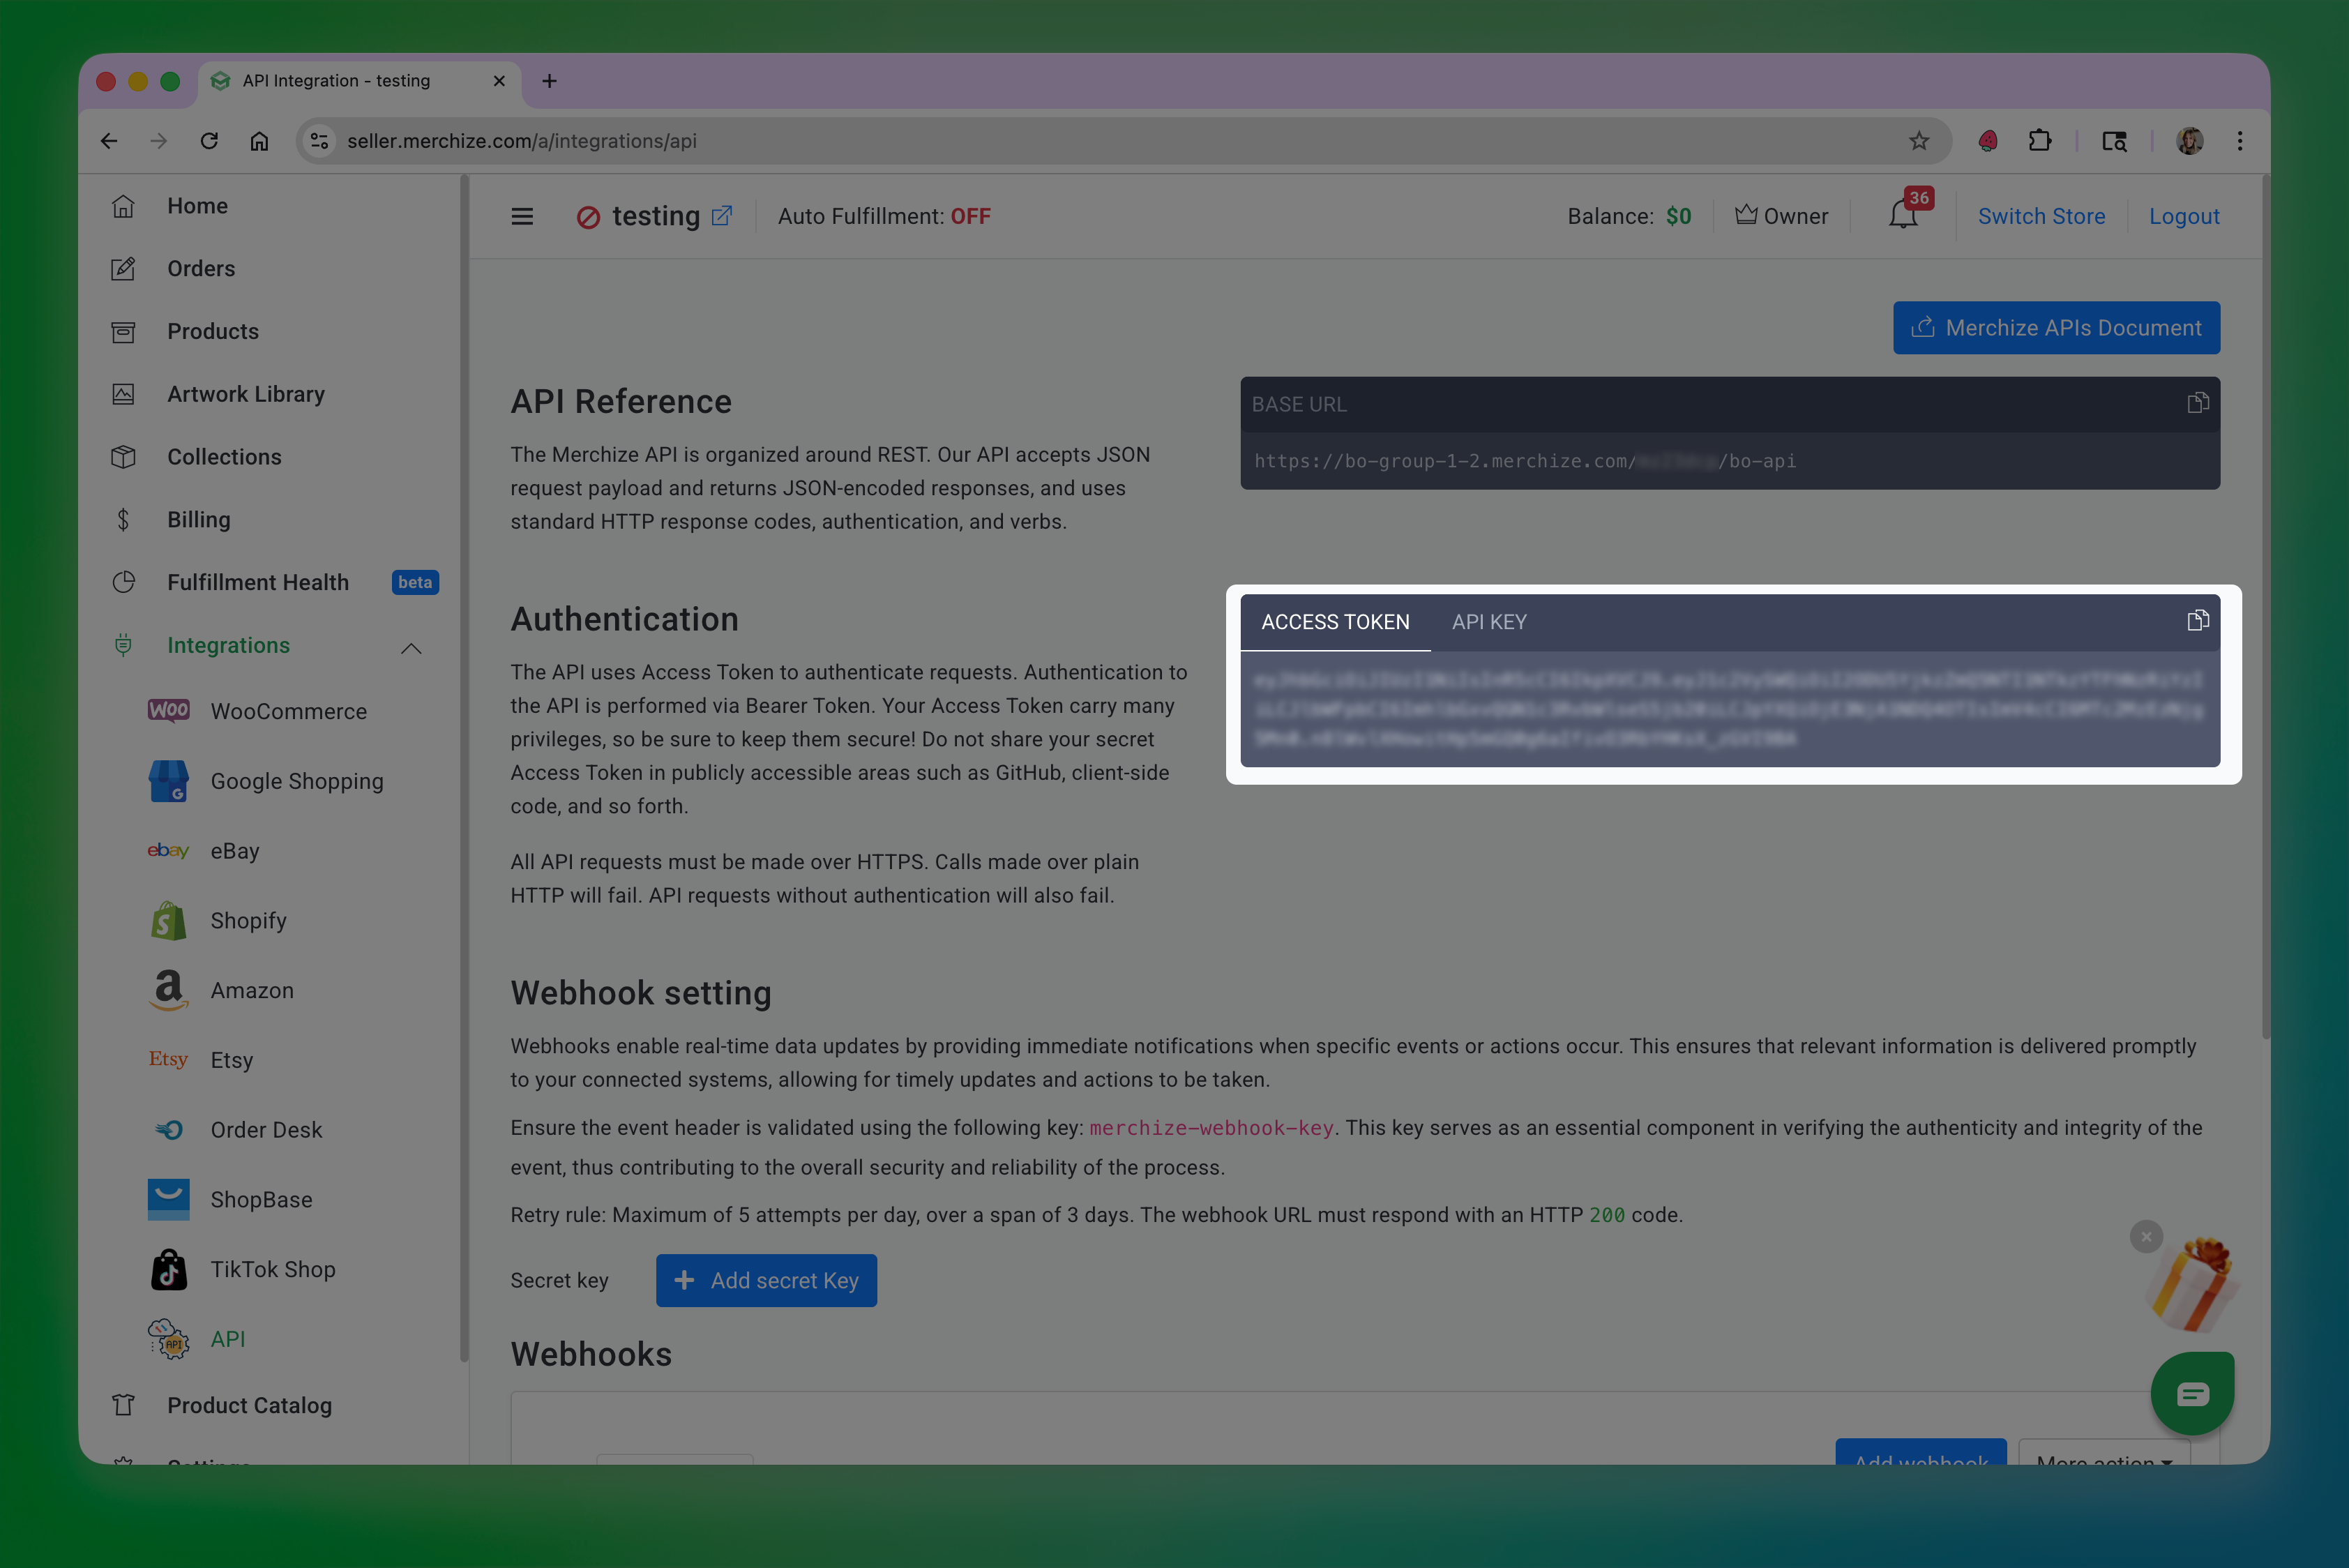access token.png**
- Find your Base URL section,and copy the 7 character string on the URL right before /bo-api. This will be used in the API Signature input in Customily.
- If you havent already, make sure you add Customily's webook to your stores configuration in Merchize. To do that, scroll down to the webhook section, click Add webhook.
- Paste the following URL on the Webhook Endpoint
<https://sh.customily.com/provider/hooks/orderShipped?provider=merchize>
And select the event: Order changed tracking
Webhook added.png**
Click Add to save the webhook.
- 作者:EcomGrace
- 链接:https://www.ecomgrace.com/article/2d935142-581f-8109-a296-f2bf741a8625
- 声明:本文采用 CC BY-NC-SA 4.0 许可协议,转载请注明出处。