
type
status
date
slug
summary
tags
category
icon
password
📚 🛍️ Store
本页汇总了 🛍️ Store 相关的常见问题(共 35 个)
▶ Linking Customily with Printful for Shopify
Link your Customily App with Printful
to send the personalized production file to
Printful directly so they can fulfill
the order.
📝 Note:
To link your Customily App with Printful, you will need a **Printful account** previously linked to your
Shopify Store. Learn how to connect your Printful account with Shopify
here.
To link your Customily App with your Printful account
- From your Customily Admin, select Store on the left toolbar.
- Select Settings on the center top options.
- Choose the Integrations tab.
- Click to Enable the Printful Integration.
- You will have to enter a Printful API Key. Learn how to get your
Printful API Key here.
- Click Save Settings.
▶ Linking Customily with Printify for Shopify
Link your Customily App with Printify to
send the personalized production file to Printify directly so they can fulfill
the order.
📝 Note:
To link your Customily App with Printify, you will need to have a **Printify account** linked to your Shopify Store.
Learn how to connect your Printify account with Shopify
here.
To link your Customily App with your Printify account
- From your Customily Admin, select Store on the left toolbar.
- Select Settings on the center top options.
- Choose the Integrations tab.
- Click to Enable the Printify Integration.
- You will have to enter a Printify API Key. Learn how to get your
Printify API Key here.
- Select your Printify Shop from the dropdown menu.
- Click Save settings.
▶ How to find the API key of POD providers
API is a unique key of an account that a provider generates in order to allow
third parties to connect and send orders. You will need to copy and paste the
API key from your POD provider and insert it into your Customily App Settings
to have them integrated.
Printful API Key
- Login to your **Printful**
account, or register with them here if
you don't have an account yet.
- Go to Stores on the left dashboard and verify your online store is
connected to **Printful**.
- If you haven't connected it yet, connect your online store with
📝 Note:
If you're just playing around and don't want to connect Printful with an
online store, you can create a manual order platform / API in order to get
an API Key. Just click on Create, fill in any store name that you want, and
continue!
- Go to Settings / API, choose your store and click on **Go to
Printful Developers**.
- Once you log in to your account click on Create a token.
- Indicate a distant Expiration Date , it supports up to 2 years.
- Select a single store to apply the token and enable all scopes.
- The Access Key to connect with the store that you selected is now
generated. Copy it and paste it on your Customily Settings to complete the
integration.
Learn where to paste your API Key on Customily App
here.
- * *
Printify API Key
- Login to your **Printify** account,
or register with them here if you don't
have an account yet.
- Click on your avatar and then go to Connections
- Then click on Generate to create a new API Key.
- Insert your store's name, make sure "all scopes" is selected, and click on
Generate token.
- The API Key is now generated. Copy to clipboard and paste it on your
Customily Settings to complete the integration. Learn where to paste your API
Key on Customily App here.
- * *
ShineOn API key
- Log into your ShineOn account, or register with them if you don't have an account yet.
- Click on your store and select Connect to a new store.
- Choose the "Selling somewhere else" option.
- Go to the API Configuration page and copy the the API key
- * *
Gelato API key
- Log into your **Gelato** account, or
register with them here if you don't have
an account yet.
- Go to the Developer menu.
- Select the API key section and click on the Add API key button.
- Enter any name for a new API key and click on Create Key.
- * *
CustomCat API key
- Log into your **CustomCat**
account, or register with them here if you don't have an account
yet.
- Click on the My Store menu or Connect Store. Select to create a
new store with Create API Order button.
- Complete the form with your store URL and a name for the API key.
- Go to Settings section and select the store you've just created.
- Open the API tab and copy the API key with Read/Write access.
- * *
Teelaunch API KEY
- Log into your [teelaunch](https://app.teelaunch.com/login) teelaunch **account, or
register with them here if you don't
have an account yet.
- Click on Account, then Settings. Scroll down until your reach the
Developer Settings section and click on Generate Token.
- The API Key is now generated. Copy to clipboard and paste it on your
Customily Settings to complete the integration. Learn where to paste your API
Key on Customily App here.
- * *
merchOne
- Log in to the merchOne account or
register with them here if you
don't have an account yet.
- Go to the Store section and create a new store by clicking _Create_
button under Create your custom store.
▶ Change options styles with CSS
If you want to add advanced styles to change the way options are displayed,
you can do that by adding custom CSS.
To change Customily Options styles through CSS
- Open **store**
- On the top menu go to Settings
- Open theDeveloper settings tab 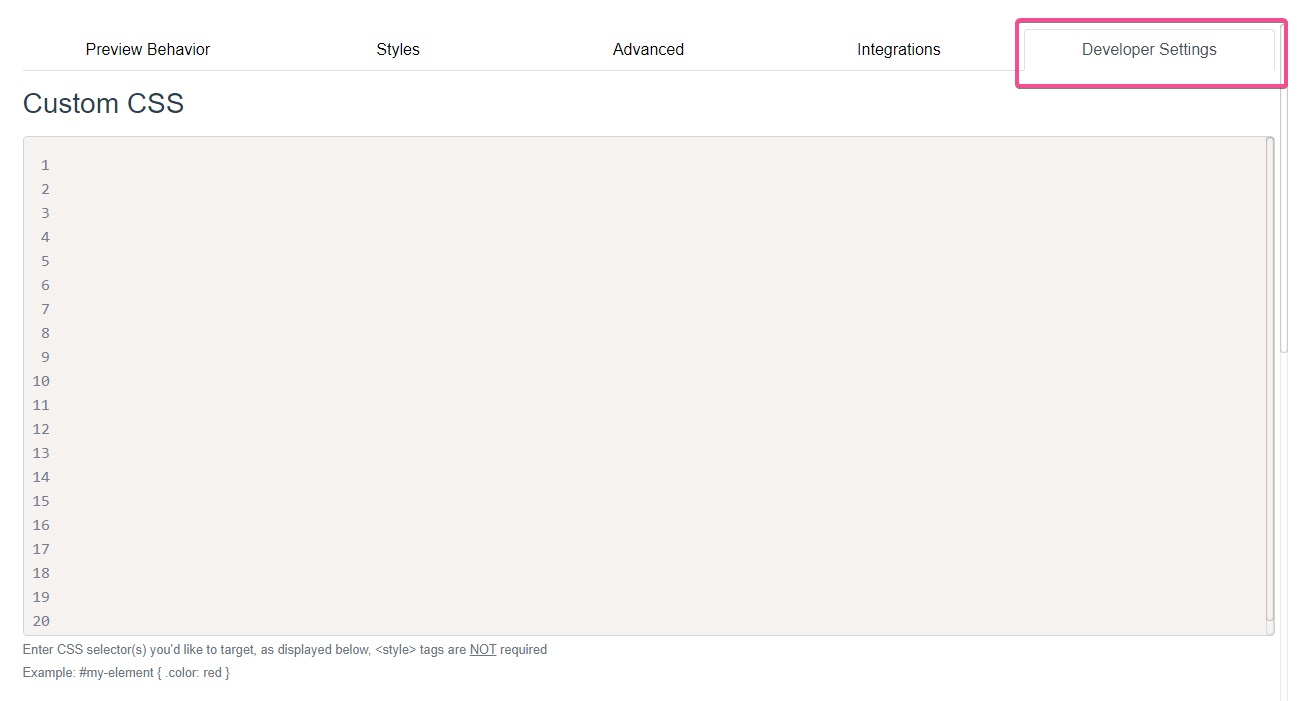
- Type in any custom CSS you would like to add.
Be careful
If you are not familiar with CSS, we recommend you find someone to help you
adjust the styles of your options. Changing styles without knowing how can
result in breaking the layout of your product page.
To change specific Customily Options styles through CSS
To change the style of specific Customily options, you can generate a Custom
CSS class in the Option Set for them.
- Open Customily
- Go to the Store section.
- Open the Option Sets tab.
- Select the option set.
- Expand the option you want to style.
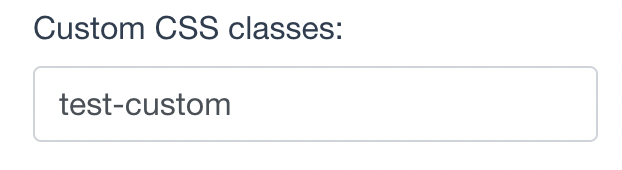
- Add a name for the special class in the Custom CSS classes field. Use
lowercase characters and the hyphen"-" symbol to separate the words. No dot is
required.
- Save the option set.
- Follow the steps above to open the Developer Settings tab and use the
custom CSS class you created to style the option. Depending on the changes you
want to make, you might need to combine this CSS class with the others listed
below.

- Save
📝 Note:
This option isn't available for all platforms.
CSS Classes of Customily Options
Use these class selectors to identify the different type of options and their
elements
Element | Class selectors
---|---
Text Input | #cloptionsapp .customilyoption input
Drodpown | #cloptionsapp .customilyoption select
Swatch | #cloptionsapp .swatch-container .swatch #cloptionsapp .swatch-container label #cl_optionsapp .swatch-container label img
Image upload button | #cl_optionsapp .customily-download-button
Remove uploaded photo button | .cl_remove-image
Option Labels | #cloptionsapp .customilyoption label
Help Text | #cl_optionsapp .help-text
Photo size limit text | .cl_image-invalid-size
Required message | #customily-required-after-label
▶ How to charge extra for the personalizations
You can set an extra price for your personalizations by **linking Customily
options to Shopify products**.
Once a customer chooses that option, the extra product will be added to the
cart, increasing the price of their order.
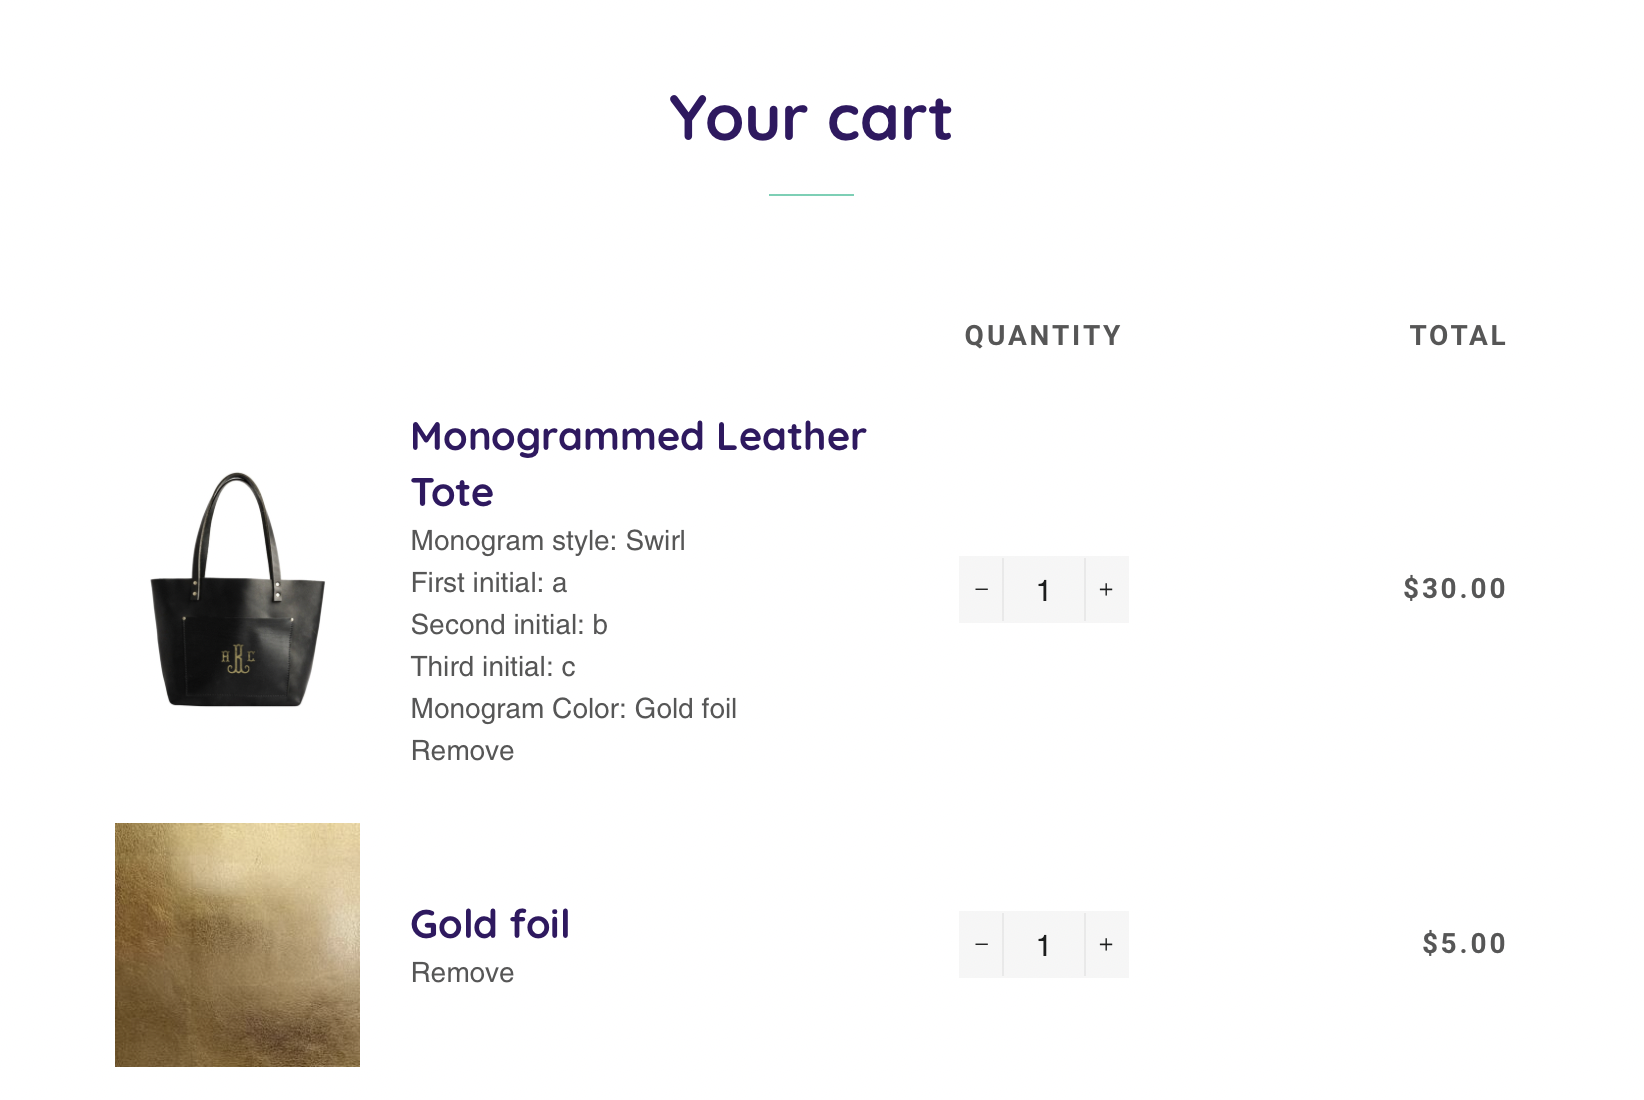
For example, if you offer a monogrammed tote, and want to charge $5 extra if
customers choose to monogram it in gold foil. You will need to create a
Shopify product for the golden foil that costs $5. Then connect that product
to the gold thread option using Customily.
When customers choose to monogram their tote with gold foil, they'll see the
price increase by $5. Then on their cart they'll see the tote, plus the extra
item of $5 for the gold foil.
Learn how to do this in more detail below.
To add pricing to your Customily options
- Start by creating the products in Shopify, for the extra charges you want
to add. In this example we will create a product for the gold foil.
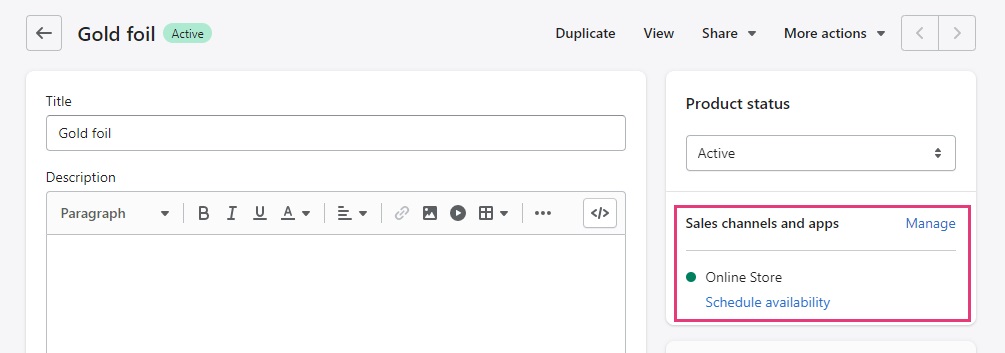
Important
Make sure the product is active, and listed on your sales channels and apps.
If you want to keep the extra product hidden you can do so by creating a
collection for all the hidden products.
- Set the price for the product. This should be only the extra price you
want to charge for that specific option. In this case it will be $5.

Tip
You can also keep track of this product, and add a SKU to it in case you need
to track inventory of the option.
- Once the product is ready, go to Customily and open the option set of the
product you want to work with.
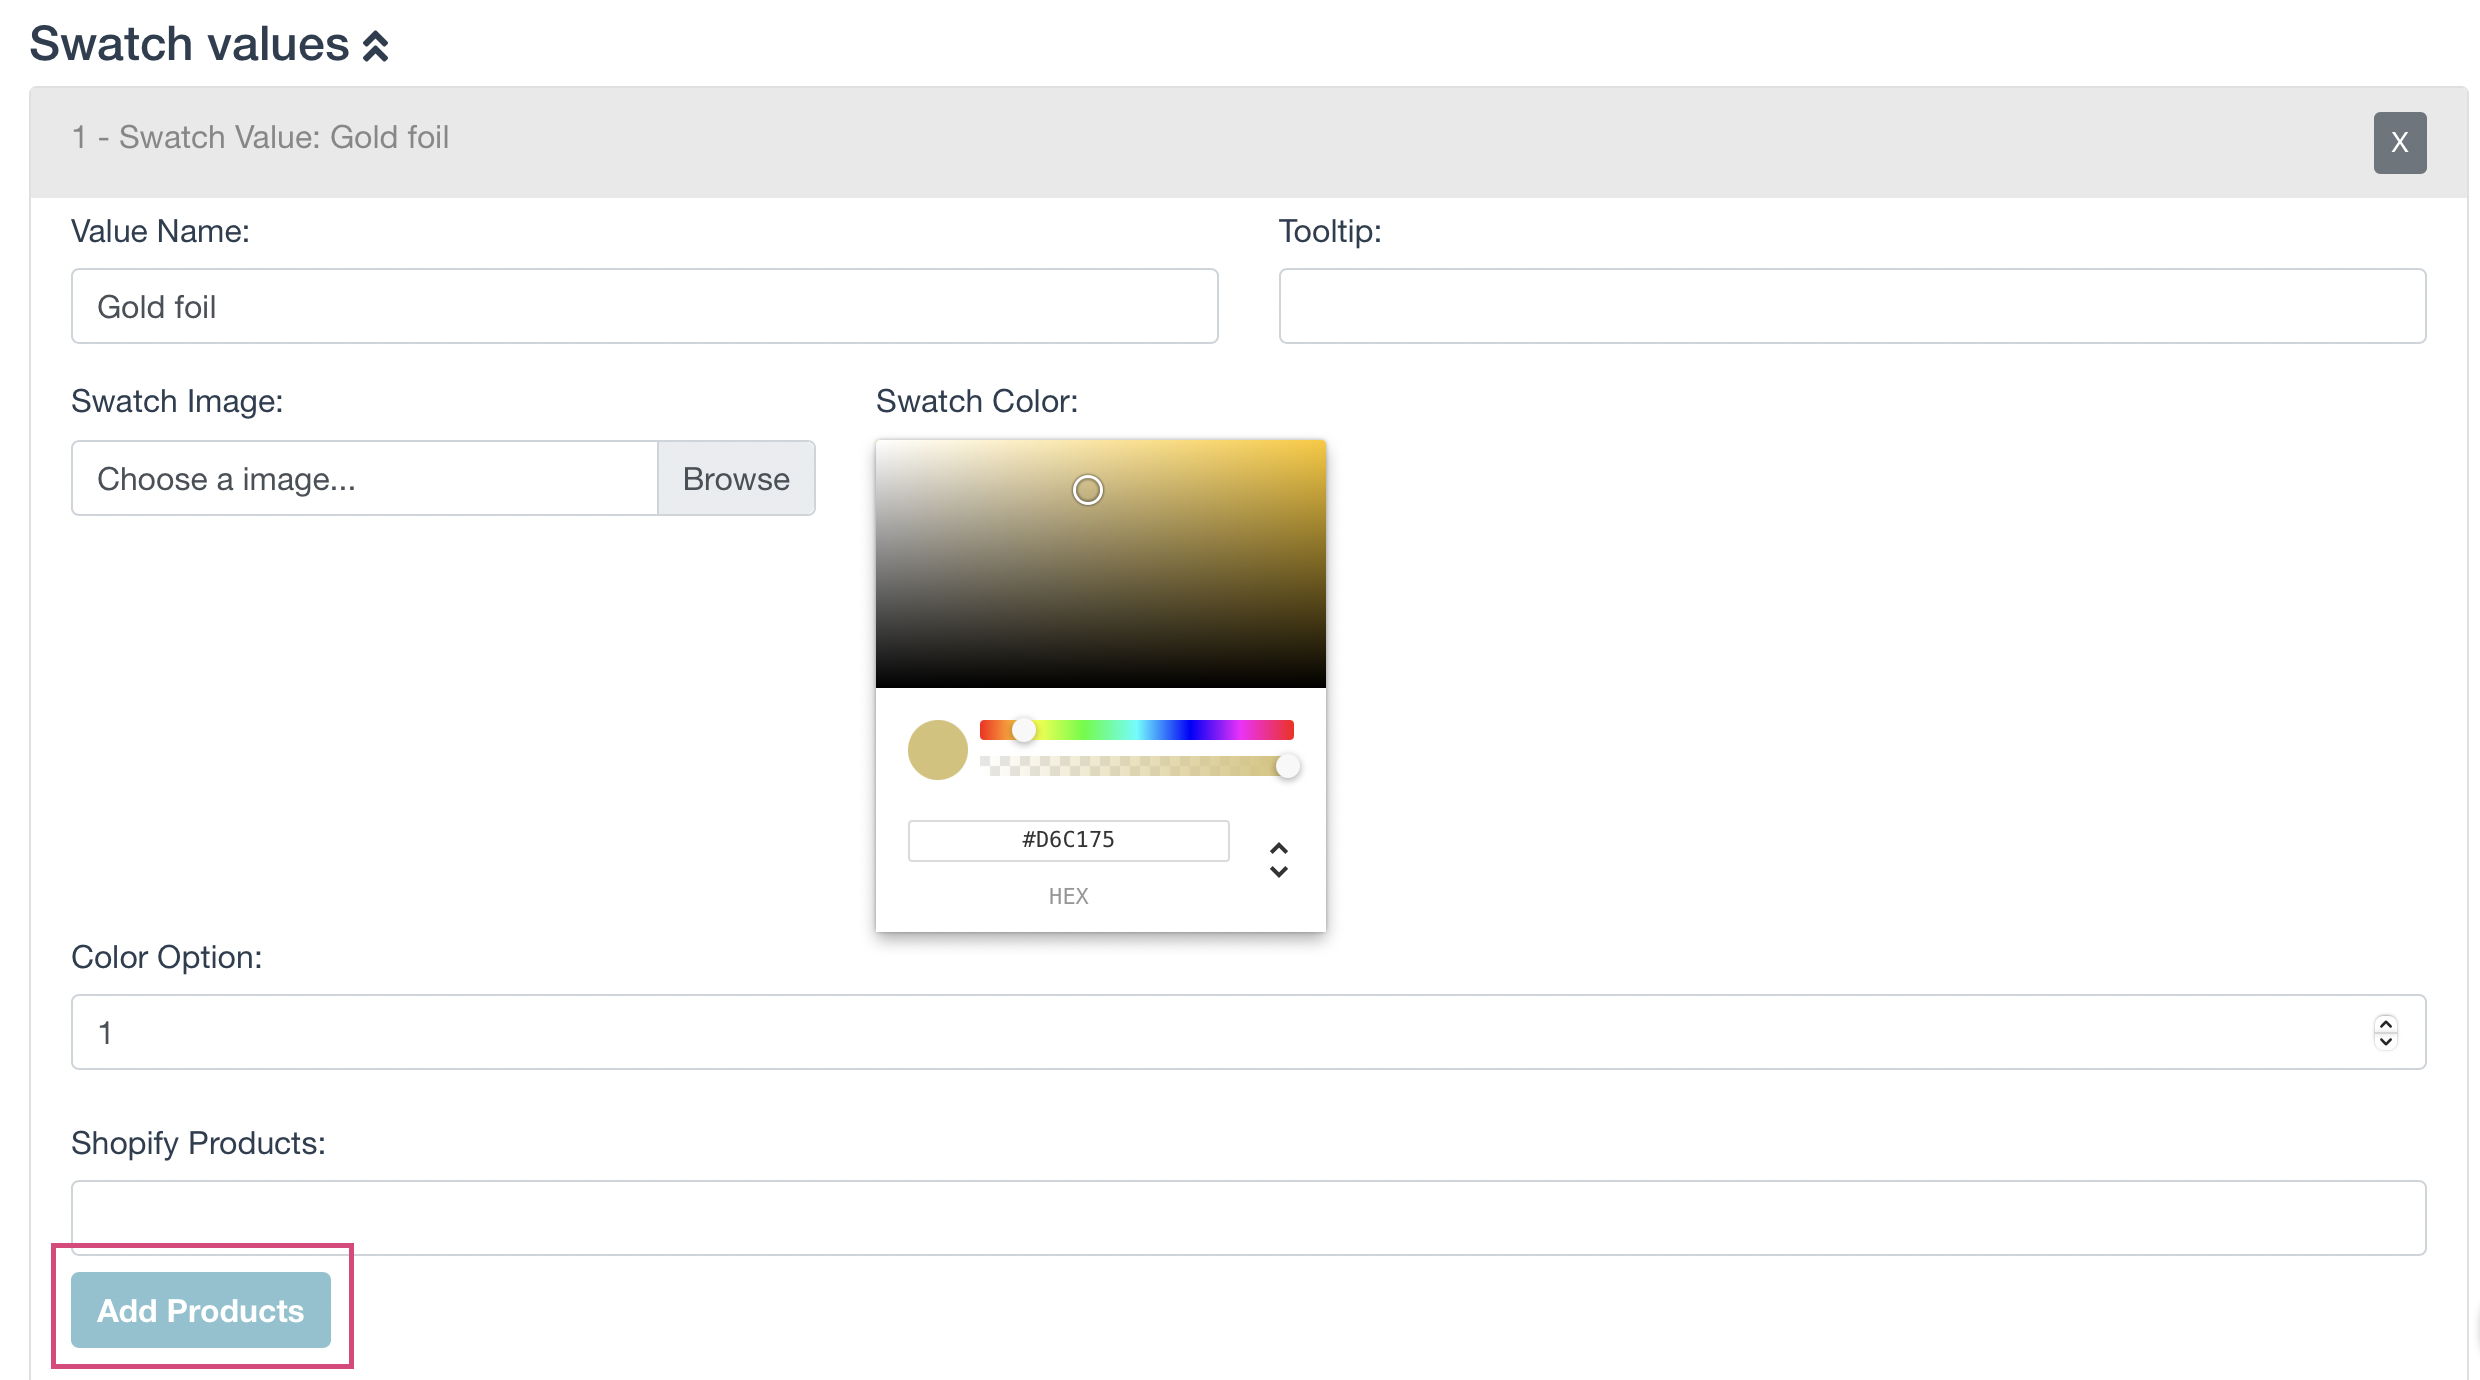
- Find the option you want to affect price, expand it and go to the
functions section.
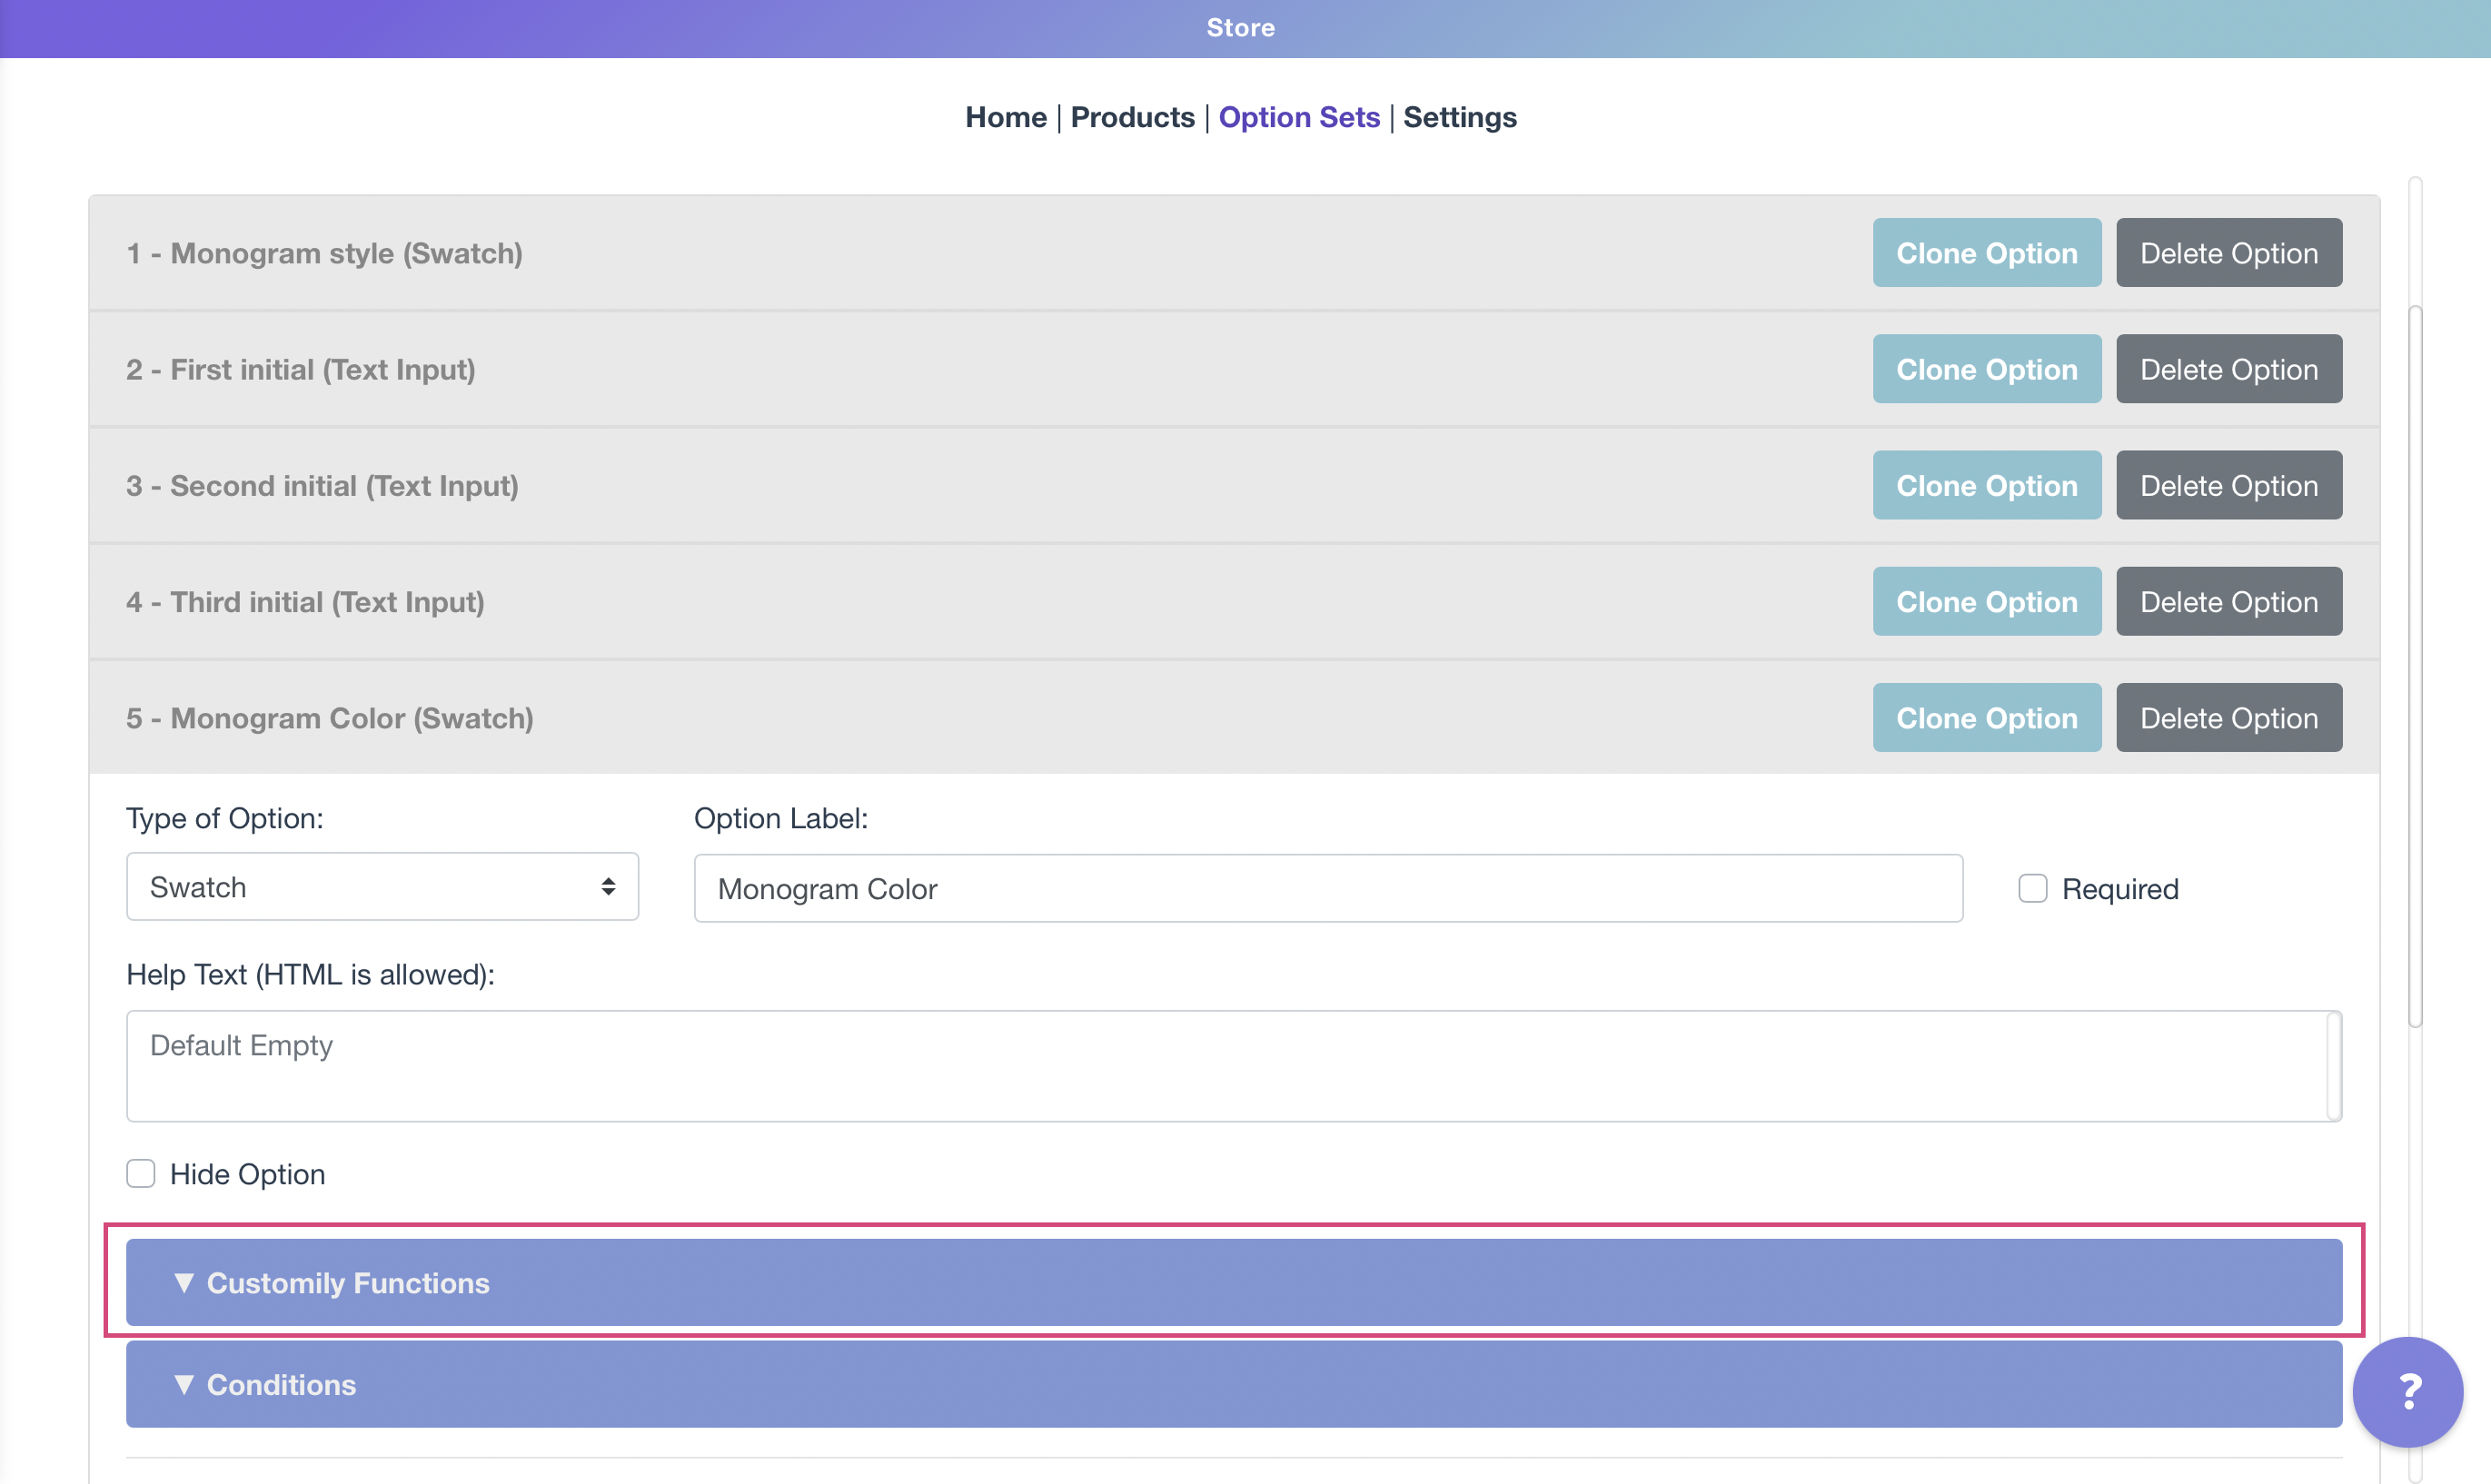
- Click to add a new function and select Add Shopify product

- Then expand the value by clicking on it, and assign the product you want
for that value by clicking Add value.
- Choose the product you created on step 1 for that specific option. In this
case it's the gold foil
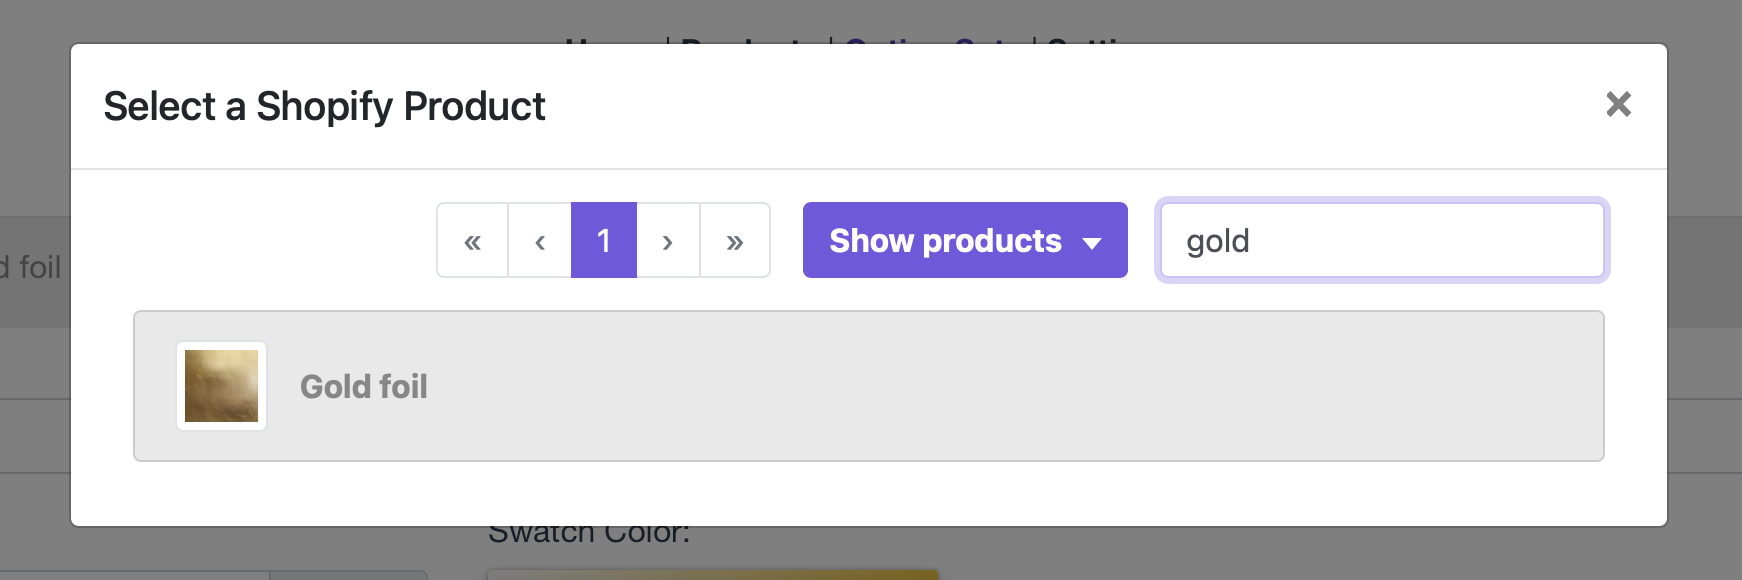
Note
If the product you will be using for the extra price has multiple variants.
Make sure you select the proper variant after choosing the product.
You can also define the quantity you want to add, though in most cases you'll
use one.
- Once the product is added to the option, it will look like this:
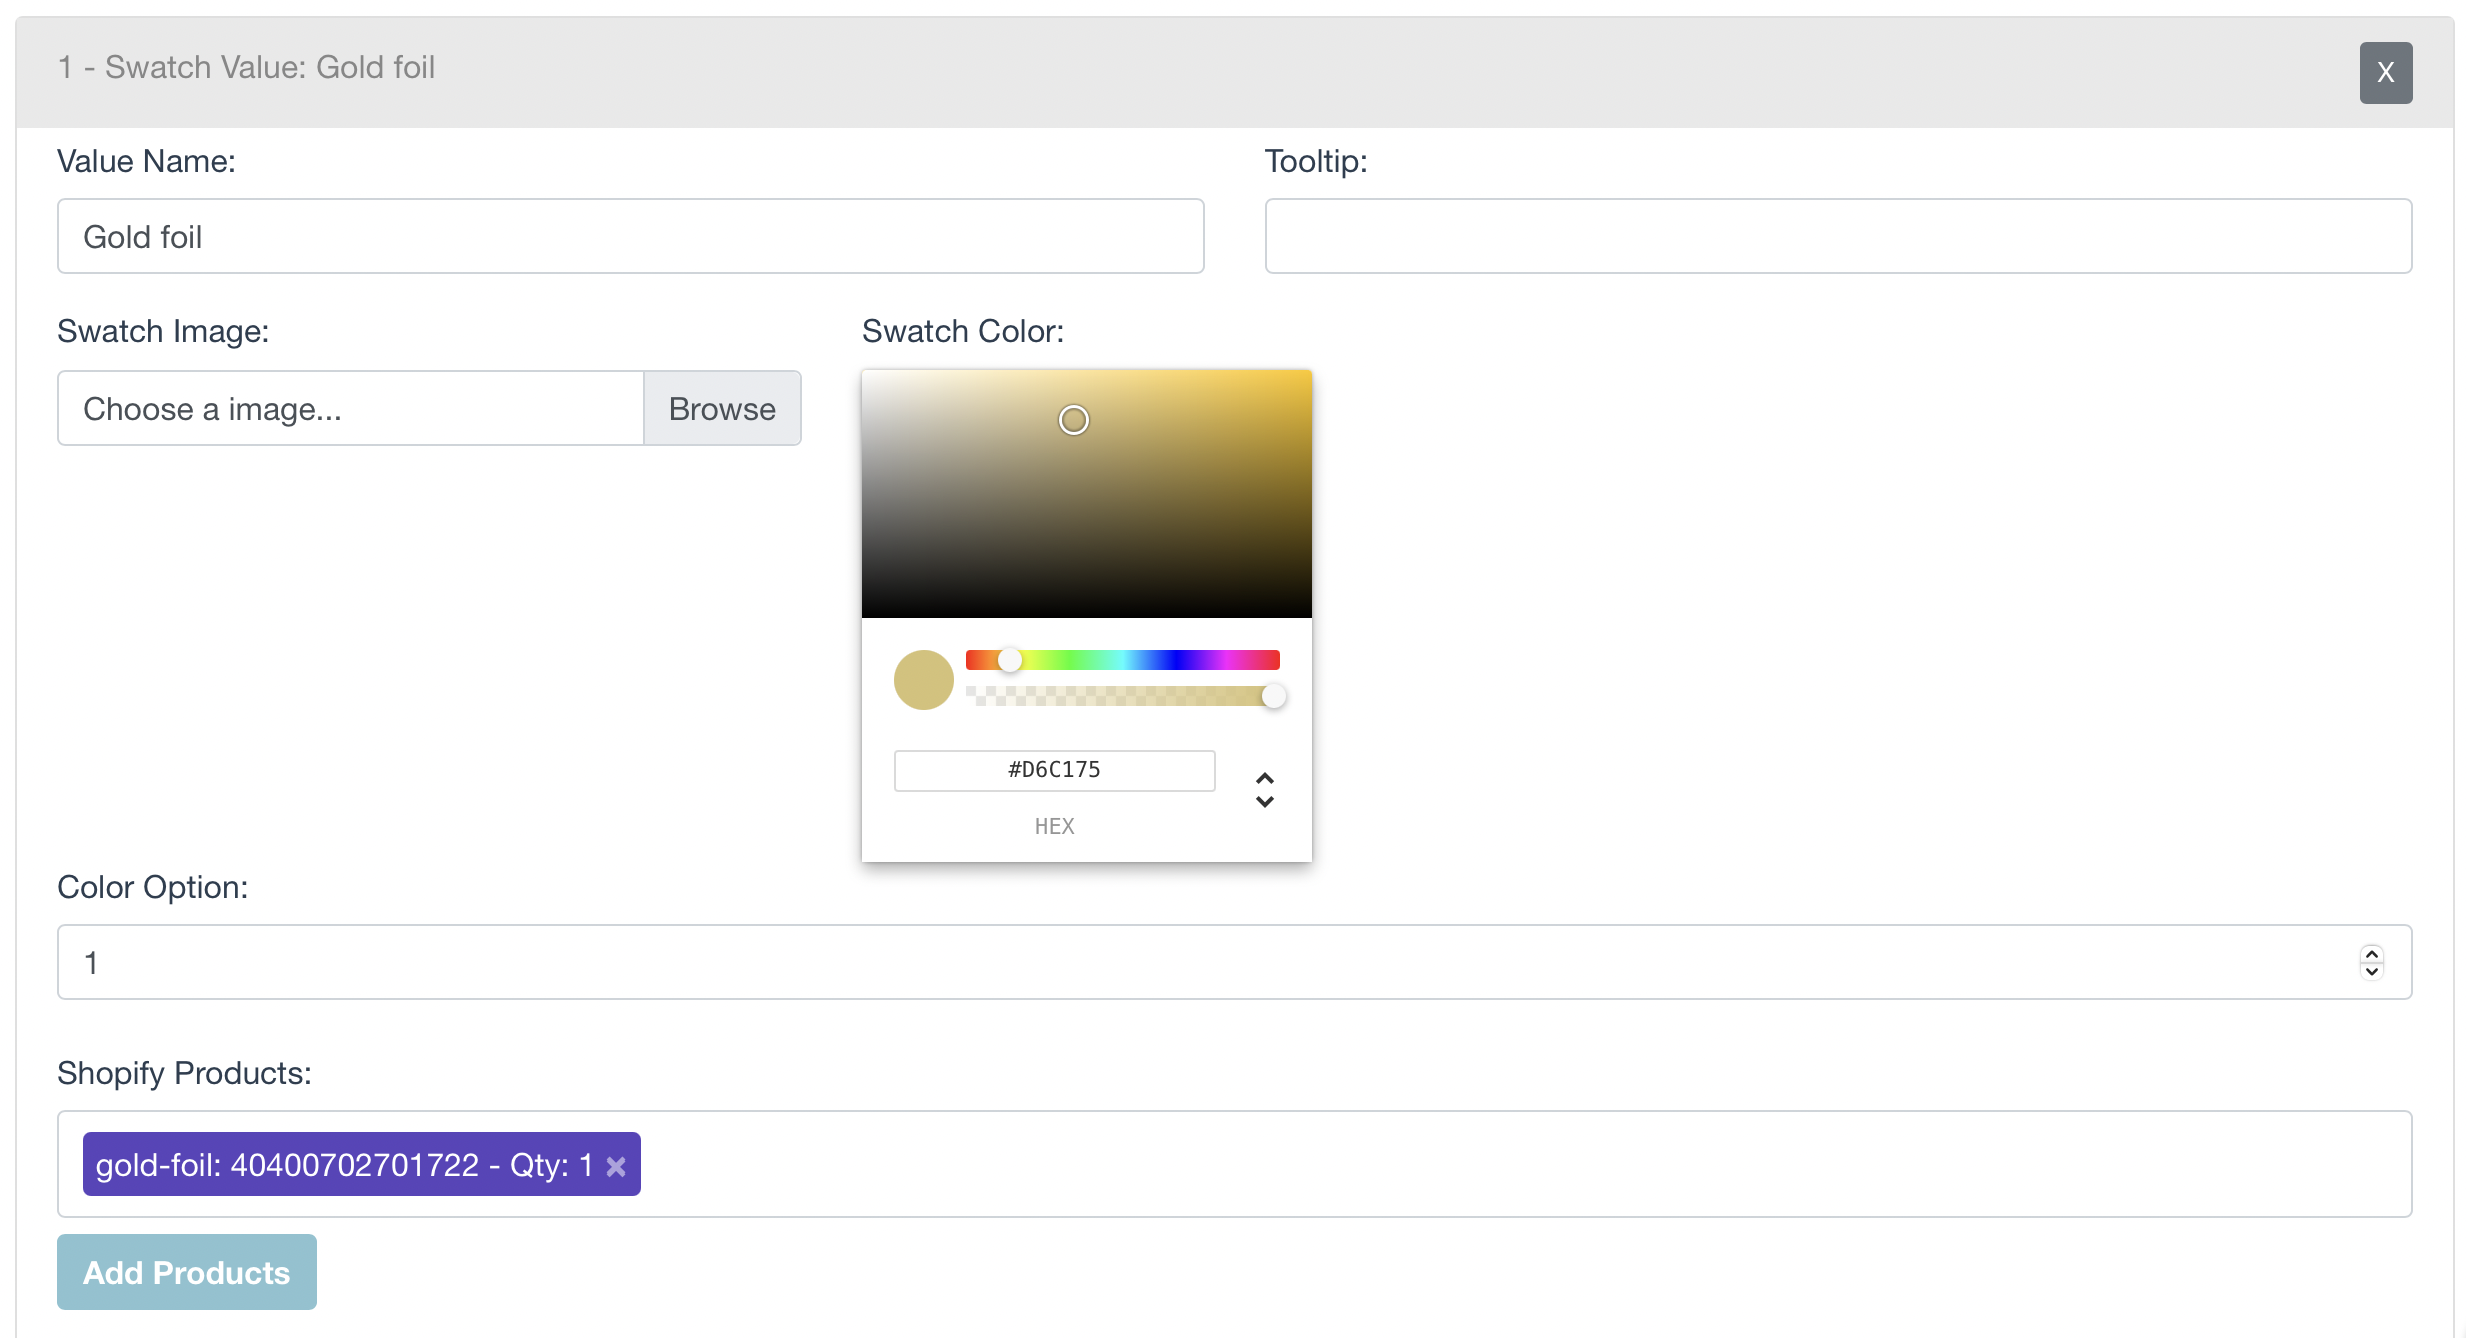
- Save the option set to apply the changes.
How it looks from the customer side
When customers choose that option on your store, they'll see the price
increase.
You can see how the price changes from $30 to $35 when we choose the gold
option.
And on the cart, they will see the extra product for the gold foil in it.
▶ Linking your personalized products with Melco embroidery
If you have a Melco account, you can link your Melco embroidery templates with
Customily, to automatically generate Melco embroidery files with every order.
Important
To be able to use the Melco integration, you need to have credentials to
access Melco's API and designs created in
https://admin.livedesignerfusion.com
Follow this 3 steps to connect any text personalization in Customily with your
Melco account.
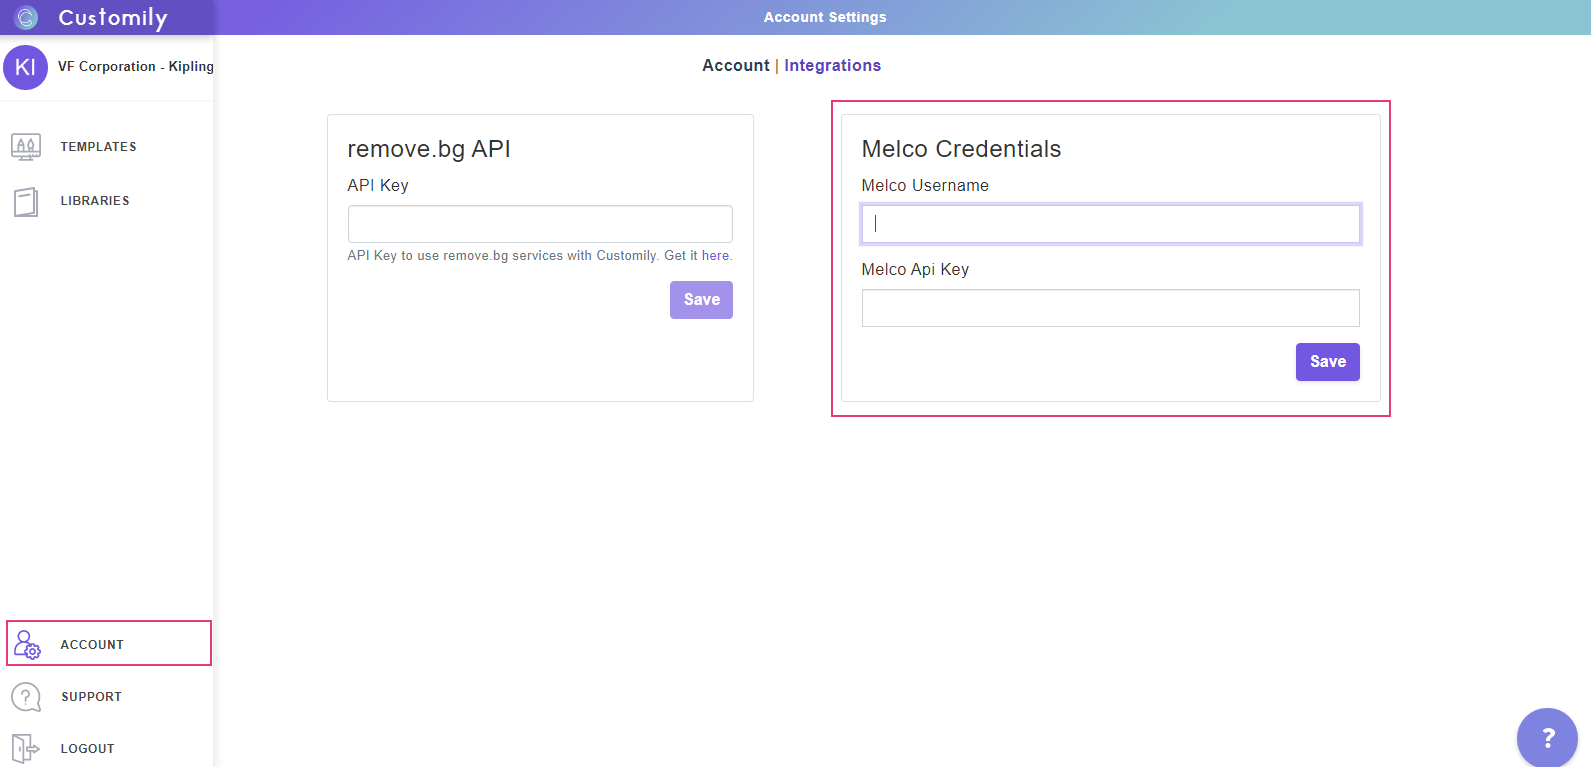
1. Connect your Melco account with Customily
- Go to Account on the left menu
- Open Integrations
- Add your Melco Credentials.
2. Create font and color libraries compatible with Melco
Melco designs only work with font and color options created using library. So
before creating your templates, make sure you have the proper libraries to use
in them.
To create a color library:
- Go to Libraries and create a new color library
- On the creating color library dialog, choose the color Mode as RGB
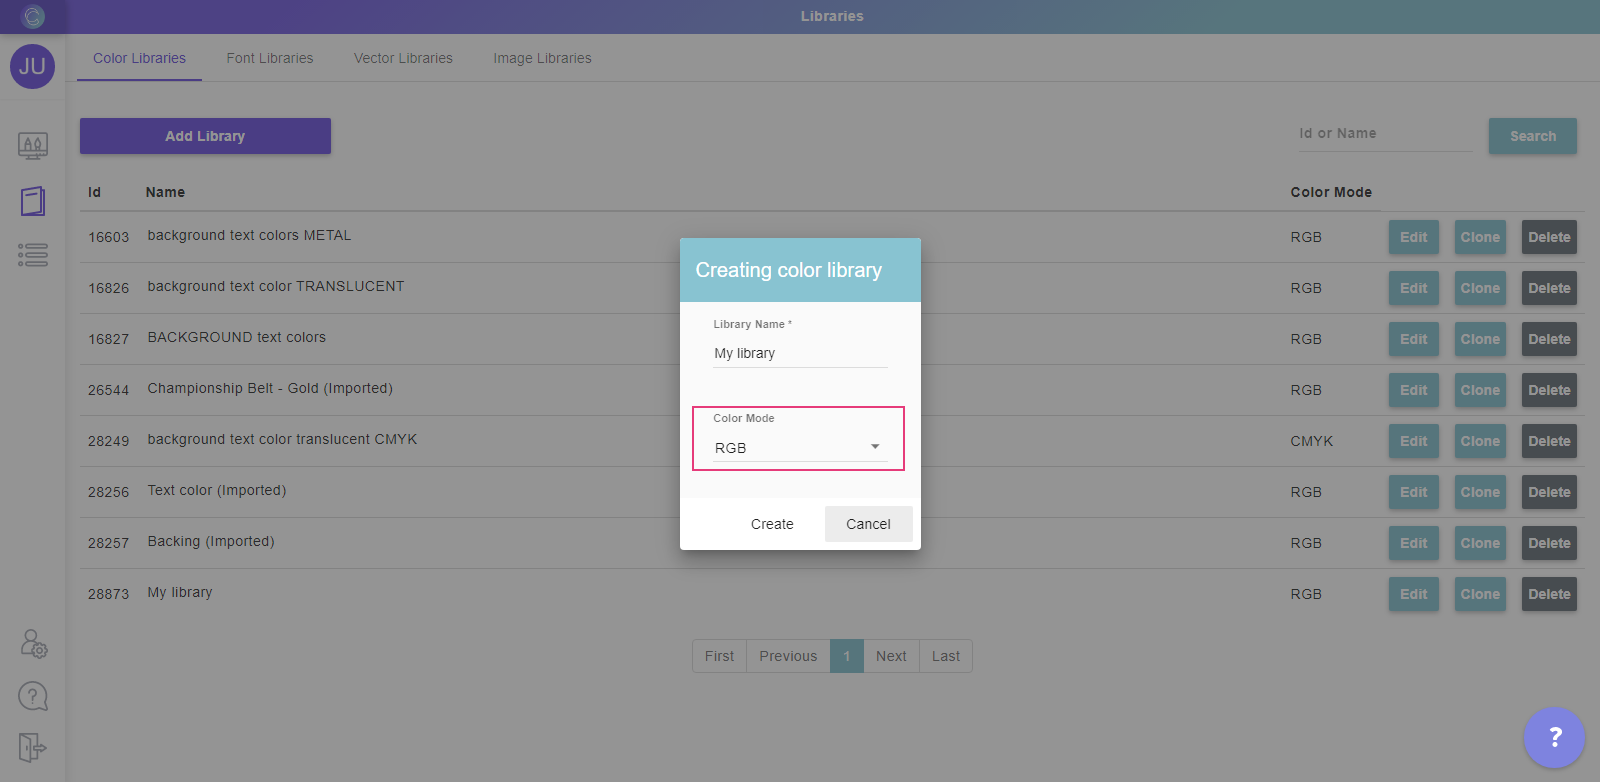
- Make sure you use colors that match your Melco options
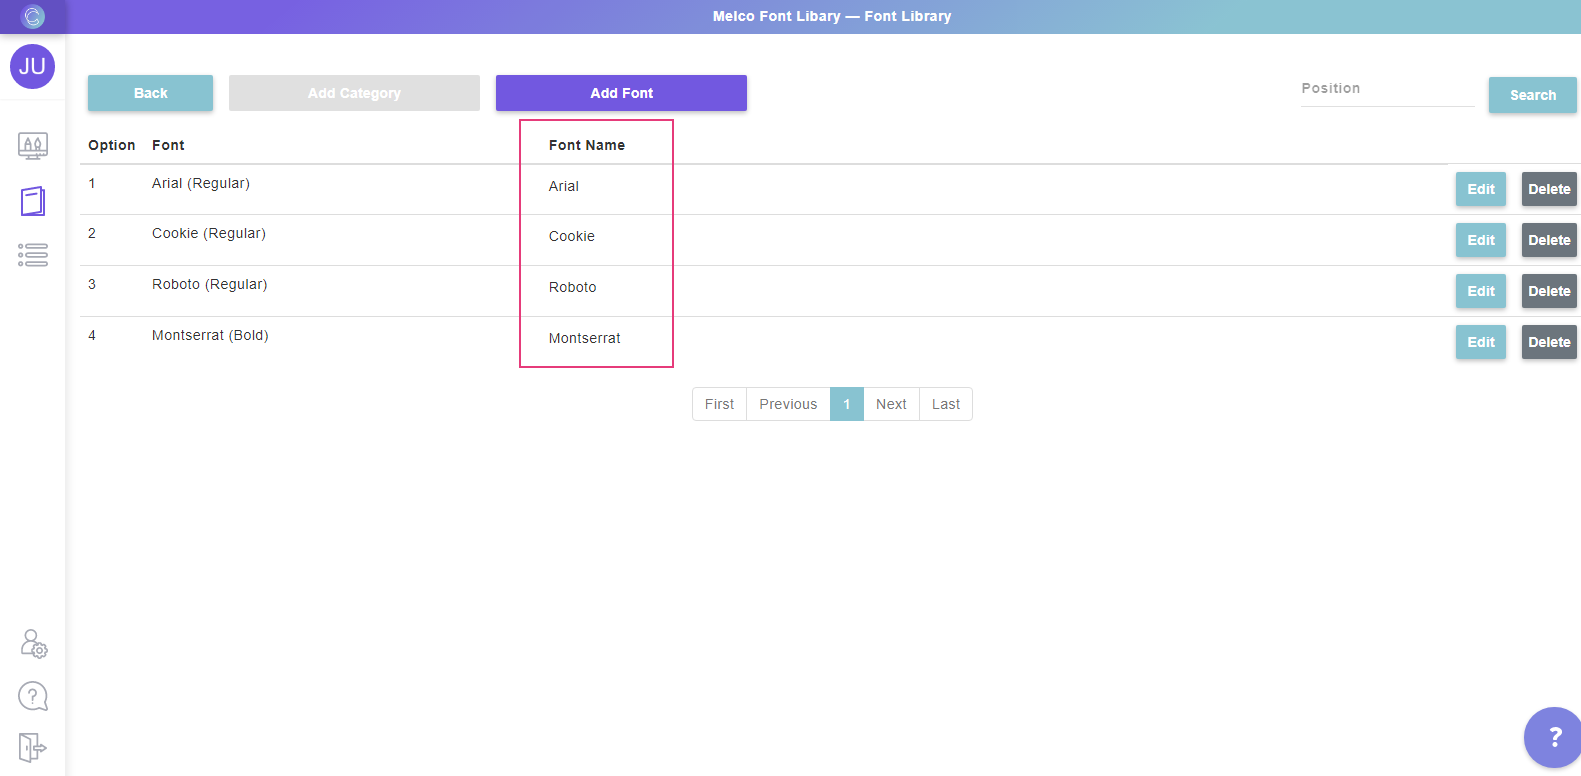
To create a font library:
- Go to Libraries and create a new font library
- Make sure you use fonts that match your Melco options
- Change the font name to match the Melco font name exactly
3. Link a Melco design to a Customily template
- Open the Customily template you wish to connect with a Melco design
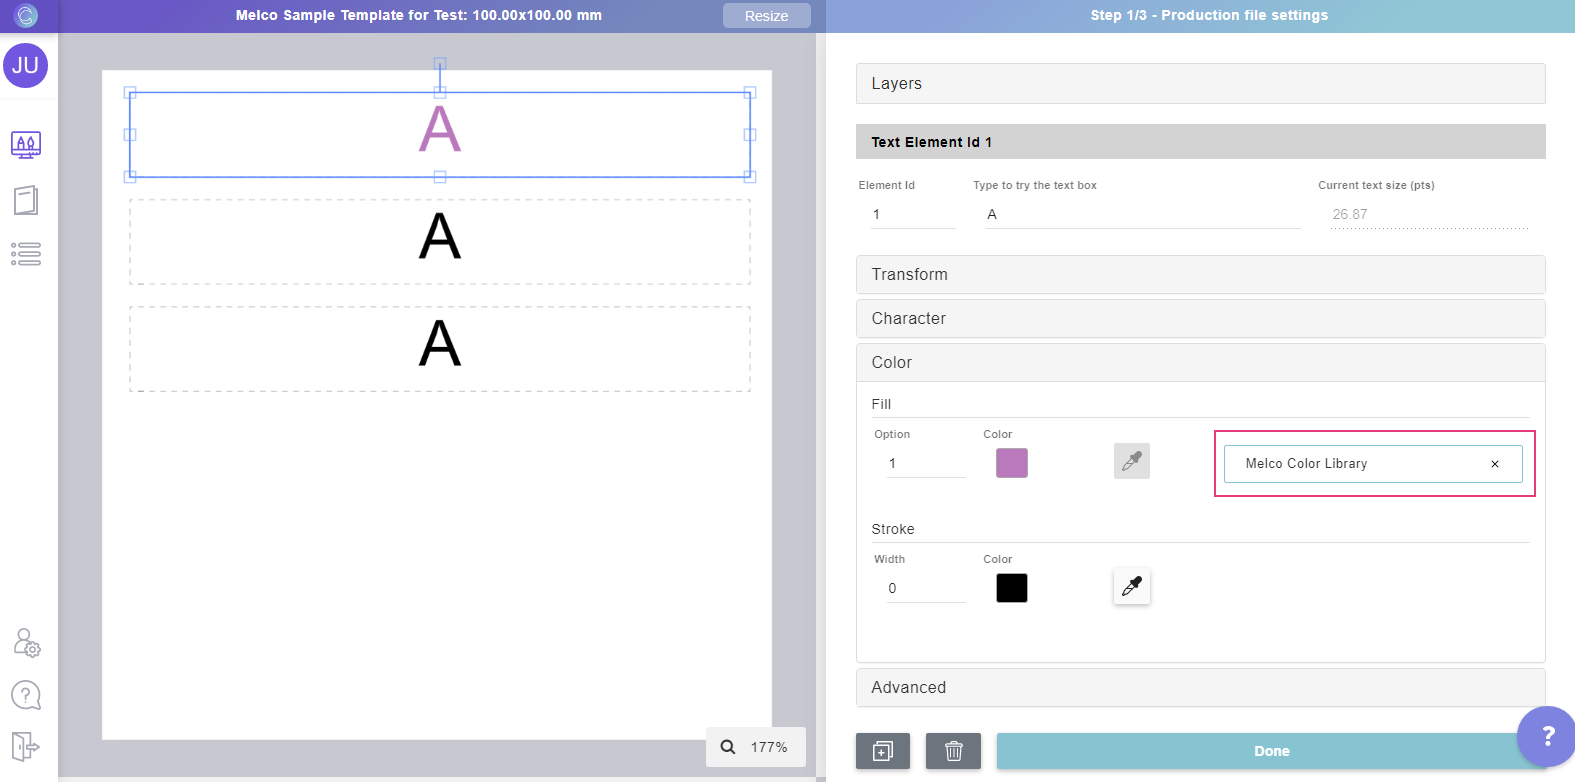
- Make sure all the text elements are using the color libraries and
font libraries created on the sep above.
- Select OFM as Export format
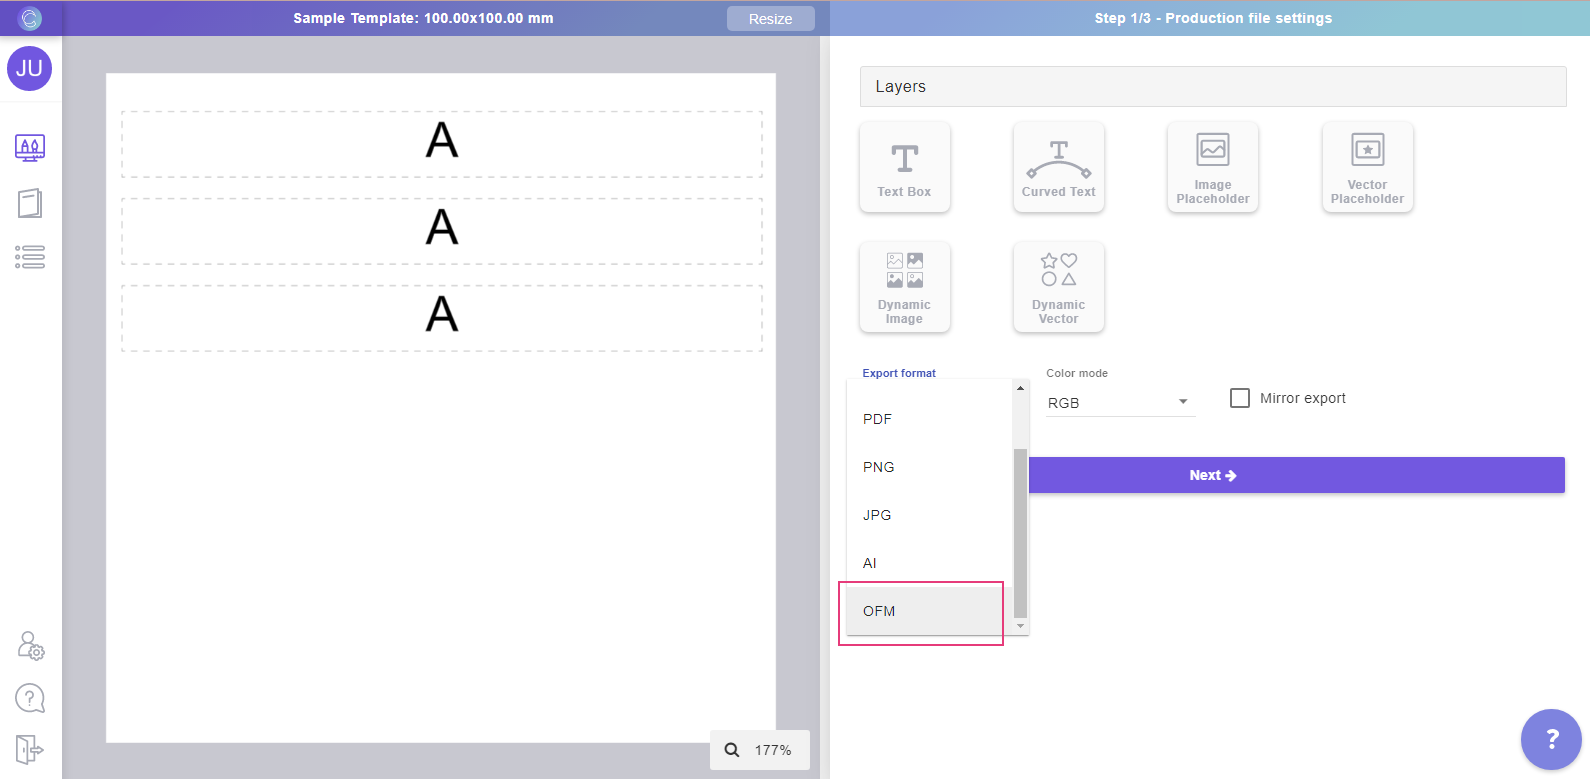
- Once the Export format OFM is selected, the "Reference ID" field will be
displayed. Paste the reference ID of the Melco design you want to use.
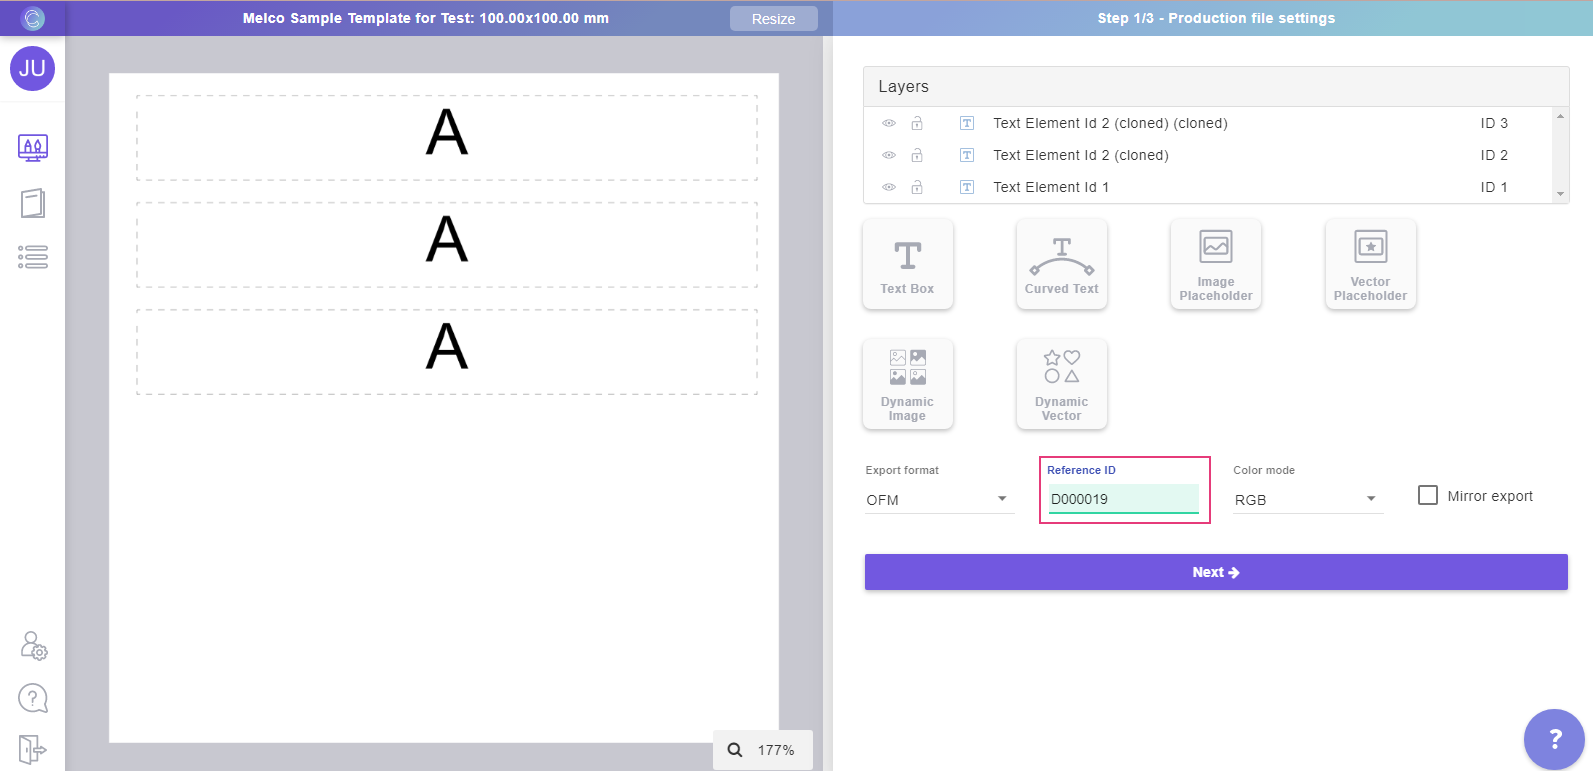
📝 Note:
The Reference ID of the Melco design can be found by logging in to your Melco
account on
Search for the design in Libraries > All Designs, you'll find it's
ReferenceID on the right column.

- Link each text element on the Customily template with the corresponding
element in the Melco design. Select the text element on the template, expand
the Advanced tool box, and choose the Reference ID for that element on the
dropdown.
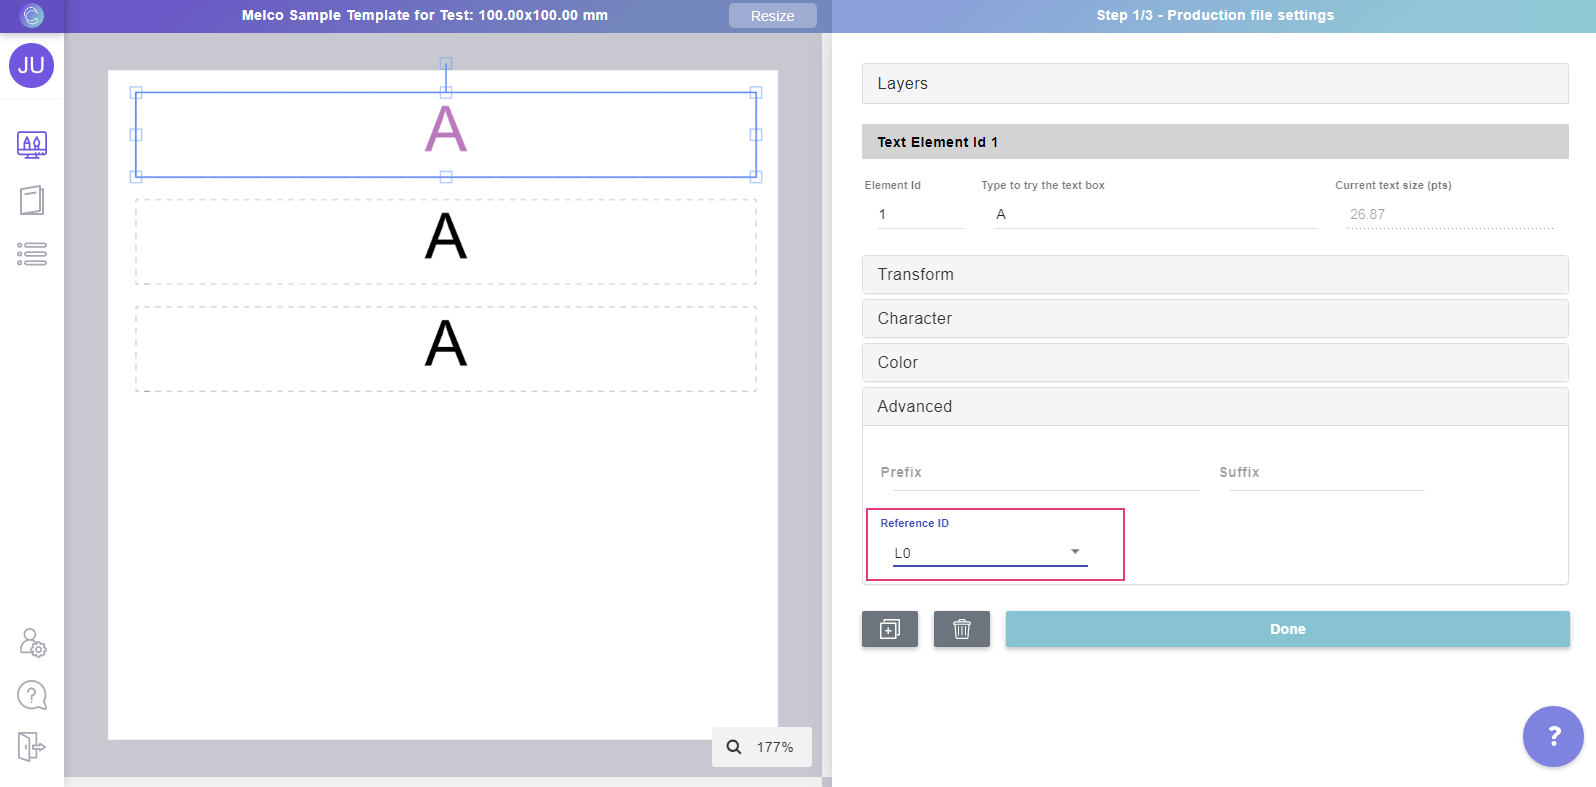
📝 Note:
The dropdown will show all the available text elements for that Melco design.
If you don't see any IDs on the dropdown, it means that the Reference ID you
are using for the design is not correct. Please make sure the "Reference ID"
used on item 3 is the correct one.
- Once you are done connecting all the elements, you can continue creating
the template as usual.
▶ Adding Customily scripts to your Shopify theme for faster loading
By default, the Customily's Shopify app is loaded after the store page has
finished loading. If you want the app to load at the same time the store page
is loaded to reduce the waiting time for your customers you need to insert the
Customily's scripts in your Shopify theme.
There are 2 ways of adding the scripts to your theme:
- Adding Customily script app block (easiest way)
- Adding Customily script tags to your theme files.
After adding the script to your theme, you need to **enable the load scripts
from store's theme setting in Customily**. This step is very important as it
will disable the loading of the script from dynamically from the app, as it
knows they will be loaded from the theme instead. If this step is not done,
the **script will be loading twice and you will see your Customily Options
duplicated**.
Important
If you insert the Customily scripts into your Shopify theme you will need to
re-add them if you switch to a different theme.
Adding scripts via the app block
Important
App blocks are only available for themes 2.0. If your theme is not on Shopify
2.0 you won't be able to add app blocks. You should add the tags to your theme
files instead.
- Open your Online Store sales channel, go to Themes and find the theme you want to modify. Click Customize.
- Open your Default Product Page
- On the left menu locate the Template section, and click Add Section. Go to Apps and choose Add Scripts to theme by Customily. Click to add the App Block.**
**
- The App block will be added to the product page, and you will see the Customily personalization options displayed on top of the Add to cart button.
Important
If you see the options double, it means that the **script is also being loaded
by the app**. Continue with the next steps, we'll disable the script from
loading via the app on your settings on step 8.
- Now switch to your Cart Page and repeat the process.
- On the left menu locate the Template section, and click Add Section. Go to Apps and choose Add Scripts to theme by Customily. Click to add the App Block.!Add scripts to theme.png
- The App block will be added to the cart page, although no changes are visible on the cart, this is what will ensure that when a customized item is added to the cart, the personalized preview will be visible in the product thumbnail.
- Now it's time to disable the script from loading on via the app. Open Customily app navigate to Store > Settings > Developer Settings tab:!developer settings.png
- Scroll down to the Store Theme section, and look for the option that says Load scripts from store's theme option!Store theme section.png
- Enable the setting.!load script from theme.png
- Scroll to the bottom and hit Save to save the settings. The app will be now loaded from the script tags in your theme
Tip
After the setting is activated, wait a couple seconds, then refresh your
product page to check if it's working correctly. If you see options are
duplicated, wait a couple of minutes and try again, as these changes might
take some time to populate. If you still see them double, reach out to our
support team.
Adding the script tags on your theme files
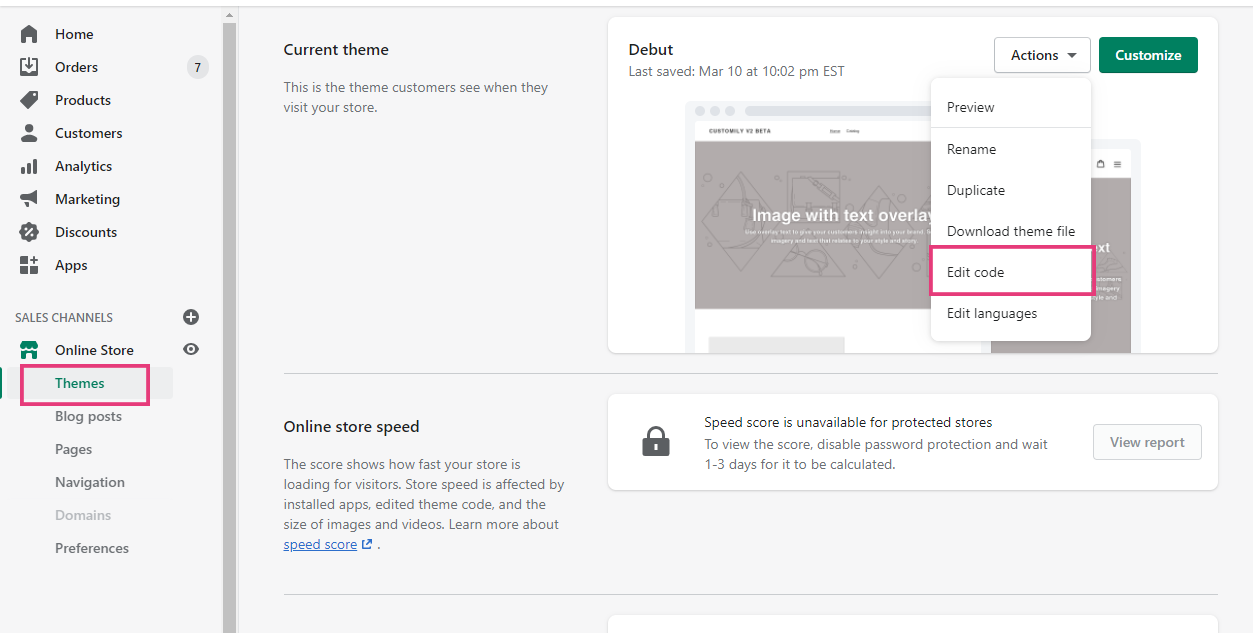
- Open your Online Store sales channel, go to Themes and find the theme you want to modify. Click the ... next to Customize, and select Edit Code.!Edit code.png
- Find the file called theme.liquid and open it.

- Within this file, locate the HTML tag </body>. It's always at the end of the file.!image \(4\).png
- Insert the following script tags just above the line where </body> is defined:
{% comment %}
ADDED BY CUSTOMILY
{% endcomment %}
{% if template contains "product" %}
<script src="<https://cdn.customily.com/customily.js>"></script>
<script src="<https://cdn.customily.com/shopify/static/customily.shopify.script.unified.js>"></script>
{% endif %}
{% if template contains "cart" %}
<script src="<https://cdn.customily.com/shopify/static/customily.shopify.script.unified.js>"></script>
{% endif %}
{% comment %}
END: ADDED BY CUSTOMILY
{% endcomment %}
- Check that the scripts were added in the correct position and save the file.!image \(5\).png
- Open Customily app navigate to Store > Settings > Developer Settings tab:!developer settings.png
- Scroll down to the Store Theme section, and look for the option that says Load scripts from store's theme option!Store theme section.png
- Enable the setting.!load script from theme.png
- Scroll to the bottom and hit Save to save the settings. The app will be now loaded from the script tags in your theme
Tip
After the setting is activated, wait a couple seconds, then refresh your
product page to check if it's working correctly. If you see options are
duplicated, wait a couple of minutes and try again, as these changes might
take some time to populate. If you still see them double, reach out to our
support team.
▶ How to add the customized product image to the cart
If you want to add the customized product image to the cart page or to the
pop-up cart follow the instructions below.
To add the customized product image to the cart page
- Go to the Shopify theme you want to use and click on Actions \- **Edit
code**
- Identify the cart page file. This could have one of the following names:
- cart-template.liquid
- cart.liquid
- template--cart.liquid
- Find the piece of code that renders the product image. It looks something
like this:
{% render 'image', src:item, alt: item.title | escape, size: 'medium'%}
- Add a condition that evaluates whether this property exists:
item.properties['_ customily-thumb']
- If true, show an image with the src attribute asitem.properties['_ customily-thumb']
- if false, show the original image.
When added it should look like this:
Here is a code example:
{% if item.properties['_customily-thumb'] %}
<img src="{{item.properties['_customily-thumb']}}" />
{% else %}
// Add the piece of code of your theme that renders the image.
{% endif %}
##
To add the customized product image to the pop-up cart
To add the customized product image to your pop-up cart:
- Go to the Shopify theme you want to use and click on Actions \- **Edit
code**
- Identify the pop-up cart file. This could have one of the following names.
- header.liquid
- ajax-cart-template.liquid
- mini-cart.liquid
- Follow the rest of the instructions indicated above.
▶ Orders arriving without personalization - Buy now button compatibility.
Shopify allows you to offer an express checkout experience via Dynamic
Checkout buttons (also known as Buy Now buttons) on your product pages. This
will take your customers directly to the checkout, completely bypassing the
add-to-cart process.
All forms of express checkouts and Buy Now buttons, don't save the line item
properties on checkout, meaning any custom fields on the product (like options, preview and production file link) are not being saved on the order.
This will cause orders to arrive without any personalization information, that
is why **we highly recommend completely removing the buy now button from your
product pages to avoid orders without information.**
This is a developing issue
We are discussing with Shopify ways to solve this issue, as we understand the
Buy Now button is a great asset for stores. As it is affecting all apps that
rely on line item properties, together with other app developers we are
working to find a solution. You can follow the thread regarding this issue
here.
You can subscribe to this issue at the bottom of the page to receive updates
on it. Hopefully, we'll be able to enable this button again soon!
Remove the "Buy Now" Button from Your Store
Removing the dynamic checkout button will help ensure that Customily options,
and other 3rd-party apps, function correctly on your store.
Most third-party applications that would depend on an add.js call will
conflict with this button on product pages only.
- From the Shopify admin, select Online Store , then Customize.
- Select **Customize.
**
- Select the dropdown menu at the top and select Products.

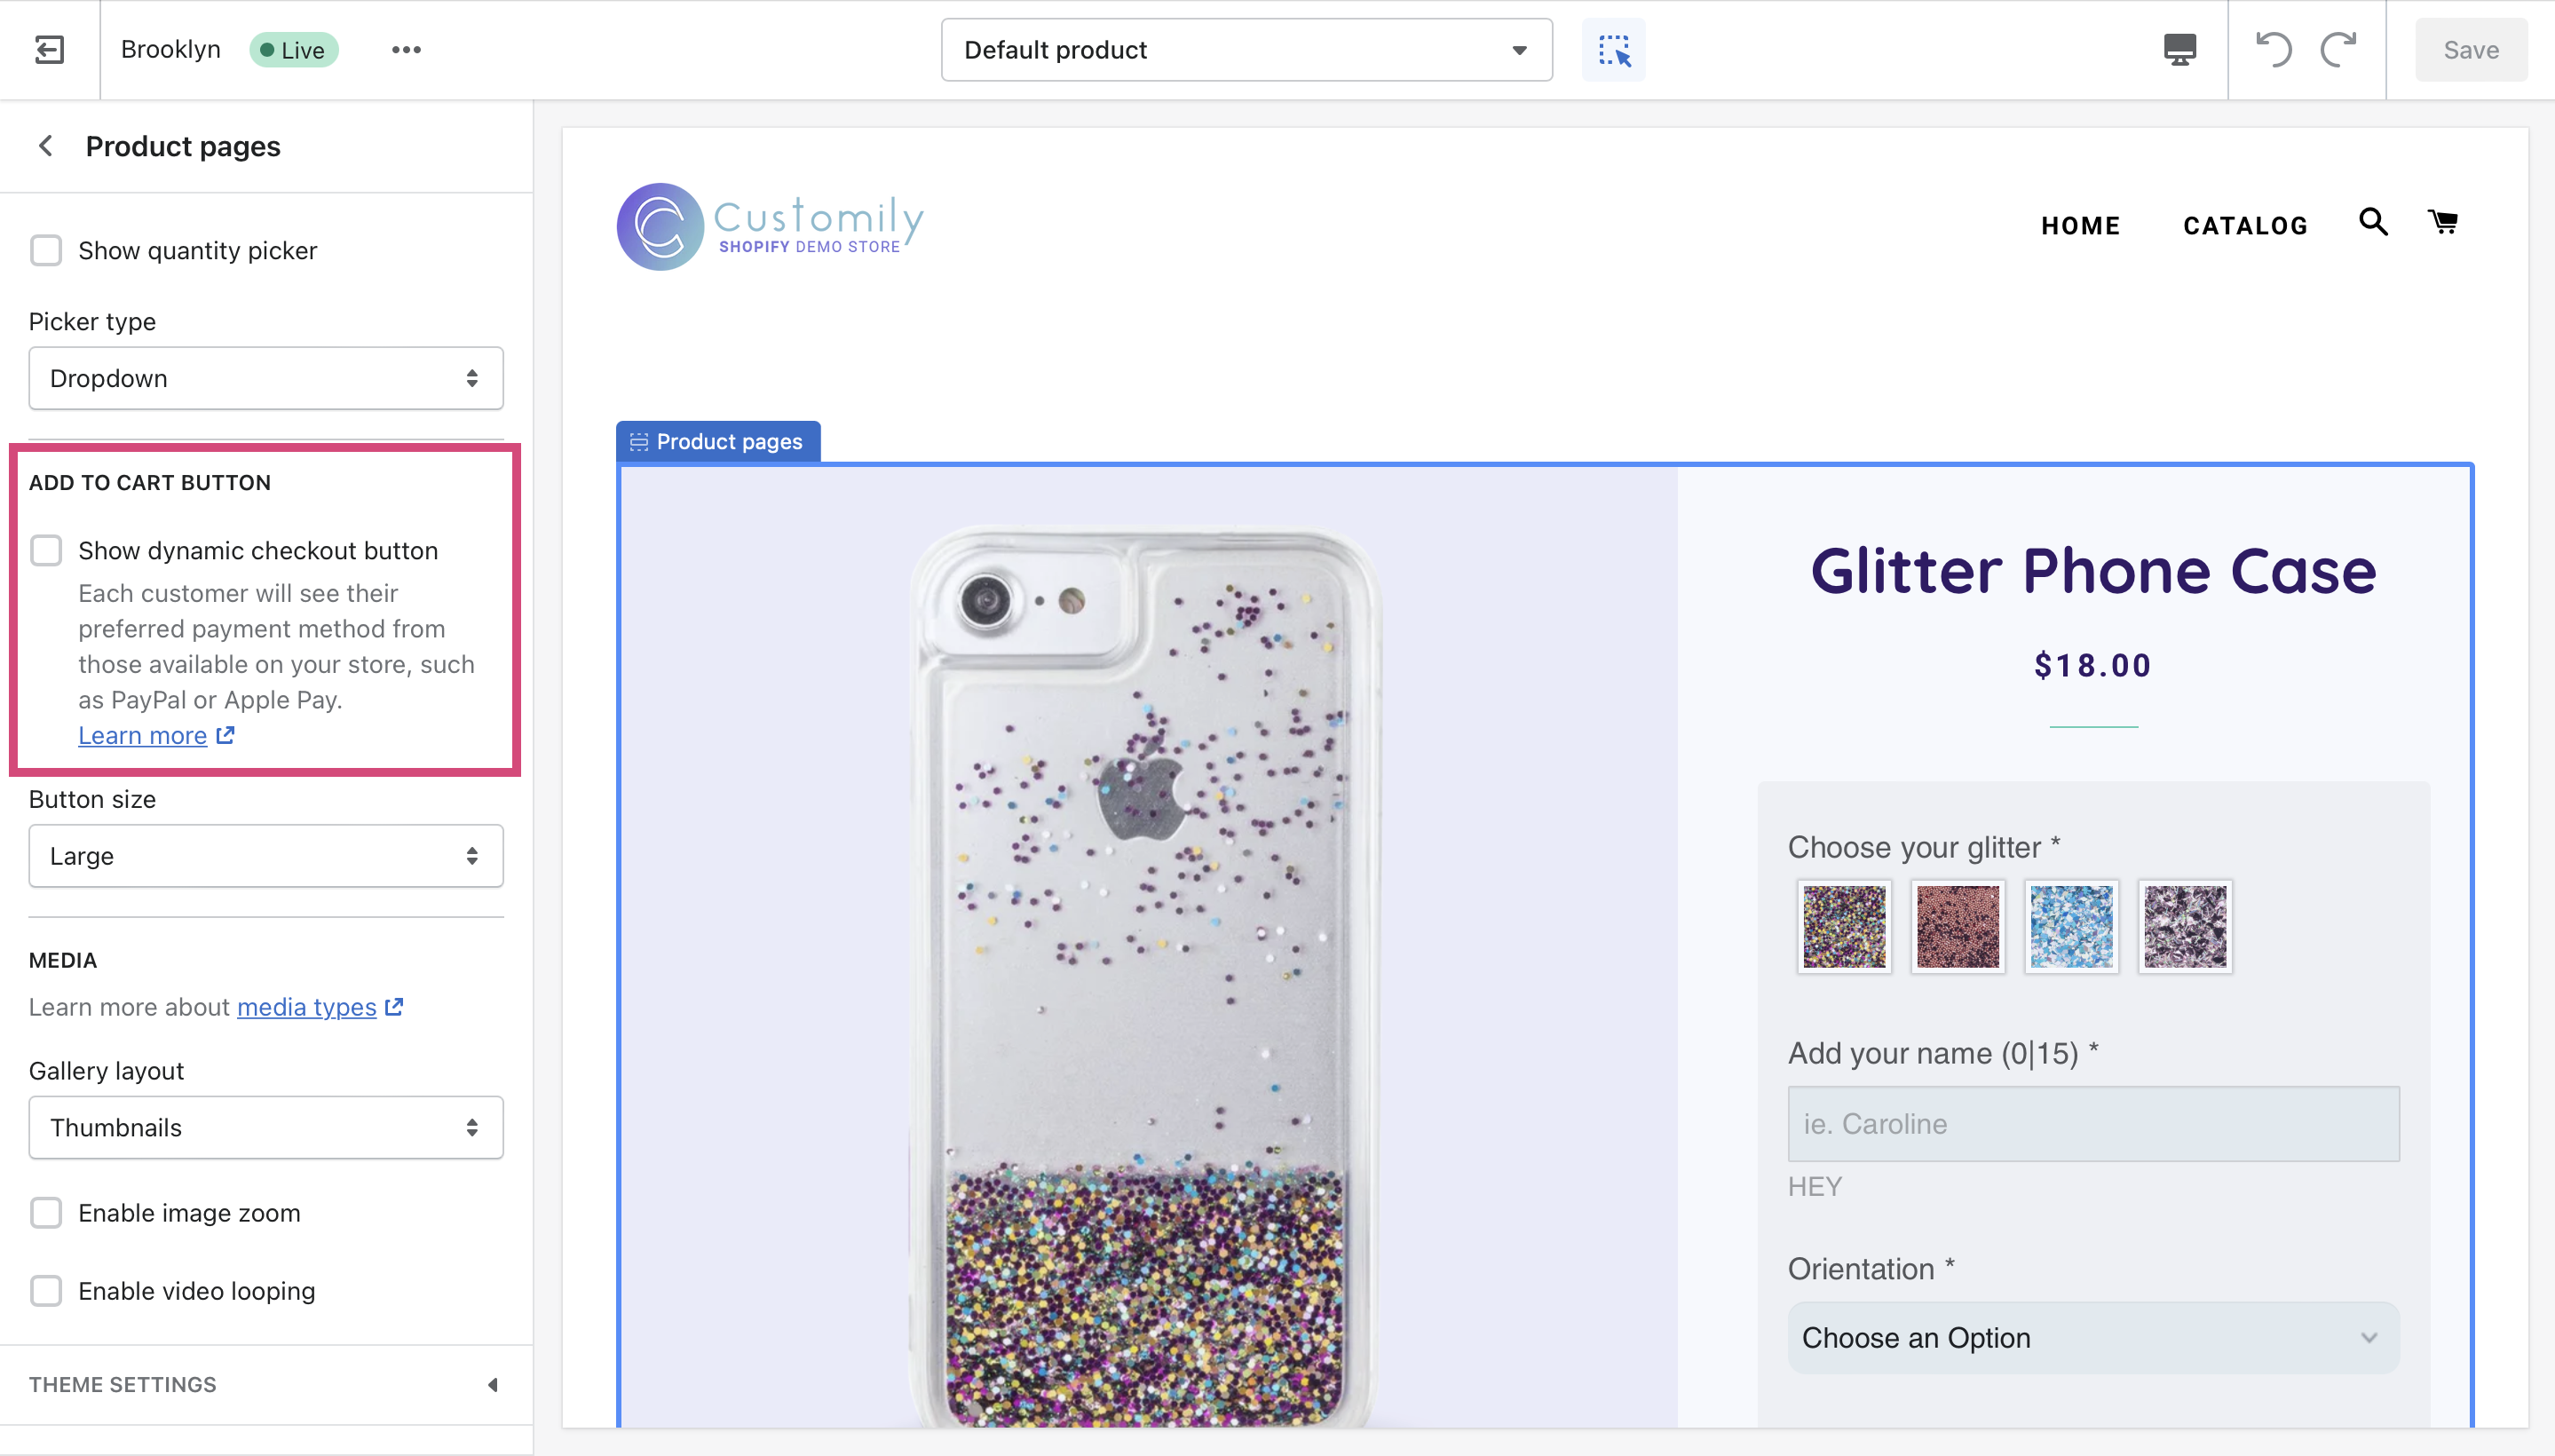
- Select Product Pages.
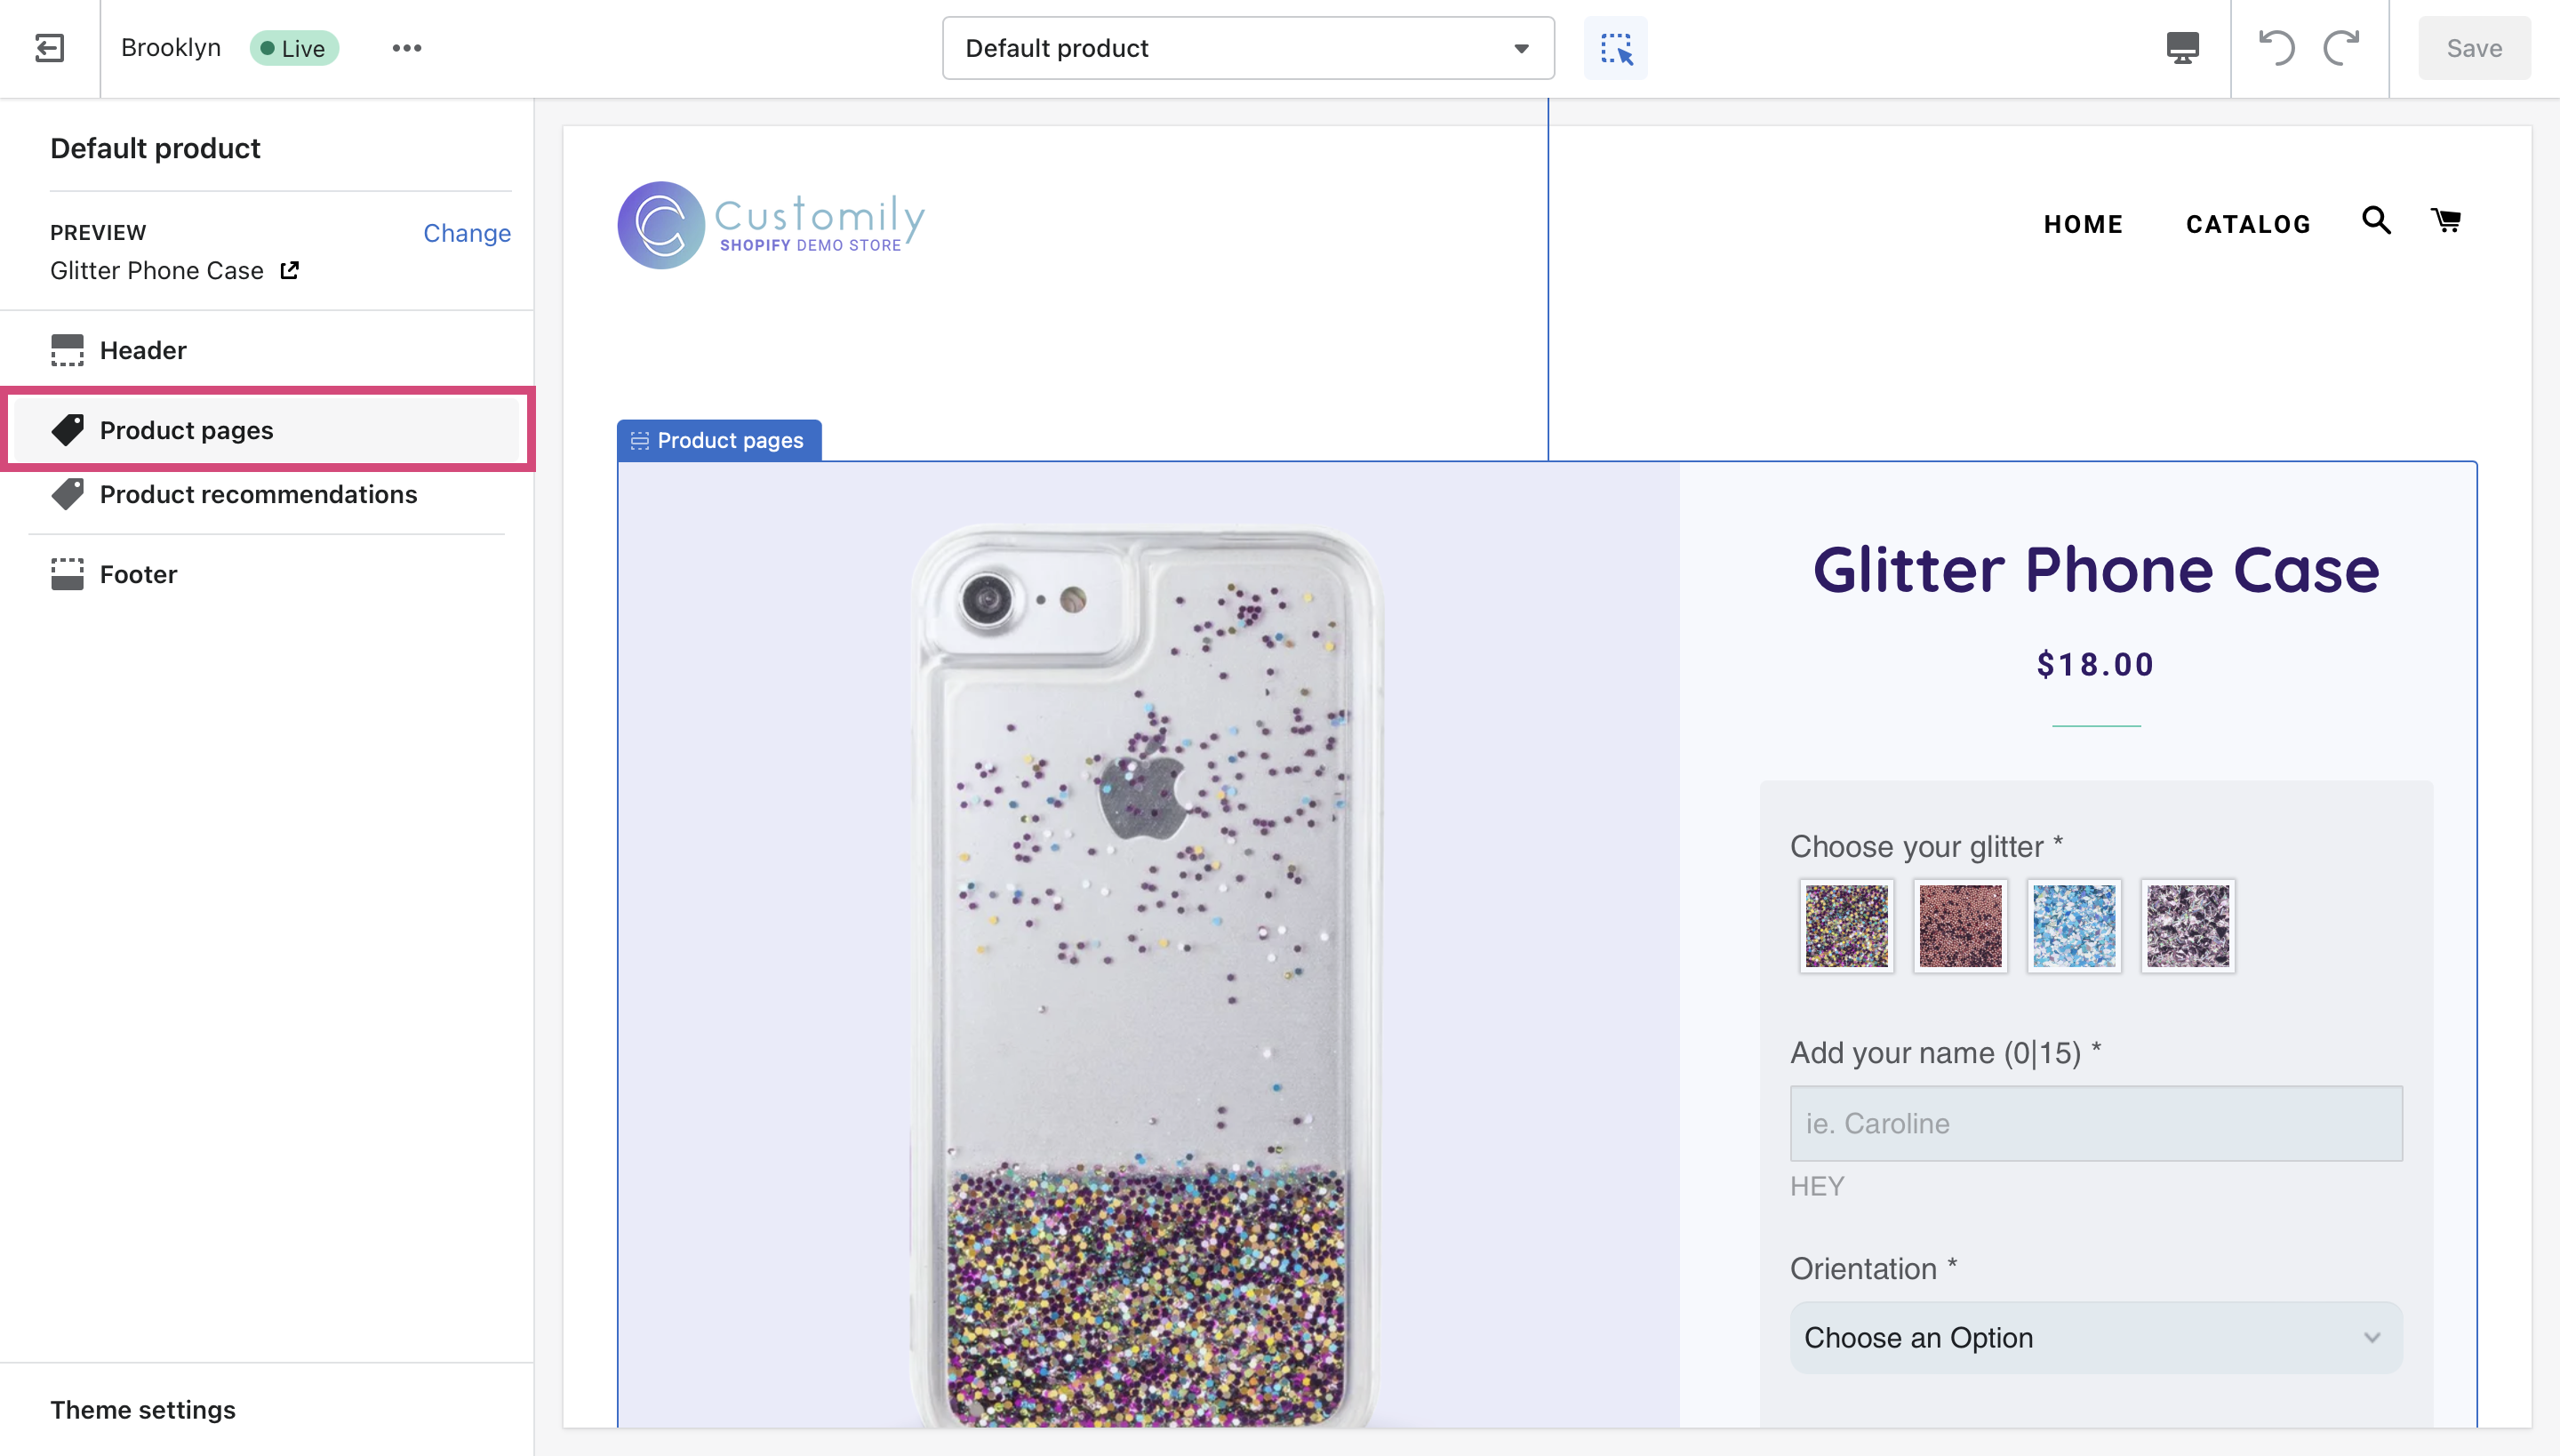
- Uncheck Show dynamic checkout button.
▶ Add Sticky Preview
Sticky Preview is the ability to keep the preview on the top of the page while
scrolling through the options. While Sticky Preview is enabled, the preview
will "stick" to the screen even as the user scrolls up or down the page.
Sticky preview is only available when the preview style **Product Page Preview** is set.
To add sticky preview
- Open **store**.
- On the top menu go to Settings.
- Open the Preview Behavior tab
- Under Preview Style you can enable the sticky preview

Keep in mind
Sticky preview is not compatible with every Shopify theme.
Some themes may not work properly with sticky preview, so be sure to check how
your product page works after enabling this. If the page has issues, please
disable and contact support.
▶ How to translate option's counter on mobile.
Most of the options texts can be translated manually by editing the option
set. This includes the option label , help text , and **buttons
texts**.
However, there are some default texts from the options that can't be edited
from the option set, such as the option counter for mobile devices.
To translate the option counter
- Open the app settings
- Go the the tab Developer settings
- Paste the following code on the Custom Javascript section
window.addEventListener('customily-modal-show', () => { setTimeout(translateOptionLabel, 200); });
function translateOptionLabel() {
const optionLabels = document.querySelectorAll('#cloptionsapp .optionnumber');
optionLabels.forEach(label => { label.textContent = label.textContent.replace('Option', 'Step'); });
}
- Replace with your desired language on the pasted code where it says
replace with the translation for the word option and **replace with the
translation for the word of**
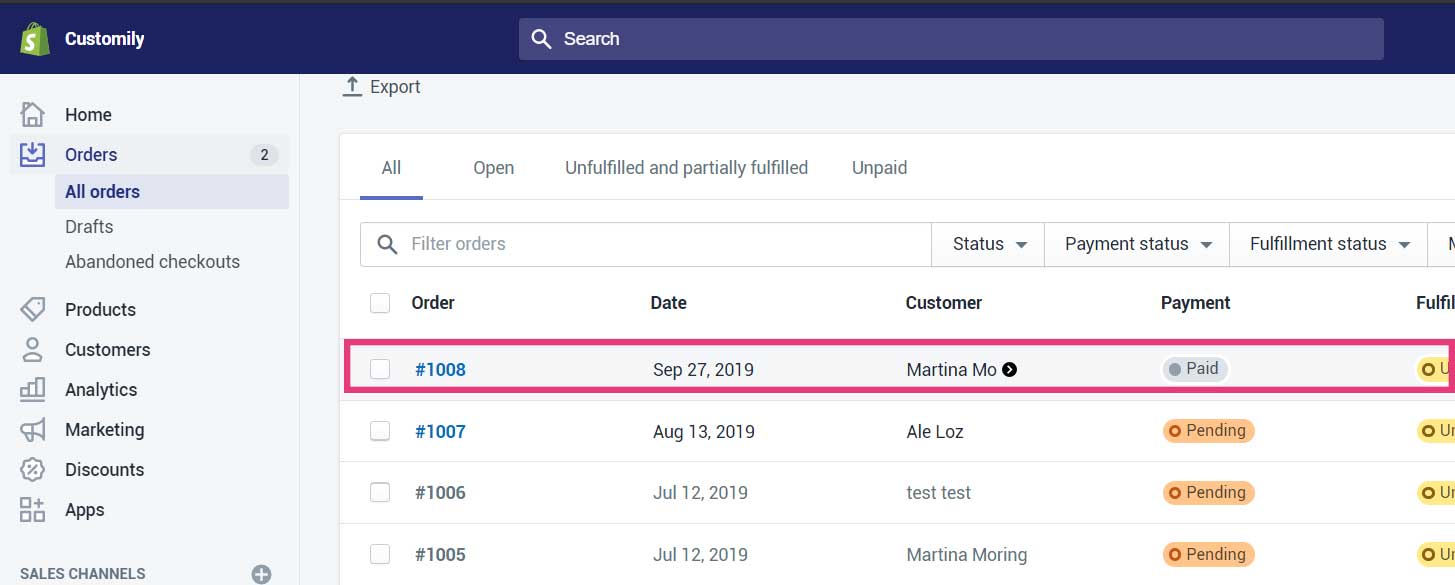
▶ Where do I get the print file and the personalization information on Shopify?
All the personalization information and the print file from an order will
appear in your Shopify Order manager.
This information includes:
- All the personalization fields the customer entered. For example text inputs, color choices, etc.
- A link to the preview the customer was seeing when buying.
- A link to the production file
- If your product lets customers upload their own picture, a link to the raw uploaded picture.
To find your personalization information within the order
- Browse to Shopify Order manager.
- Find the customer order you want to get the information from and click on
it to view the details.
- In the first section of the order details, you will find the fields the
customer entered, the dropdowns and swatches he chose, a link to the
preview , and a link to the image uploaded by him (if your product has image upload). And at the bottom of the section, you will find the
production file links.
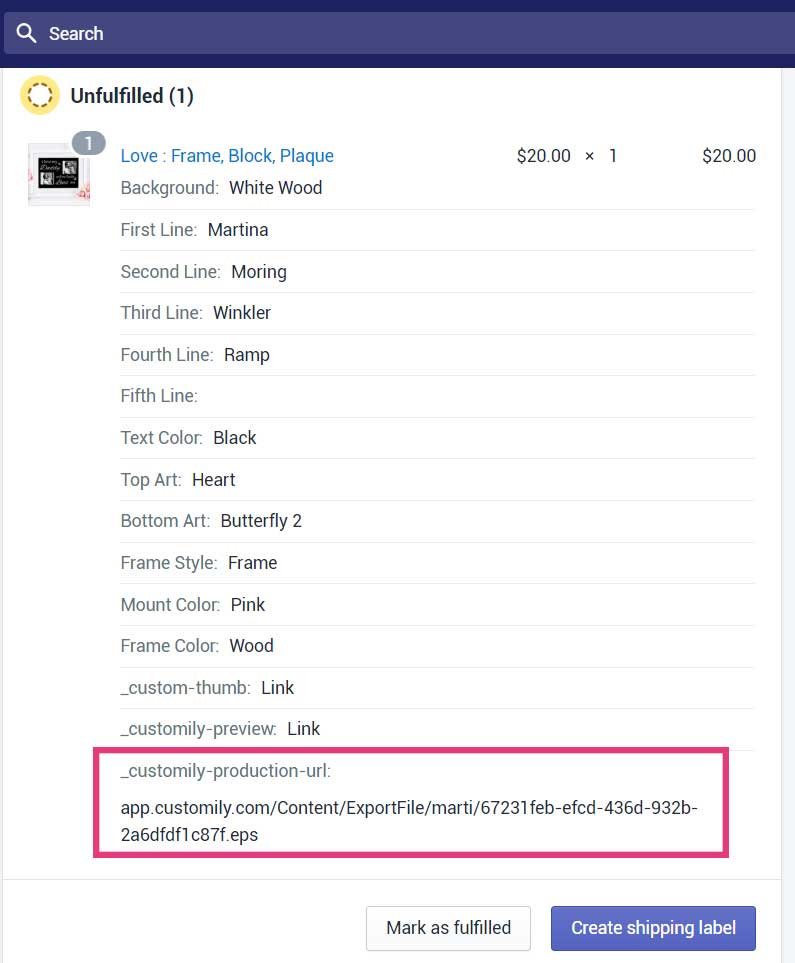
Tip
To download the production file just copy the URL in a new tab of your
browser. The file will be downloaded on your browser's defined download
folder.
▶ Add personalized preview link at checkout (Only available for Shopify Plus)
If your store is on Shopify Plus, you can
customize the checkout experience and display a link to each product’s preview
image—right inside the checkout page. This is done by enabling the **Customily
App Embed for checkout**.
Here's how to do it
- Access the Checkout Editor. Go to Settings > Checkout and click **Customize
- Once inside the Checkout customization screen, click on the Apps tab.
- Search for Customily in the app list. Look for the app embed called Customization Image Preview and click the + button next to it. Choose Add to Checkout to enable it.!Checkout.png
- Don’t forget to Save your changes in the top right corner once you're done!
Now, products personalized with Customily will include a new link in the
checkout that contains the preview image!! When shoppers click it, a bubble
with the preview will be visible.
Note
Keep in mind this is only possible if you have Shopify Plus. If not available for your store, contact
Shopify to upgrade your plan.
▶ How to create test production files
Generating production files allows you to see how the final printable file
from Customily will look without the need to place an order. This is great for
checking sizes, definition, and elements' placement.
Since production files are exclusive to your store, before creating one you
will need to generate an API key. This API key will be used to validate your
production file generation.
Important
Do not share your API key. If you suspect someone has your API key, you can
always generate a new one.
To generate an API key
- Open Account settings on your left menu
- On the top menu open Integrations.
- Select Generate new API Key. If you already have an API key generated, click the button Show to see it.
Tip
If you're using Customily through Shopify and don’t know your password, you
can reset it at app.customily.com/signin.
Create a new production file using Customily's Chrome extension
- Install Customily's extension in your Chrome browser.
- Go to the store product page of the preview you want to test.
- Personalize the product as needed.
- Open the Customily extension in Chrome.
- Paste your API key and save it.
- Click on Generate File—a link will appear below. Click on it.
- Wait for the estimated time indicated, then refresh the page to access the print file.
Create a new production file using the browser console
- Customize the product as you want in your store
- Once you’ve finished open inspect element (Right Click Inspect) and open
the console tab
- Write the code below at the bottom and paste your API Key**in between the
quotation marks**('')
engraver.exportFileAuth('Erase this message and paste your API key').then(u => console.log(u));
- Press enter. This will return a link. Click the link to get the production
file.
Keep in mind
Production files take a while to get generated. So if you are prompt with the
screen almost there just wait a couple of minutes and refresh the page to
try the download again.
▶ Preview zoom style settings
Add zoom to your preview so customers can see their personalization in more
detail.
You can choose the way the zoom works on your store, for desktop and mobile
devices.
There are 3 ways the preview zoom can behave in your store:
- No Zoom
- Zoom on hover
- Zoom on click
📝 Note:
The zoom setting will be applied to all your products using customily equally.
To add zoom on your preview
- Head to Store
- Open the Settings section
- Click on the Preview Behaviour tab
- Scroll down until you find the Zoom section
- Choose the option that best fits your needs.
Different zoom styles for desktop
No zoom
By choosign this option customers won't be able to zoom on the preview.
Zoom on hover
The canvas will be zoomed by 2x when hovering the mouse over it.
Zoom on Click
When clicking on click to zoom a dialog zoomed by 2x will appear to the side
of the preview.
💡 Tip:
The Zoom on Click style is recommended when customers need to interact with
the preview (for example, moving uploaded images).
Enable zoom for mobile devices
When enabled a click to zoom button will appear on the preview in mobile
devices.
To enable this feature:
- Access your Settings information following the steps above
- Scroll down the page until you find the Zoom options
- Enable zoom for mobile devices
▶ Image Upload Manipulation Options
On previews that an image upload option, customers can easily adjust their
pictures within the image placeholder element using a set of control buttons.
These buttons will appear automatically under your preview and with them, you
can:
- Zoom in or zoom out
- Rotate
- Move it in different directions.
Besides the button, there is also the possibility to let the customer move the
image directly from the preview on desktop, or with touch controls on mobile.
Learn how to enable these option below.
To enable mobile touch controls
When enabled, uploaded images or vectors can be moved, rotated and resized
with touch gestures on mobile devices as well as using the control buttons.
- Open store.
- On the top menu go to Settings , and open the tab Preview Behavior
- Scroll down the page until you find theImage Upload Manipulation
section
- Enable the mobile touch controls options
Resizing the preview to fit the image control buttons
Image control buttons appear only after a customer uploaded a picture. They
usually take up a portion of the preview area, so after they appear the
preview resizes to make room for the controls.
You can avoid this resizing, by disabling the **resize preview to fit image
control buttons** option.
When disabled, the image control buttons will have a fixed location, and the
preview won't change size.
When enabled, the preview will automatically downsize when the image control
buttons appear.
To enable/disable this option
When this function is enabled, the preview will automatically downsize when
the image control buttons appear, and enlarge when the controls are not there.
When disabled, the image control buttons will have a fixed location so the
preview won't change size.
- Open store.
- On the top menu go to Settings, and open the tab Preview Behavior
- Open theSettings section
- Scroll down the page until you find theImage Upload Manipulation
options
- Enable the Resize preview to fit image control buttons options
💡 Tip:
We recommend having this enabled if your products don’t have photo upload.
▶ Let customers share their personalization
You can let customers share on social media (Facebook, Twitter, Pinterest) or
email their personalizations. When sharing them, others will be able to see
what he personalized, what options he chose, the preview, and even add the
product to cart and make a purchase.
To enable personalization sharing
- Open store.
- On the top menu go to Settings.
- Open the Advanced tab
- Under Save and Share personalization Enable **Allow personalization
sharing**

How does sharing work?
After enabled, your products will have a button similar to this one:

Once you click on it the following screen with these options will appear:
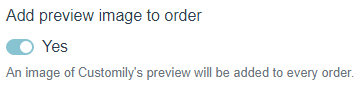
▶ How to add the preview image to the order details
When activated, this option will add the item "preview: link" on the order
information. By clicking the link you will be able to see the preview
customers were seeing when buying.
When disabled, the customer will see the image in the shopping cart but not on
the order.
To add the preview image to the order
- Open store.
- On the top menu go to Settings.
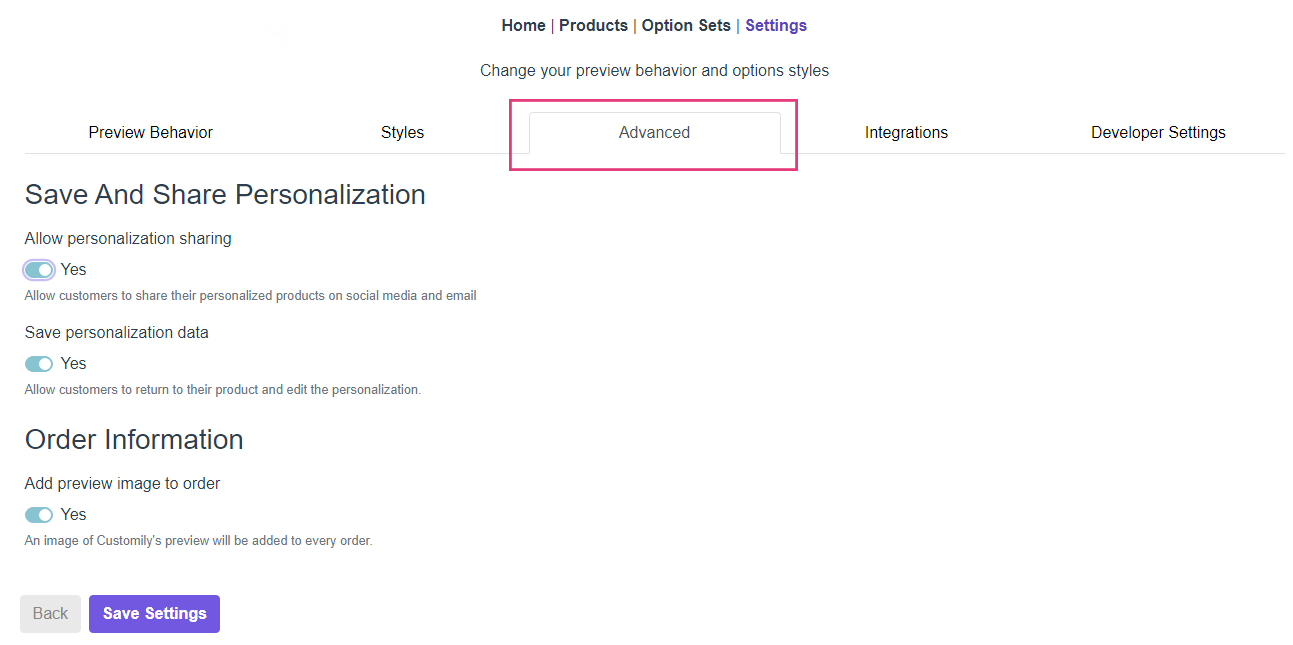
- Open the Advanced tab, go to Order Information section, and enable
(or disable) the Add preview image to order option
▶ How to add the production file link to your order confirmation email
If you want to add the production file link from Customily inside the order
confirmation email your customers will get once they place an order, you just
need to edit the template that Shopify uses to create those emails. For more
information on this, we recommend you read the following articles:
There you’ll find all the information you need to know on how to properly edit
Shopify’s email template.
Customily stores the production file URL in the order properties, so you can
easily access it through the line item properties. In this case, the specific
property for the production file is called:
"_customily-production-url "
Here’s an example of how you would use it in the order confirmation email
template from your store:
{% if line.properties['_customily-production-url'] %}
<span class="order-list__item-title">
<a href="{{ line.properties['customily-production-url'] }}" target="blank">Production file</a>
{% endif %}
Once you copy this, a link to download the production file will be added to
the order confirmation email!
Digital Product Version
If you want to include the link only when the product or variant is marked as
a Digital product, use this version.
{% if line.requiresshipping == false or line.producttype == 'digital' %}
{% if line.properties['_customily-production-url'] %}
<span class="order-list__item-title">
<a href="{{ line.properties['customily-production-url'] }}" target="blank">Production file</a>
{% endif %}
{% endif %}
Keep in mind
The email confirmation template may vary from store to store. You have to find
the line in your Shopify template where the product item is inserted and add
the production file URL in the right place.
▶ Access Customily through Shopify
Follow these steps to login to your Customily Account through Shopify:
- From your Shopify Admin, select Apps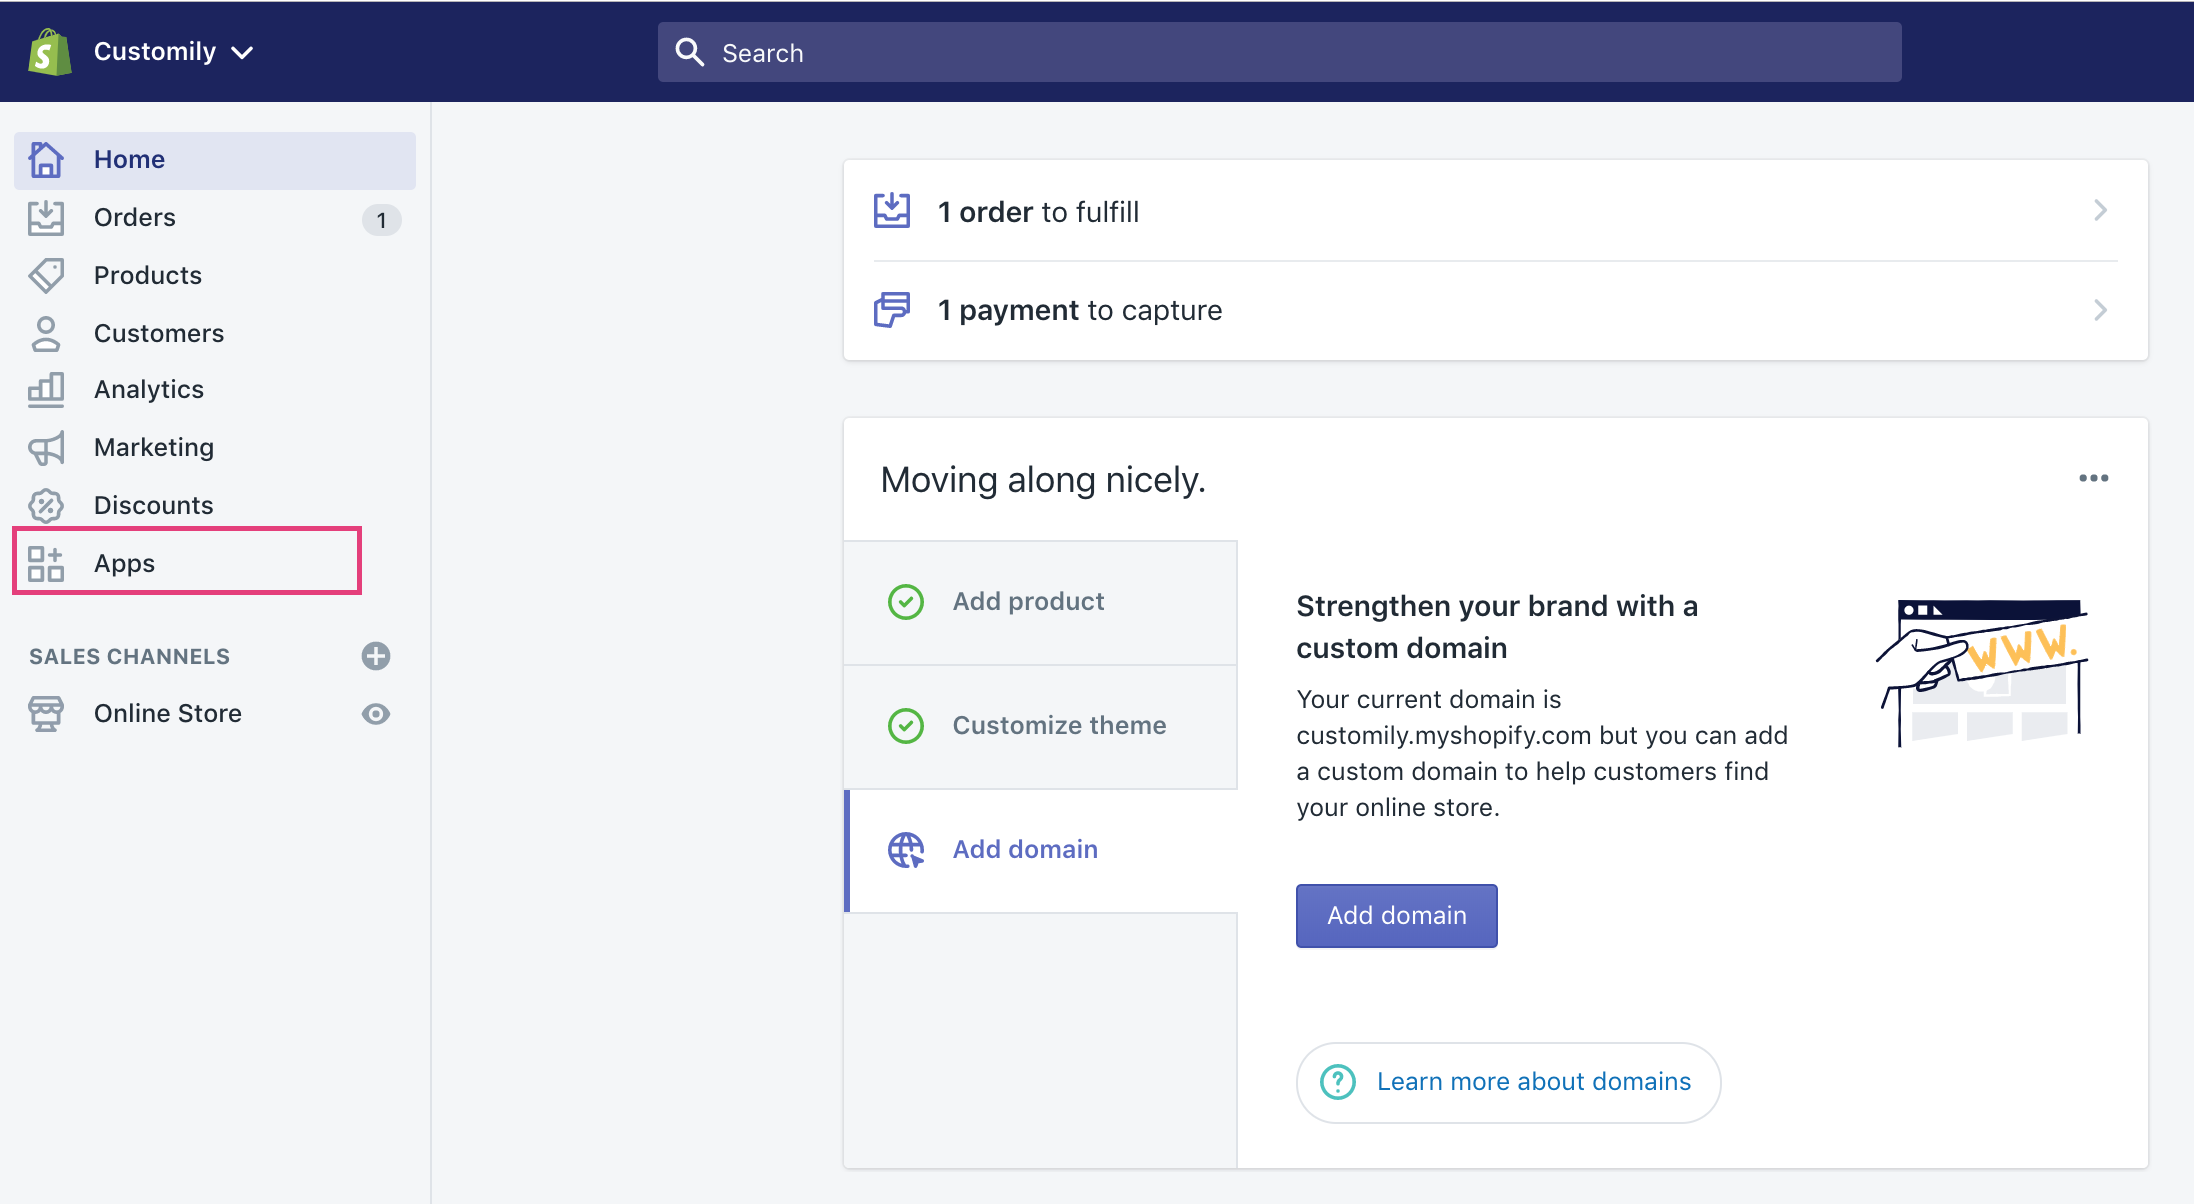
- From your App list select Customily
▶ How to add the personalized image to your order confirmation email
If you want to add the personalized image from Customily inside the order
confirmation email your customers will get once they place an order, you just
need to edit the template that Shopify uses to create those emails. For more
information on this, we’d recommend you read the following articles:
There you’ll find all the information you need to know on how to properly edit
Shopify’s email template.
Customily stores the personalized image URL in the order properties, so you
can easily access it through the line item properties. In this case, the
specific property for the preview image file is called "_customily-preview
".
Here’s an example of how you would use it in the order confirmation email
template from your store:
Here's the code so you can easily copy it into your template:
{% if line.properties['_customily-preview'] != blank %}
<img class="order-list_product-image" src="{{ line.properties['customily-preview'] }}" width="60" height="60" align="left">
{% endif %}
Once you copy this, the Shopify product image will be replaced with the
Customily personalized one!
Keep in mind
The email confirmation template may vary from store to store. You have to find
the line in your Shopify email template where the product image is inserted
and replace it with the Customily image instead.
▶ What's the difference between WooCommerce Variations and Customily Options?
WooCommerce variations are WooCommerce's standard way to add options to a
product. You add variations to a product that comes in more than one option,
such as size or color.
WooCommerce variations let you adjust the settings for the product for each
variation, with control over Prices , Stock , Shipping and more
for each variation.
📝 Note:
Variations are usually displayed as dropdowns. If you want to change how
variations appear on your product page, you need to edit your WooCommerce
theme or use third-party apps to customize them.
Customily Options are Customily's way of adding personalizable options to a
product. You can add options for endless aspects of your product, color,
style, pattern, text, fonts, etc.
Options in Customily come in different forms, such as text fields, dropdowns,
swatches, and image upload buttons.
Customily functions do not control Pricing ,Stock or Shipping.
There is no limit on how many options you can add with Customily Options.
However, we recommend to keep it to a reasonable amount, to avoid overwhelming
your customers with infinite options.
📝 Note:
The way Customily Options are displayed depends on the type of option if it's
a text field, a swatch, a dropdown, etc.
Styles are usually picked up from your theme automatically, however, if you
want to change styles you can do that through simple CSS. Learn how to change the styles of your options here.
When should I use WooCommerce Variations?
Use WooCommerce Variations if you want options to:
- Affect the product price
- Affect inventory
Otherwise, adding Customily Options is a better way to go, since you won't
have limitations and you will be able to customize the options to look the way
you want!
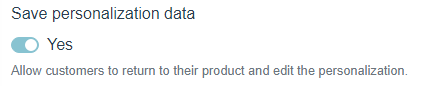
▶ Save Personalization data
By activating this option a property named "_customily-customization-url" will
be added to every item in the cart. It contains an URL that, when visited,
will open the product with all the personalization that was entered by the
customer before adding the product to the cart.
This is great if you want to use the personalization URL to send to customers
on marketing campaigns, cart recovery, and more.
To enable save personalization data
▶ Where do I get the personalization information in WooCommerce orders?
All the personalization information from an order will appear in your
WooCommerce Order manager.
This information includes:
- All the personalization fields the customer entered. For example text inputs, color choices, etc.
- A link to the preview the customer was seeing when buying.
- A link to the production file (if you are using Customily's Preview + Production Plan).
- If your product lets customers upload their own picture, a link to the raw uploaded picture.
To find your personalization information within the order
- Browse to WooCommerce Order manager.
- Find the customer order you want to get the information from and click on
it to view the details.
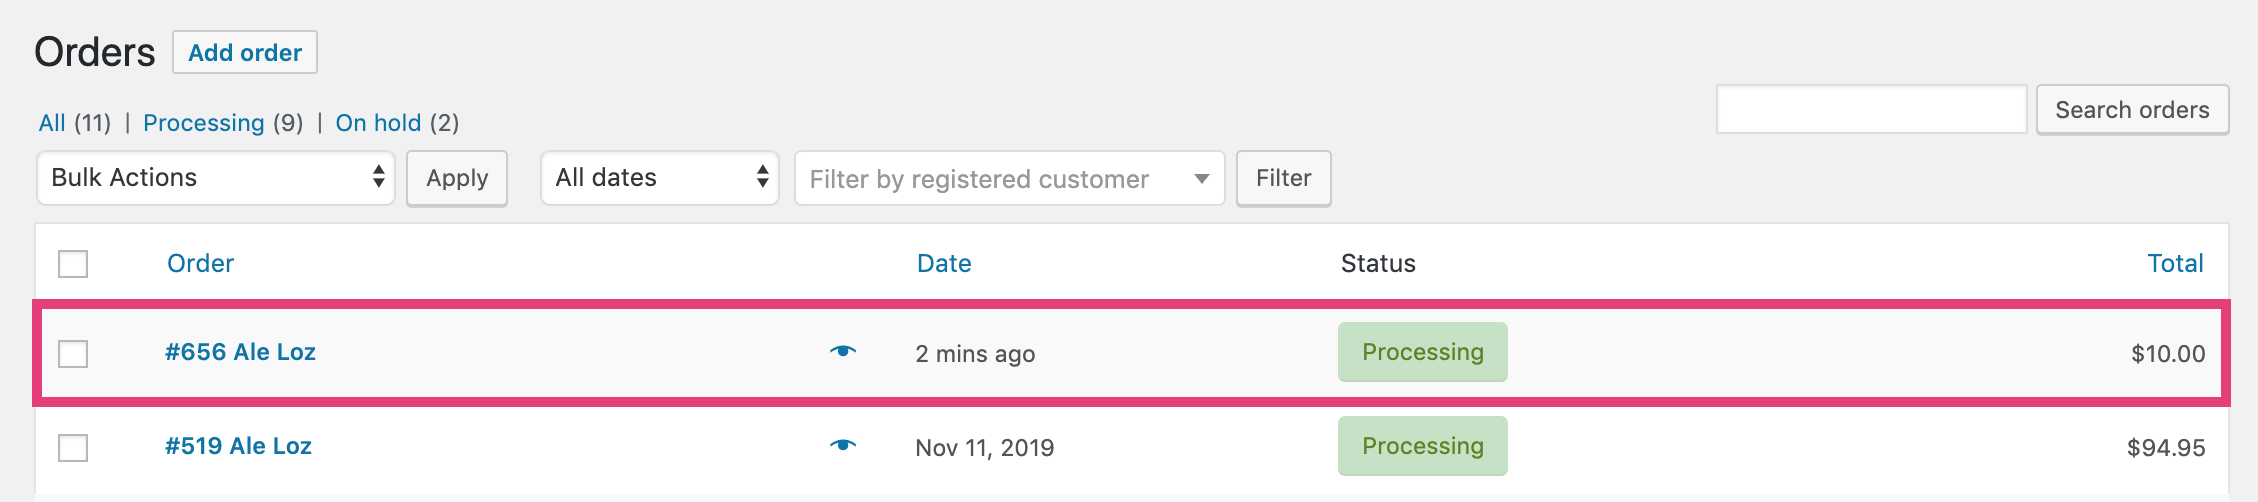
- In the first section of the order details, together with the customer,
billing and shipping information, you will find the production file links.
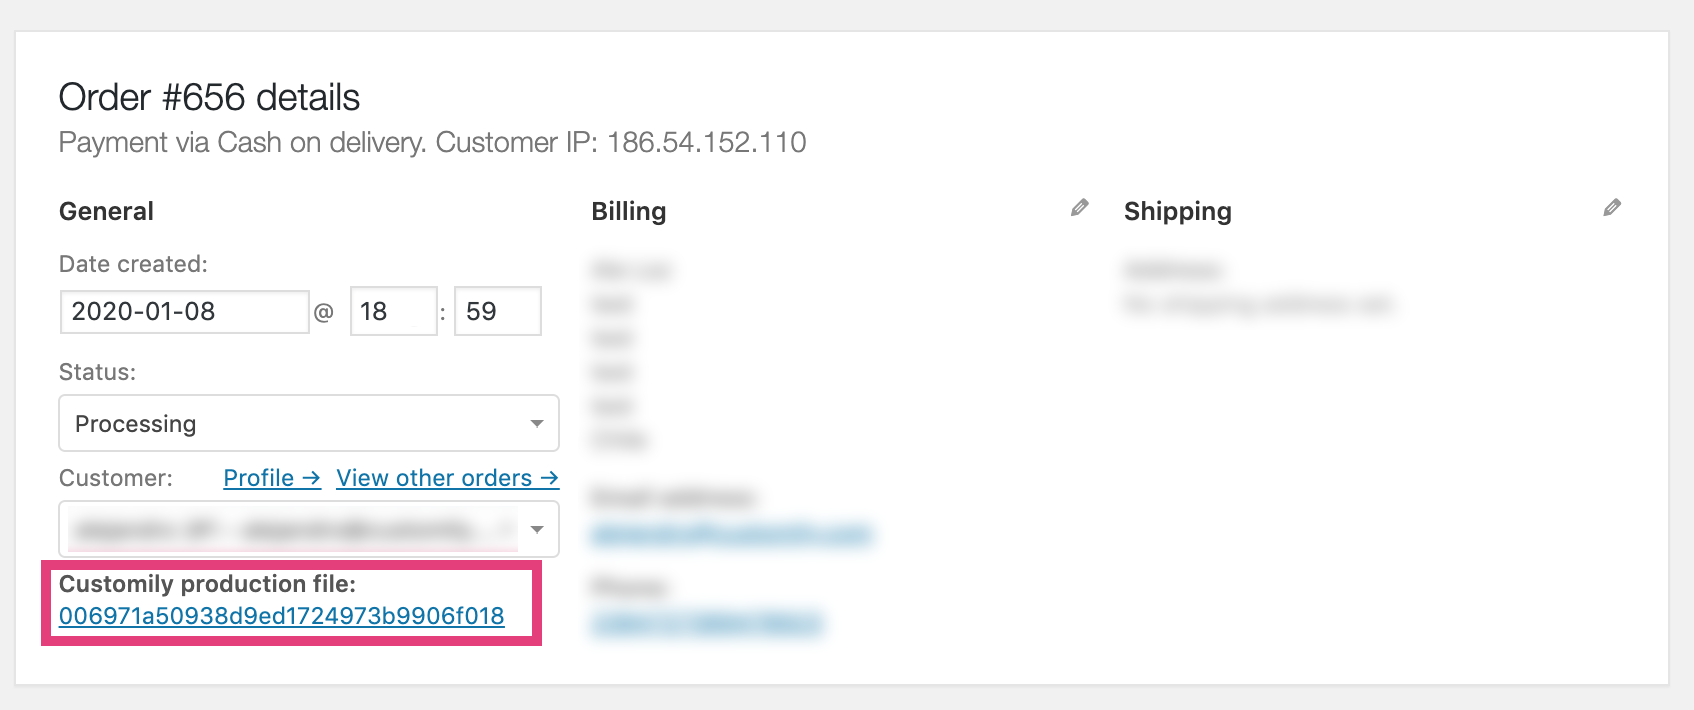
If your customer purchased more than one item, a list with the production
files for each of those items will appear.

Tip
To download the production file just click on the link. The file will be
downloaded on your browser's defined download folder.
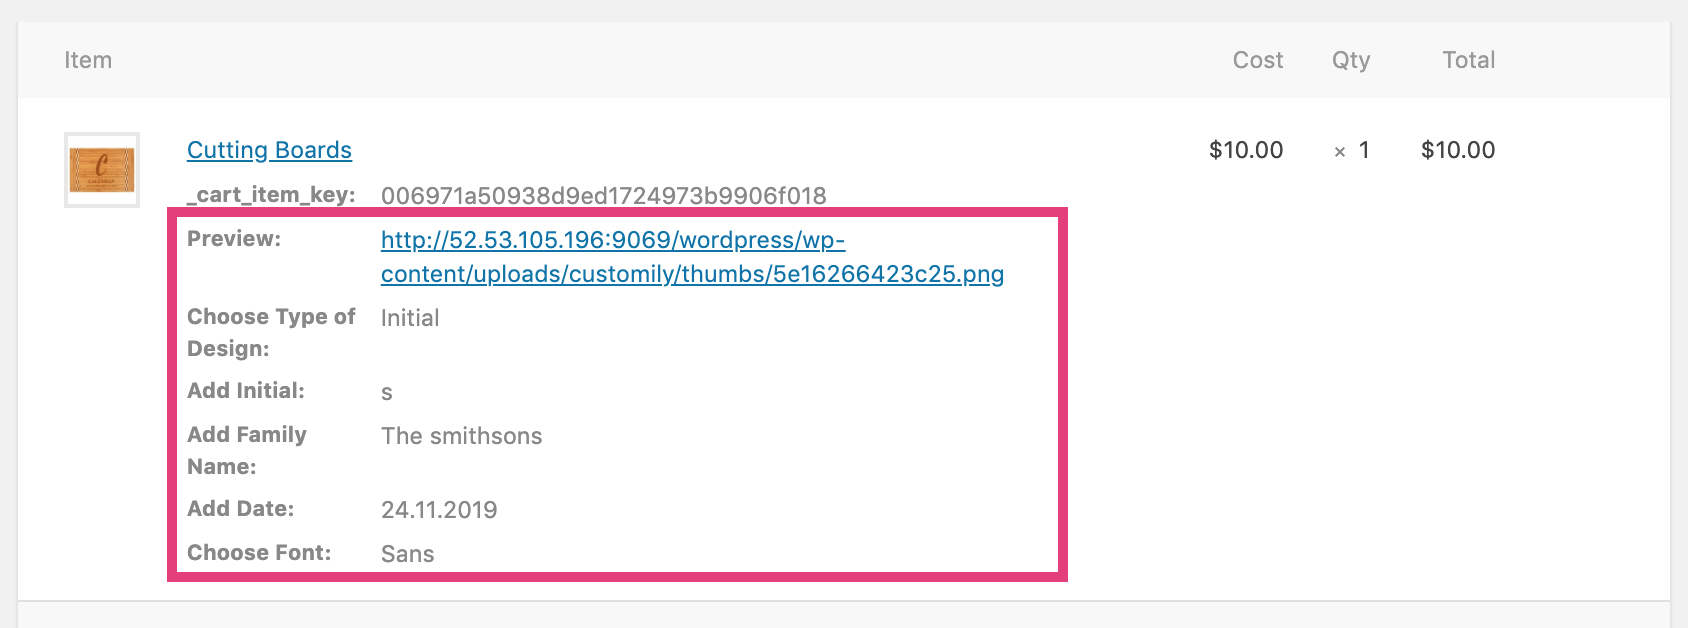
- In the second section of the order details, where you find the detailed
information for each line item of the order, you'll see the rest of the
personalization information. This is, the fields the customer entered, the
dropdowns and swatches he chose, a link to the preview, and a link to the
image uploaded by him (if your product has image upload).
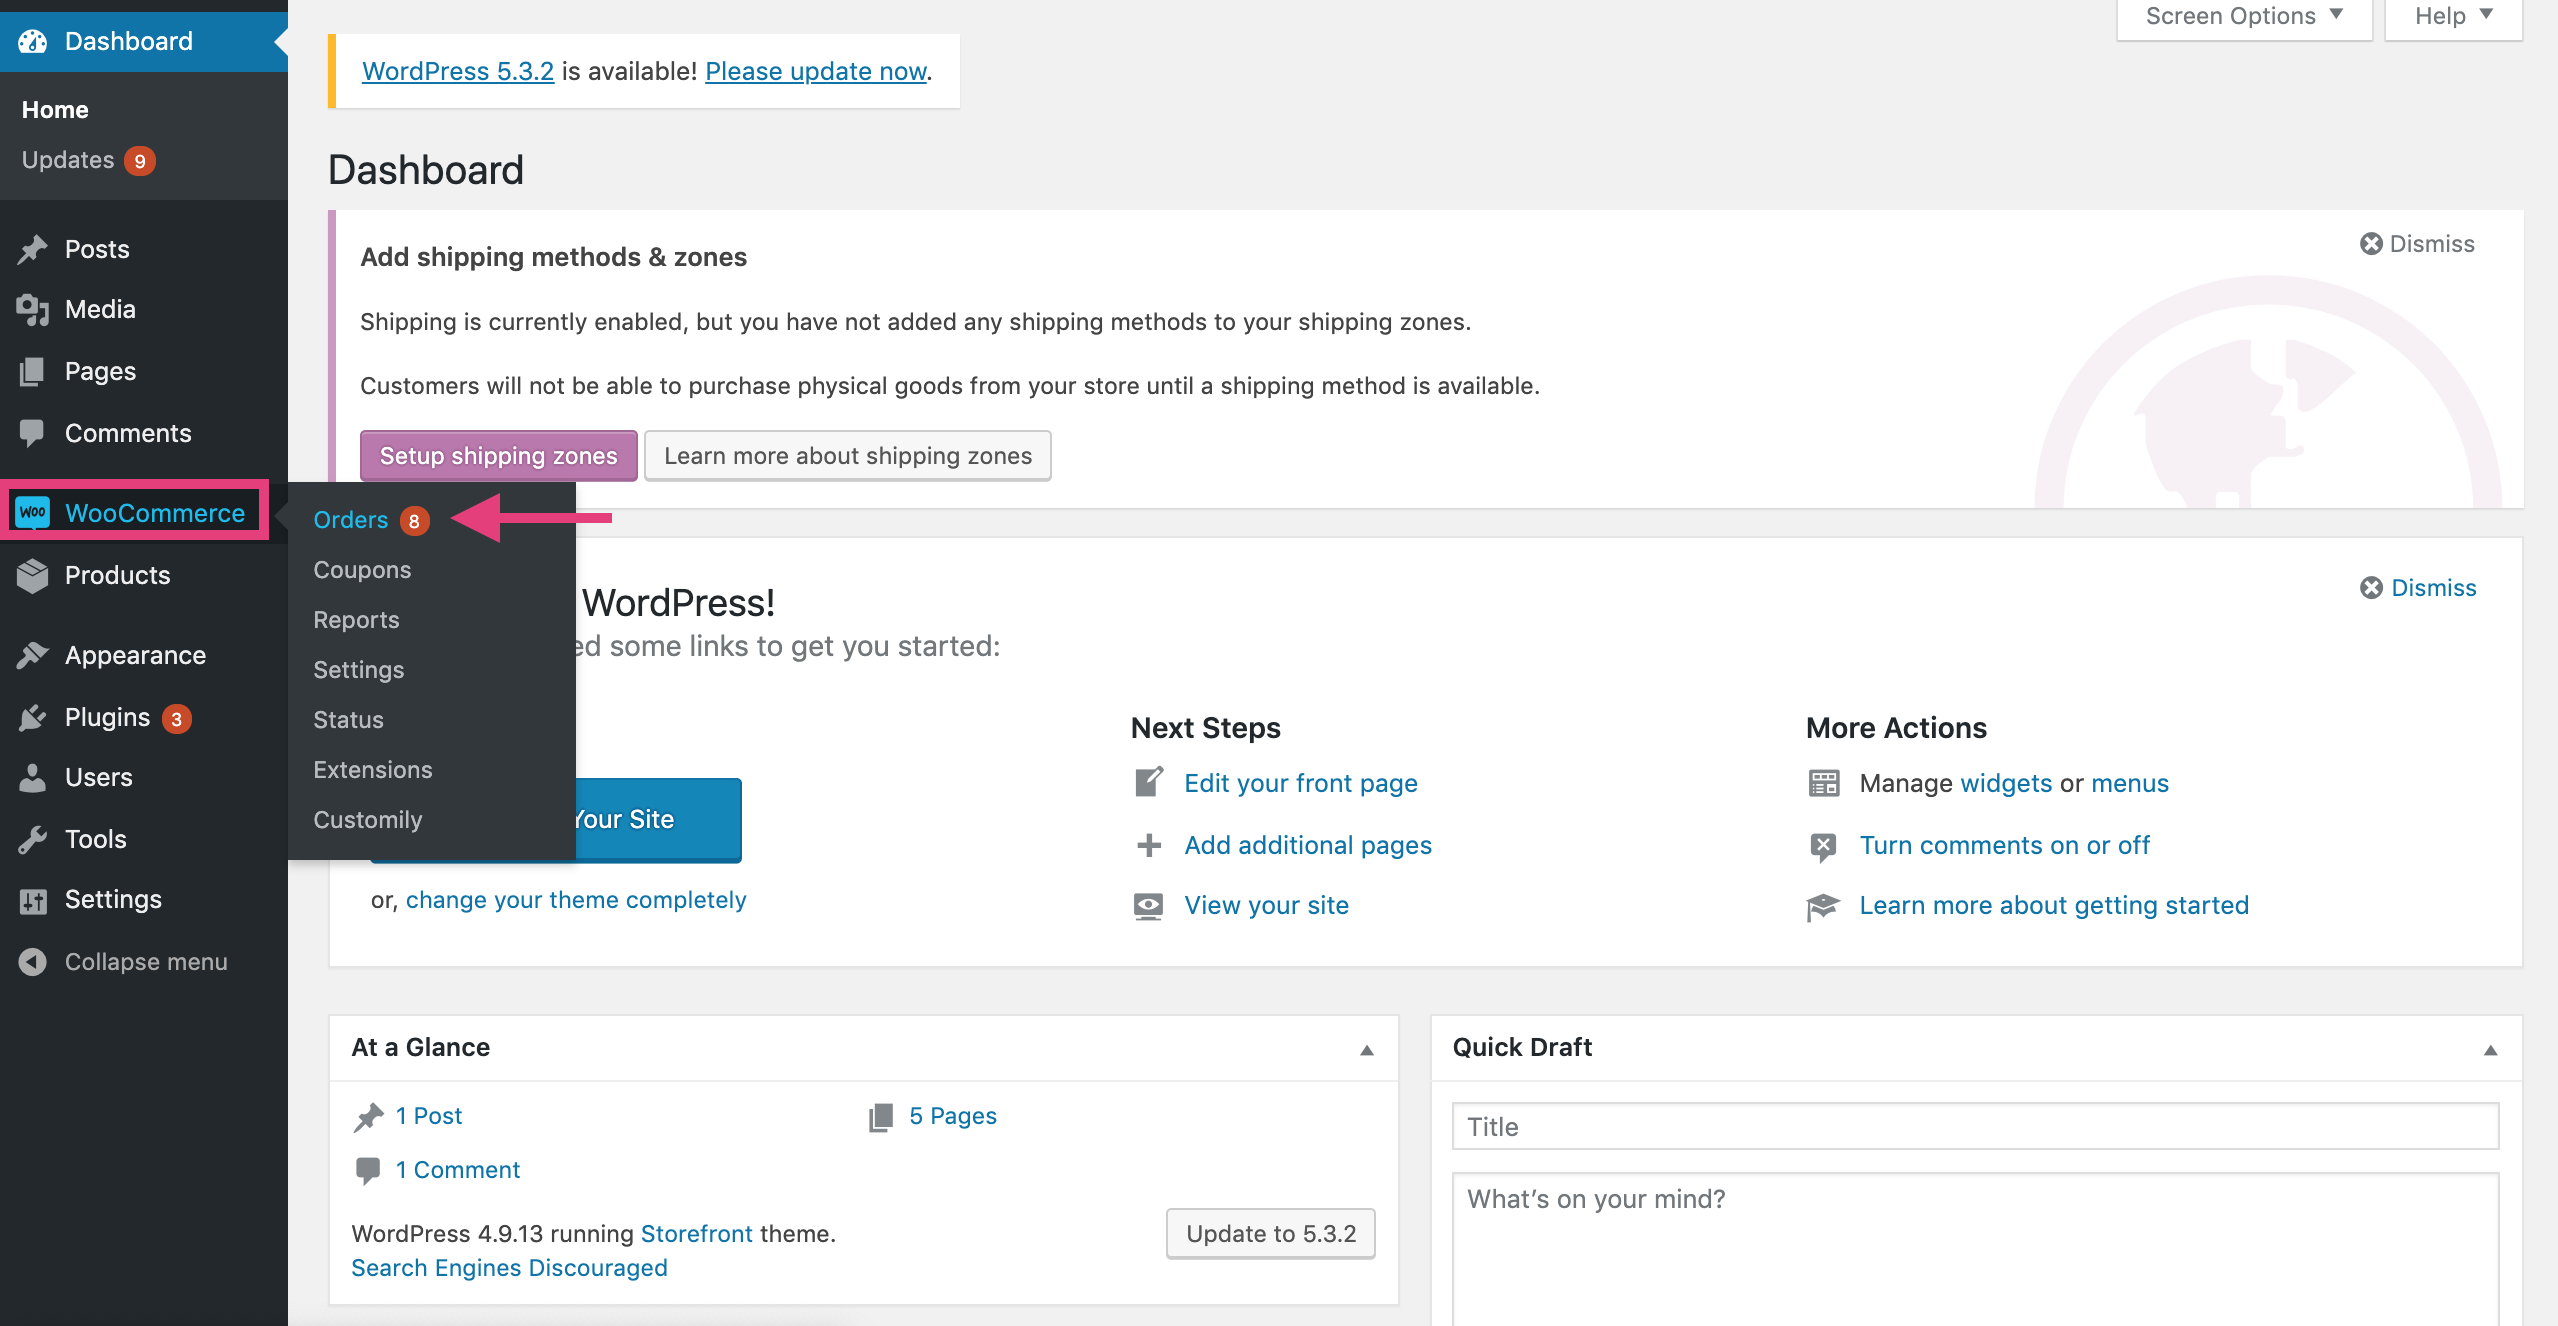
▶ Access Customily through WooCommerce
Follow the steps to login to your Customily account through WooCommerce
- On WordPress go to WooCommerce > Customily

- Click to launch Customily **
**

▶ Access your store's products on Customily
Follow these steps to access your stores' products on Customily:
From your Customily Admin, select Store on the left toolbar
▶ Assigning previews and options to your store's products
Follow these steps to connect a preview template with your store's products.
- Open store
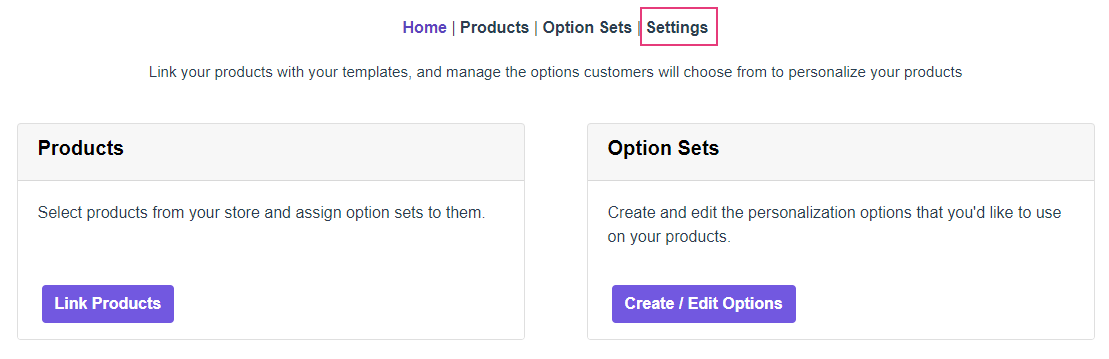
- Select Link Products to browse through your store's product list
- Choose your product from the product list by clicking on it
💡 Tip:
You can search and filter products with the search
bar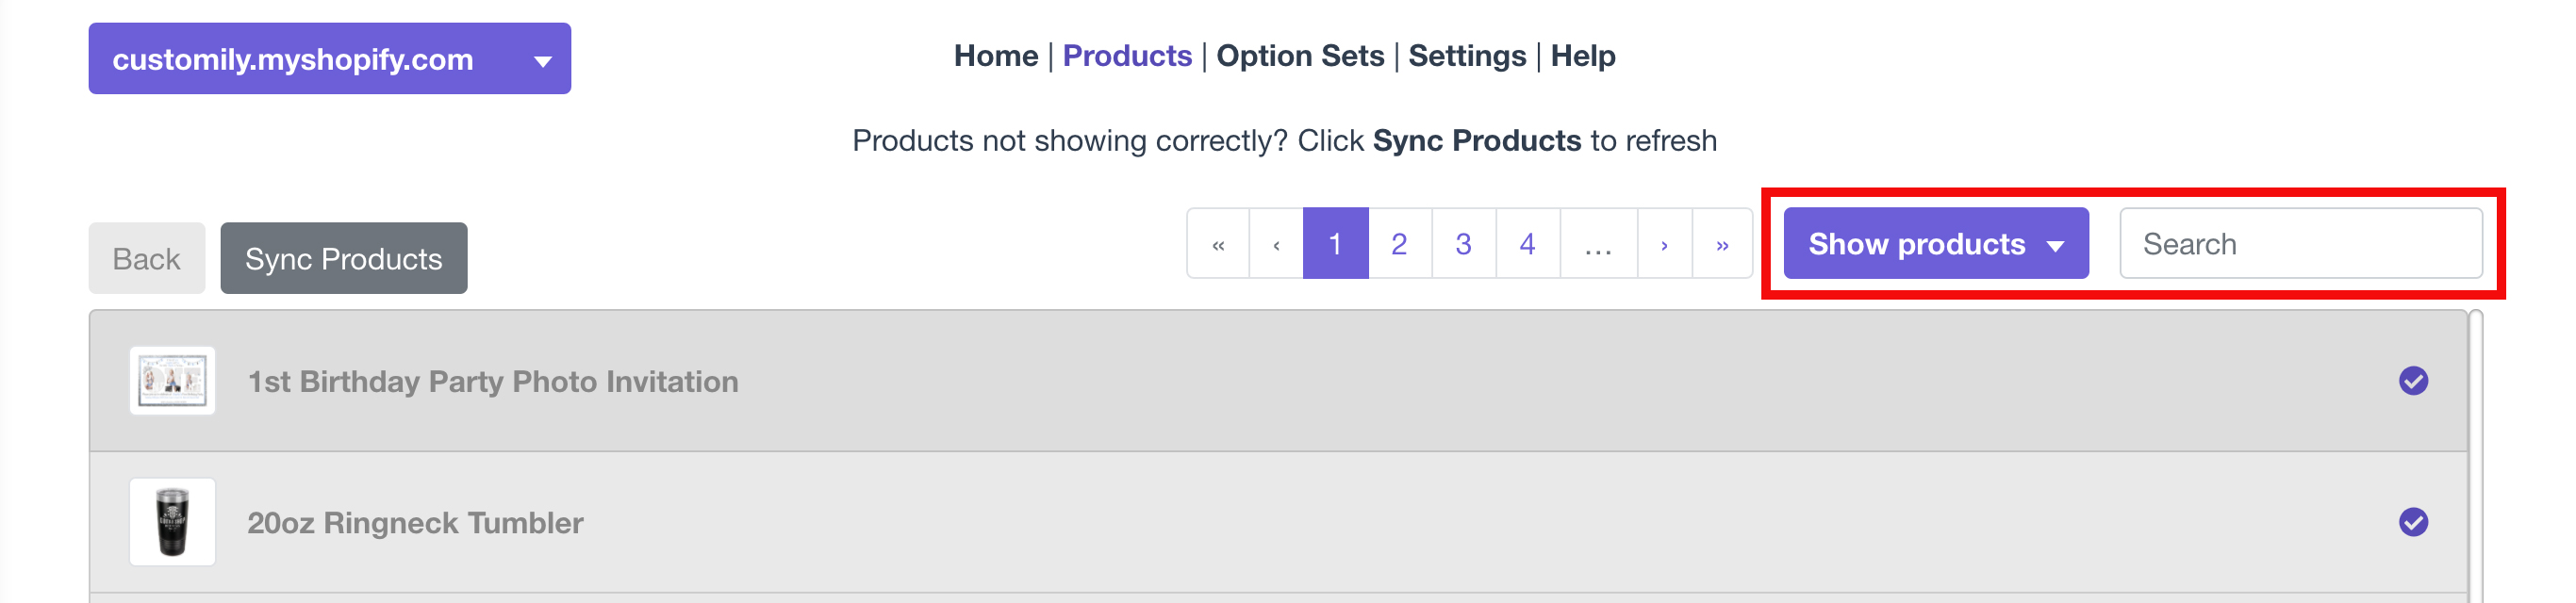
- Click on Choose Template and select a Customily Template to assign to
the product. You'll see a list of your templates will be displayed.
- Click create option set from template to automatically generate an
option set.
- Give the option set a name and click save.
📝 Note:
If you want you can also create option sets manually and assign them to your
- Once the creation of the set is complete, it will be automatically
assigned to your product.
💡 Tip:
You can assign multiple option sets to a product. This is useful if the
product has lots of options and you want to keep them organized as separate
option sets.
- If your product has Variants you can assign Customily Functions to them,
so when a customer chooses a variant it will affect the preview.
- If your product has Variants you can condition options from Customily to
appear only when certain variants are selected.
Conditions for variants will let you show or hide an option when a variant is
selected.
- When ready, click save product at the top of the page to save changes.
💡 Tip:
You can easily access your product to check how the options and the preview
look by clicking the eye icon next to the product's title.
▶ Preview styles
The preview in your store can be shown in different ways, this is what we call
preview styles.
There are 3 preview styles available. You can choose to display the preview in
one style or a combination of 2 styles.
The styles available are:
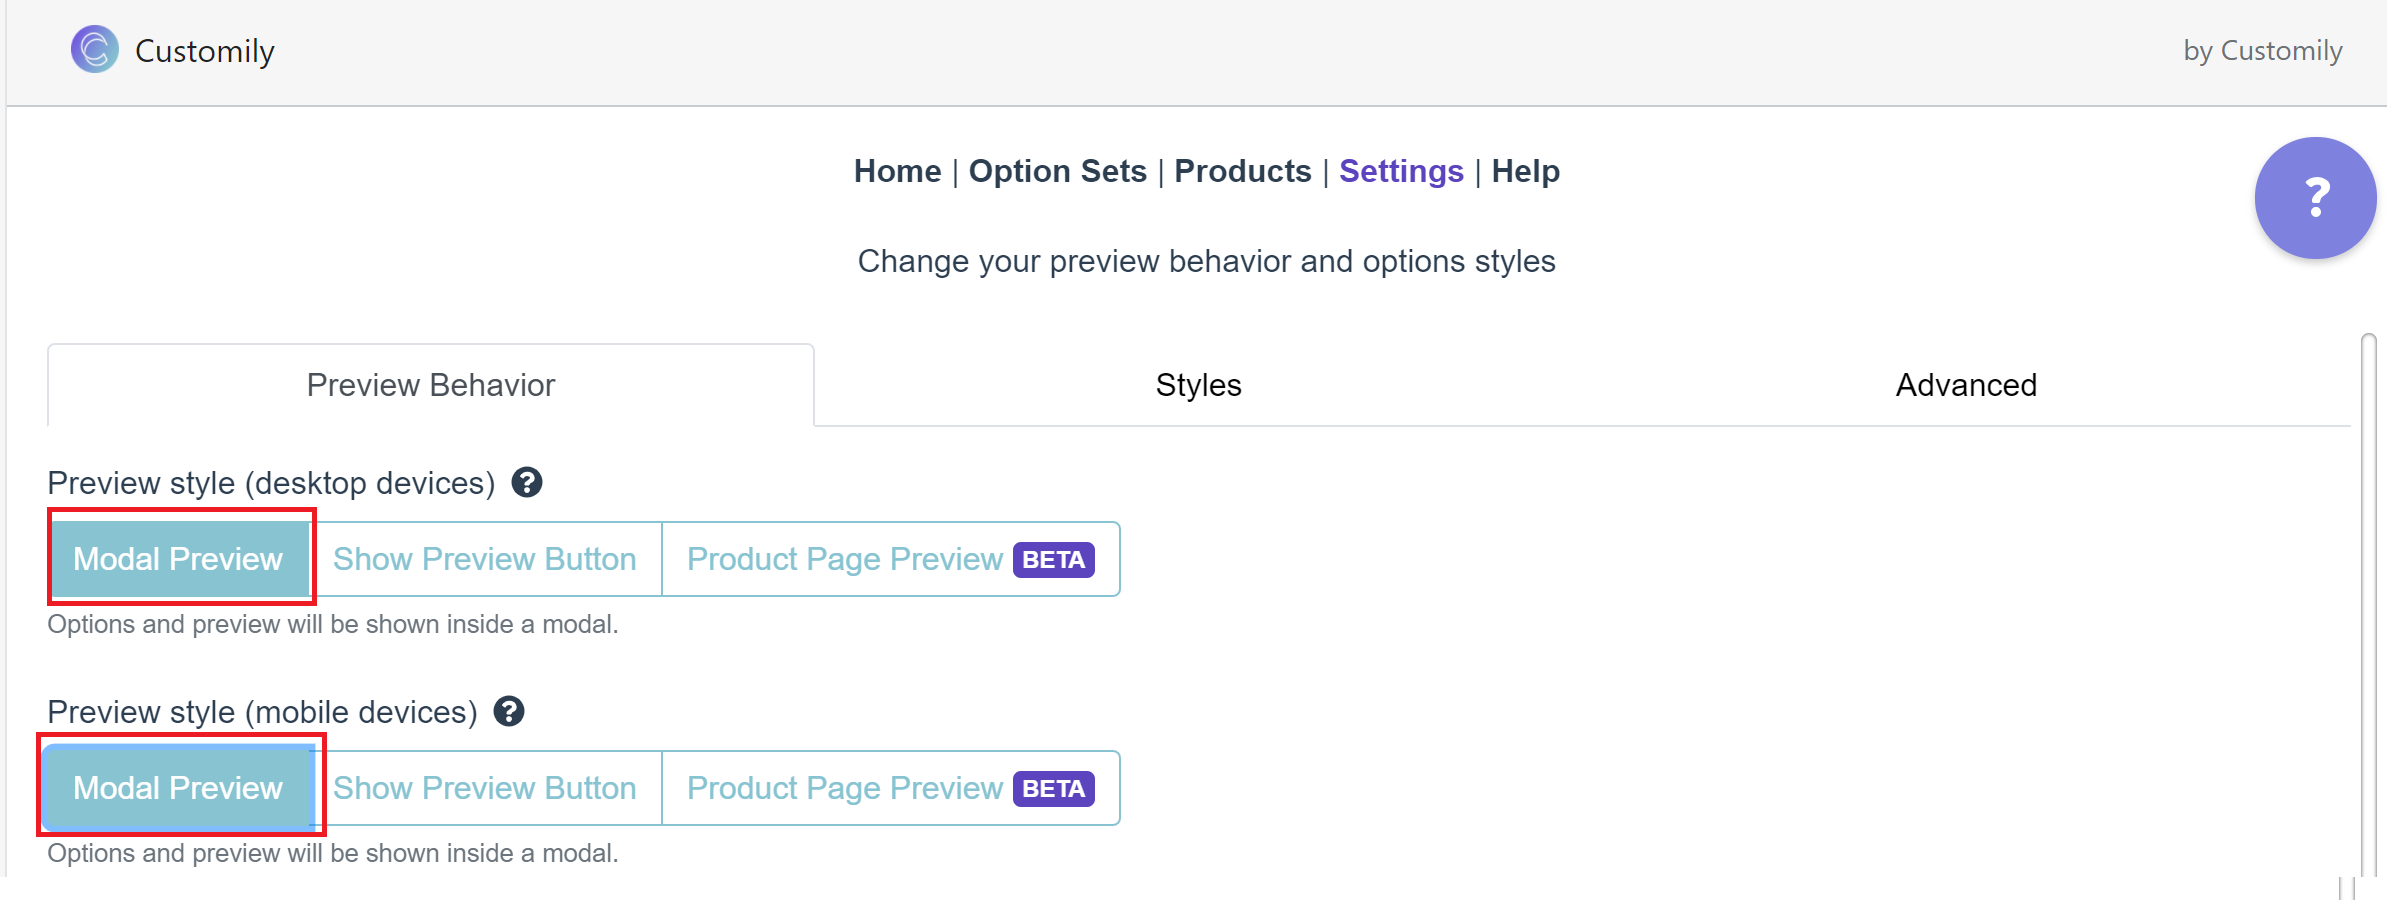
Modal Preview
A Personalize Button will be added to the product page. When customers
click the personalize button, a modal will appear with the preview and the
personalization options.
When customers interact with the options, the preview will change in real
time.
This is the default preview style when you instal Customily Options App.
To set the preview style to Modal Preview
Open **store** and go to settings. Under preview behavior, select
Modal Preview
Product Page Preview
The personalization options and the preview will be added to the product page.
The options will be added inside the product form (usually between the product title and the add to cart button). The preview will be added over the
product's picture.
When customers interact with the options, the preview will appear instead of
the product picture. The preview will change in real-time.
To set the preview style to Product Page Preview:
Open **store** and go to settings. Under preview behavior, select
**Product Page Preview
**

On some extensively modified themes, the Product page preview may not work. If
this is the case, please contact our support team
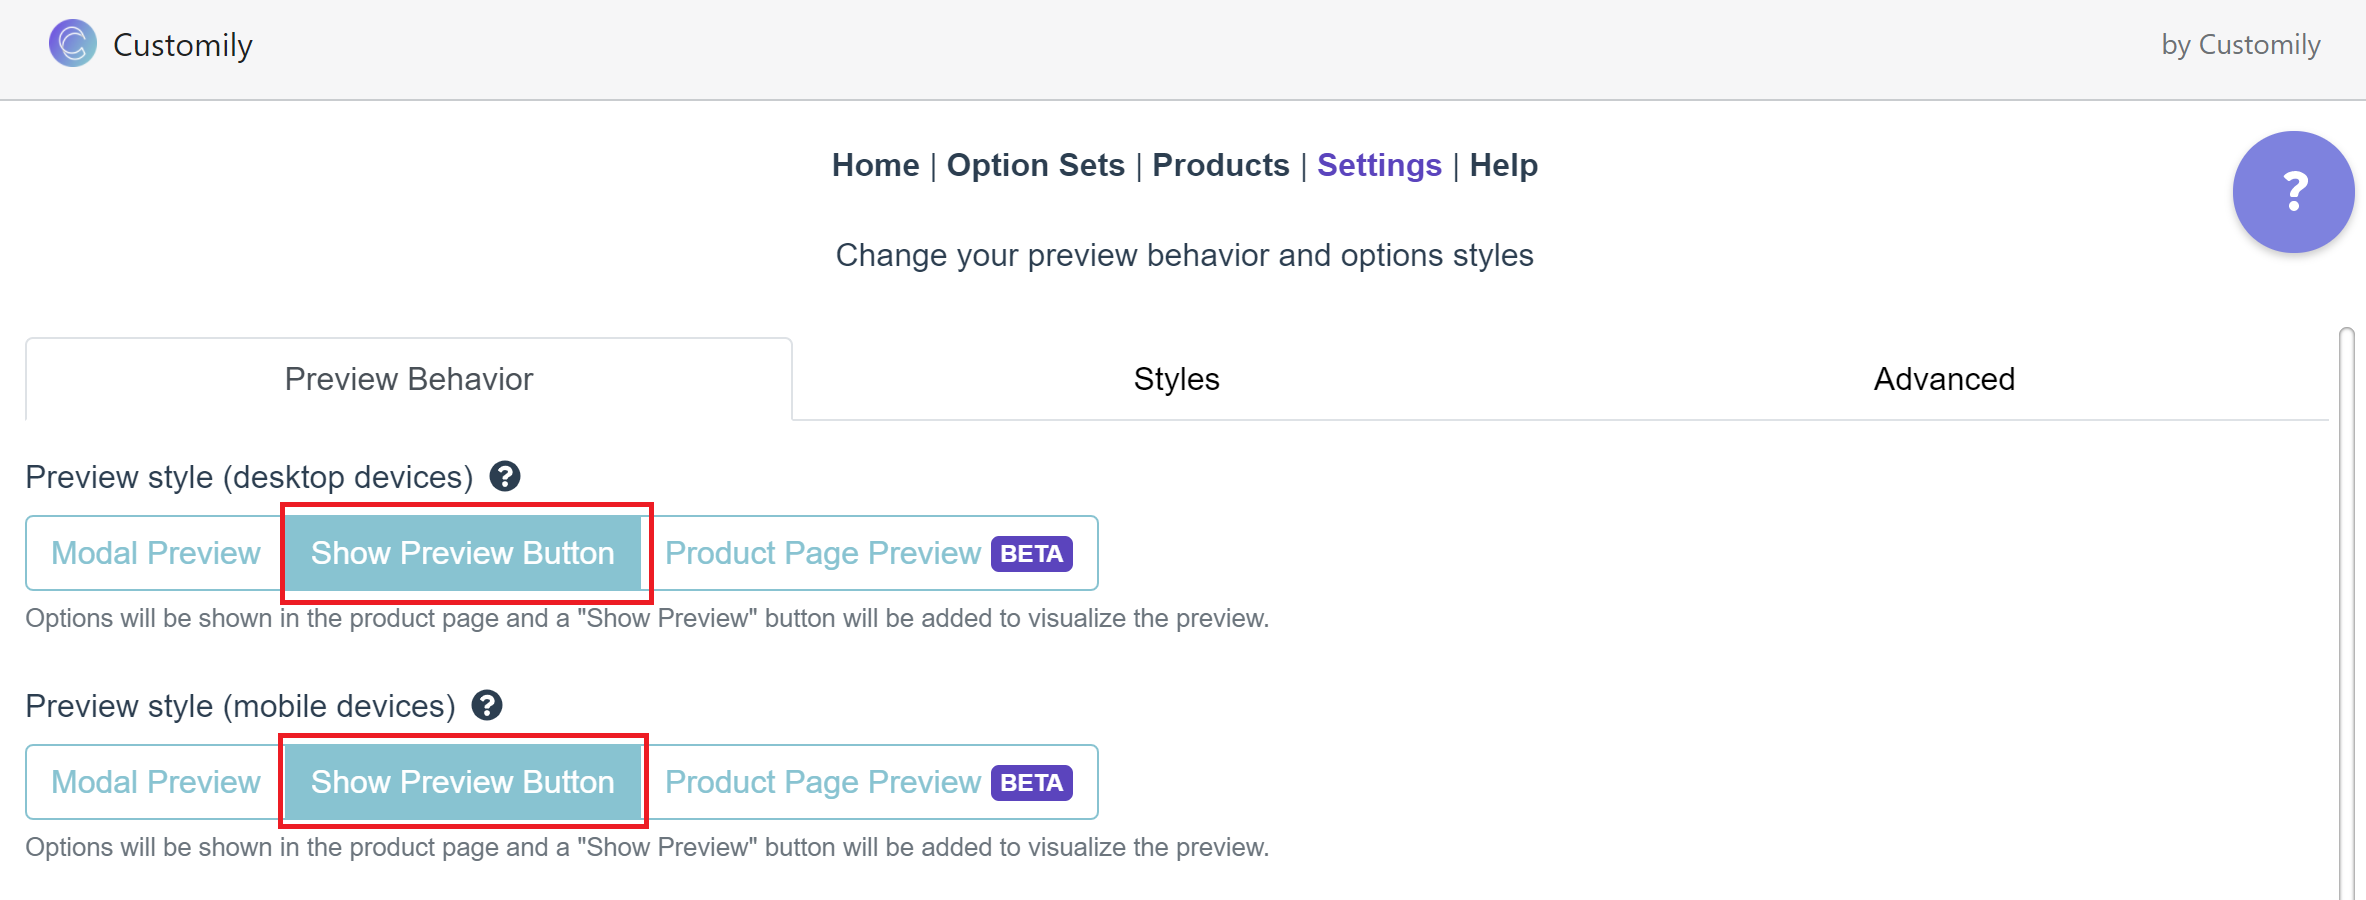
Show Preview button
The personalization options and a Show Preview button will be added to the
product page. The options will be added inside the product form (usually between the product title and the add to cart button). The show preview button
will be added at the end of the options.
When customers interact with the options, no preview will be displayed. Only
when customers click the Show Preview button, a modal with the preview
will appear.
This style can be combined with the product page preview.
To set the Preview style to Show Preview Button:
Open **store** and go to settings. Under preview behavior, select
Show Preview Button
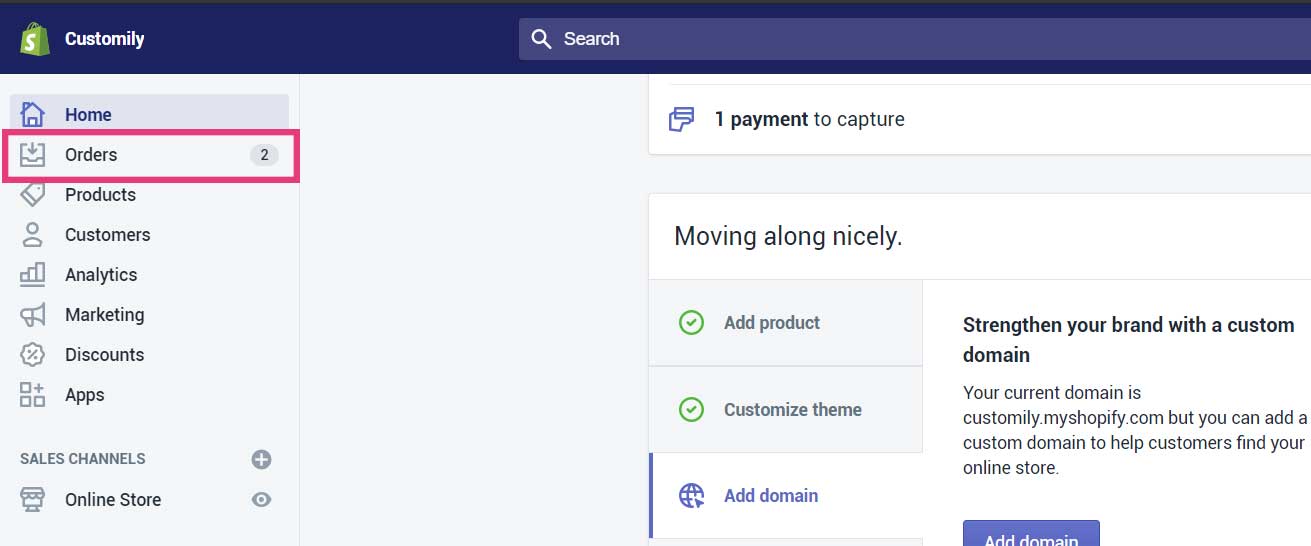
▶ Orders Dashboard
On the dashboard, left of the screen, you will find Orders. There you can
check all your recent orders of your personalized products. This feature is
currently on _BETA_ , which means there are still improvements.
You can use it to check your recent orders.
Customilytip 📝
If you have any suggestions to improve this new feature or ideas for new ones,
you can always access our _Canny portal_ to let us know!
Orders Manage Dashboard
When you click on orders, you will access the orders dashboard.
Here you will see the list of your recent orders with Customily, with the
following information:
- Preview of the product
- Order number
- Date of purchase
- Name of the product
- Name of the customer
- Quantity
- Link to the corresponding Print File
- Name of the fulfillment company (or if its manual)
By default, it will show you the orders for the current month. You can change
to a previous month to see old orders.
You can click on EXPORT CSV to download all the information to your
computer. You can also use the search bar to look for a specific order.
If you click on the production file link, it will take you to it directly, so
you can download it or share it.
Modify An Order Or Generate A New Print File
If your customer needs to change the personalization, search for the order on
your dashboard and click on it.
It will take you to the following screen:
From here, you will see the preview of the product again, with the options
your customer selected for the order.
Just pick the new options and then click on GENERATE NEW PRINT FILE. When
it's ready, you will be able to download it from the link that appears above
the button.
It will also show you the date of the last generated print file, so you can
track if it's the original one or if it has already been modified.

▶ Move Customily Options Setting
In general, Customily options should be positioned before the **"Add to
Cart"** button. However, in some cases, they may appear in the wrong location,
requiring an adjustment to their position.
Additionally, some clients, for aesthetic reasons, request that these options
be placed in a specific location according to their preferences.
**To move the options to your preferred location, we have added a new
setting**
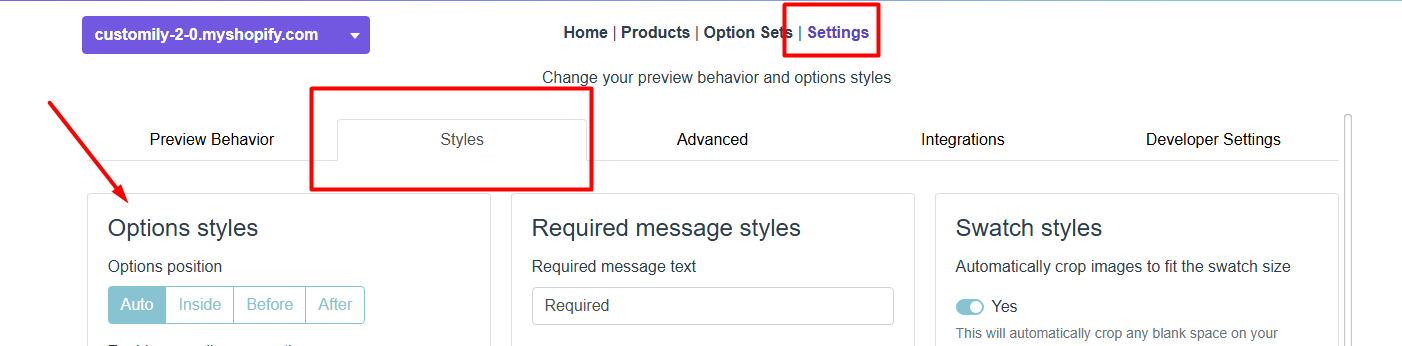
- Open the app Settings
- Go the the tab **Styles
**
How does it work?
Don’t worry, it’s very easy, and you’ll enjoy doing it. All you need is the
selector of the element that will serve as a guide to position the options as
you prefer (Auto, Inside, Before, After).
How to inspect an element and get its class or ID to use it as a selector:
- Right-click on the element you want to inspect on the webpage and select "Inspect" (or similar, depending on your browser's language).
- The developer tools panel will open, showing the page's HTML code.
- Hover over the lines of code until the element is highlighted on the page.
- Look for the
classoridattribute in the HTML tag of the element:
- If it’s a class, it will appear in the
classattribute, e.g.,class="my-class".
- If it’s an ID, it will appear in the
idattribute, e.g.,id="my-id".
- Copy the class or ID you want to use.
- Use the selector in your code as follows:
- For a class, precede the name with a dot (
.), e.g.,.my-class.
- For an ID, precede the name with a hash symbol (
#), e.g.,#my-id.
Once you have the selector you will use as a guide, follow these steps:
- Select the position where you want the options to appear (Auto, Inside, Before, After).
- Enter the selector in the text bar that appears after clicking on one of the position options.
- Don’t forget to click Save.

▶ Pre-Fill Customization Options with URL Parameters
Set prefilled values via URL parameters – A powerful new feature that lets you
customize product links by setting initial values dynamically.
✨ How It Works:
✔ Define a variable name in your Text, Swatches, or Dropdown options (see below screenshot).
✔ For Swatches and Dropdowns, use the 'Value' field of the option to pass the
value in the URL.
✔ The values persist when navigating to other products with matching variable
names, ensuring a seamless experience.
🔗 Example:
If you set "name" as your variable (@name in the option), you can generate a
link like this:
👉 yourstore.com/productHandle?@name=John
This will automatically populate the customization field with "John."
For Swatches and Dropdowns, use the 'Value' field to pass values like this:
👉 yourstore.com/productHandle?@color=Red
🔄 Persistent Customization:
If a customer personalizes a product and then browses to another product with
the same variable (e.g., "name" or "color"), the value will carry over—so they
don’t have to enter it again!
This feature works with Text, Swatches, and Dropdown options, making it
perfect for:
🚀 Streamlining the personalization process
🎯 Running targeted campaigns
🛍️ Enhancing the shopping experience
▶ Add personalized preview link on Thank you and Order Status pages.
You can customize the checkout experience and display a link to each product’s
preview image on your Thank you and Order status pages. This is done by
enabling the Customily App Embed for checkout.
Here's how to do it
- Access the Checkout Editor. Go to Settings > Checkout and click Customize!Customize checkout.png
- Once inside the Checkout customization screen, click on the Apps tab.
- Search for Customily in the app list. Look for the app embed called Customization Image Preview and click the + button next to it. Choose Add to Thank you or Order status to enable it.!Thank you Order Status.png
- If you want to add it on both pages, repeat the process and select Add to the other page where you want to add it.
- Don’t forget to Save your changes in the top right corner once you're done!
When added to the Thank you page, products personalized with Customily will
include a new link in contains the preview image! When shoppers click it, a
bubble with the preview will be visible.
When added to the Order Status page, products personalized with Customily will
include a new link in contains the preview image! When shoppers click it, a
bubble with the preview will be visible.!order status.png
▶ How to add a link so customers can view the personalization on their cart
If you want to add a link on your customers' cart page that allows them to see
the preview image of their personalized product follow these instructions.
To add a View Personalization link on the cart page
- Go to the Shopify theme you want to use and click on Actions \- **Edit
code**
- Identify the cart page file. This could have one of the following names:
- cart-template.liquid
- cart.liquid
- template--cart.liquid
- Find the piece of code that renders and filters the properties of the cart
items. It
looks something like this:
{%- assign property_size =item.properties | size -%}
{%- if property_size 0 -%}
{%- for p in item.properties -%}
{%- assign firstcharacterin_key = p.first | truncate: 1, '' -%}
{%- unless p.last == blank or first characterinkey == '_' -%}
{{- p.first | append: ":" | append: ' ' -}} {%- if p.last contains '/uploads/' -%} {{ p.last | split: '/' | last }} {%- else -%} {{- p.last -}} {%- endif -%}
{%- endunless -%}
{%- endfor -%}
{%-endif-%}
- Insert the following code after the { %- endfor -% }
{% if item.properties['_customily-preview'] %}
View Personalization
{% endif %}
When added it should look like this:
Note:
You can change the text of the link by editing the text that's inside the
label. In this case, you'd have to replace the "View personalization" in the
exact same place.
To add a View Personalization link on the pop-up cart
To add a View Personalization link on the pop-up cart:
- Go to the Shopify theme you want to use and click on Actions \- **Edit
code**
- Identify the pop-up cart file. This could have one of the following names.
- header.liquid
- ajax-cart-template.liquid
- mini-cart.liquid
- Follow the rest of the instructions indicated above.
▶ How to add a link so customers can edit the personalization on their cart.
To allow customers to edit their personalized product after adding it to the
cart, you need to slightly modify your theme code so the cart page shows the
corresponding link.
Note:
This link will redirect customers to the product so they can personalize it
and add it to the cart once again. The old product will need to be manually
removed from the cart page.
To add an Edit Personalization link on the cart page
- Go to the Shopify theme you want to use and click on Actions \- **Edit
code**
- Identify the cart page file. This could have one of the following names:
- cart-template.liquid
- cart.liquid
- template--cart.liquid
- Find the piece of code that renders and filters the properties of the cart
items. It
looks something like this:
{%- assign property_size =item.properties | size -%}
{%- if property_size 0 -%}
{%- for p in item.properties -%}
{%- assign firstcharacterin_key = p.first | truncate: 1, '' -%}
{%- unless p.last == blank or first characterinkey == '_' -%}
{{- p.first | append: ":" | append: ' ' -}} {%- if p.last contains '/uploads/' -%} {{ p.last | split: '/' | last }} {%- else -%} {{- p.last -}} {%- endif -%}
{%- endunless -%}
{%- endfor -%}
{%-endif-%}
- Insert the following code after the { %- endfor -% }
{% if item.properties['_customily-customization-url'] %}
<a href="{{item.properties['_customily-customization-url']}}">Edit Personalization</a>
{% endif %}
When added it should look like this:
Note:
You can change the text of the link by editing the text that's inside the
label. In this case, you'd have to replace the "Edit Personalization" in the
exact same place.
To add an Edit Personalization link on the pop-up cart
To add an Edit Personalization link on your pop-up cart:
- Go to the Shopify theme you want to use and click on Actions \- **Edit
code**
- Identify the pop-up cart file. This could have one of the following names.
- header.liquid
- ajax-cart-template.liquid
- mini-cart.liquid
- Follow the rest of the instructions indicated above.
▶ How to hide Customily URLs on cart
If you notice that there are some Customily URLs showing on your cart follow
the instructions below to hide them.
Be careful
Removing this involves changing code on your Shopify theme. If you are not
familiar with theme liquid files, proceed with caution!
To hide Customily URL on the cart page
- Go to the Shopify theme you want to use and click on Actions -> **Edit
code**
- Identify the cart page file. This could have one of the following names:
- cart-template.liquid
- cart.liquid
- template--cart.liquid
- Find the piece of code that renders and filters the properties of the cart
items. It
looks something like this:
{% for p in item.properties %}
{% if p.last != blank %}
{{ p.first }}:
{% if p.last contains '/uploads/' %}
{{ p.last | split: '/' | last }}
{% else %}
{{ p.last }}
{% endif %}
{% endif %}
{% endfor %}
- Insert the following code inside the condition depending on how it is
written.
- If the condition is{% if p.last != blank %} we must add the following condition inside the brackets:
and p.first.first != '_'
When added it should look like this:

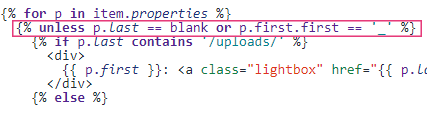
- If the condition is {%unless p.last == blank%} we must add the following condition inside the brackets:
or p.first.first == '_'
When added it should look like this:
To hide Customily URLs in a pop-up cart
To hide the Customily URLs showing on your pop-up cart:
- Go to the Shopify theme you want to use and click on Actions -> **Edit
code**
- Identify the pop-up cart file. This could have one of the following names.
- header.liquid
- ajax-cart-template.liquid
- mini-cart.liquid
- Follow the rest of the instructions indicated above.
- 作者:EcomGrace
- 链接:https://www.ecomgrace.com/article/2d935142-581f-81be-9337-e1fb2763a728
- 声明:本文采用 CC BY-NC-SA 4.0 许可协议,转载请注明出处。